This post contains affiliate links. As an Amazon Associate I earn from qualifying purchases.
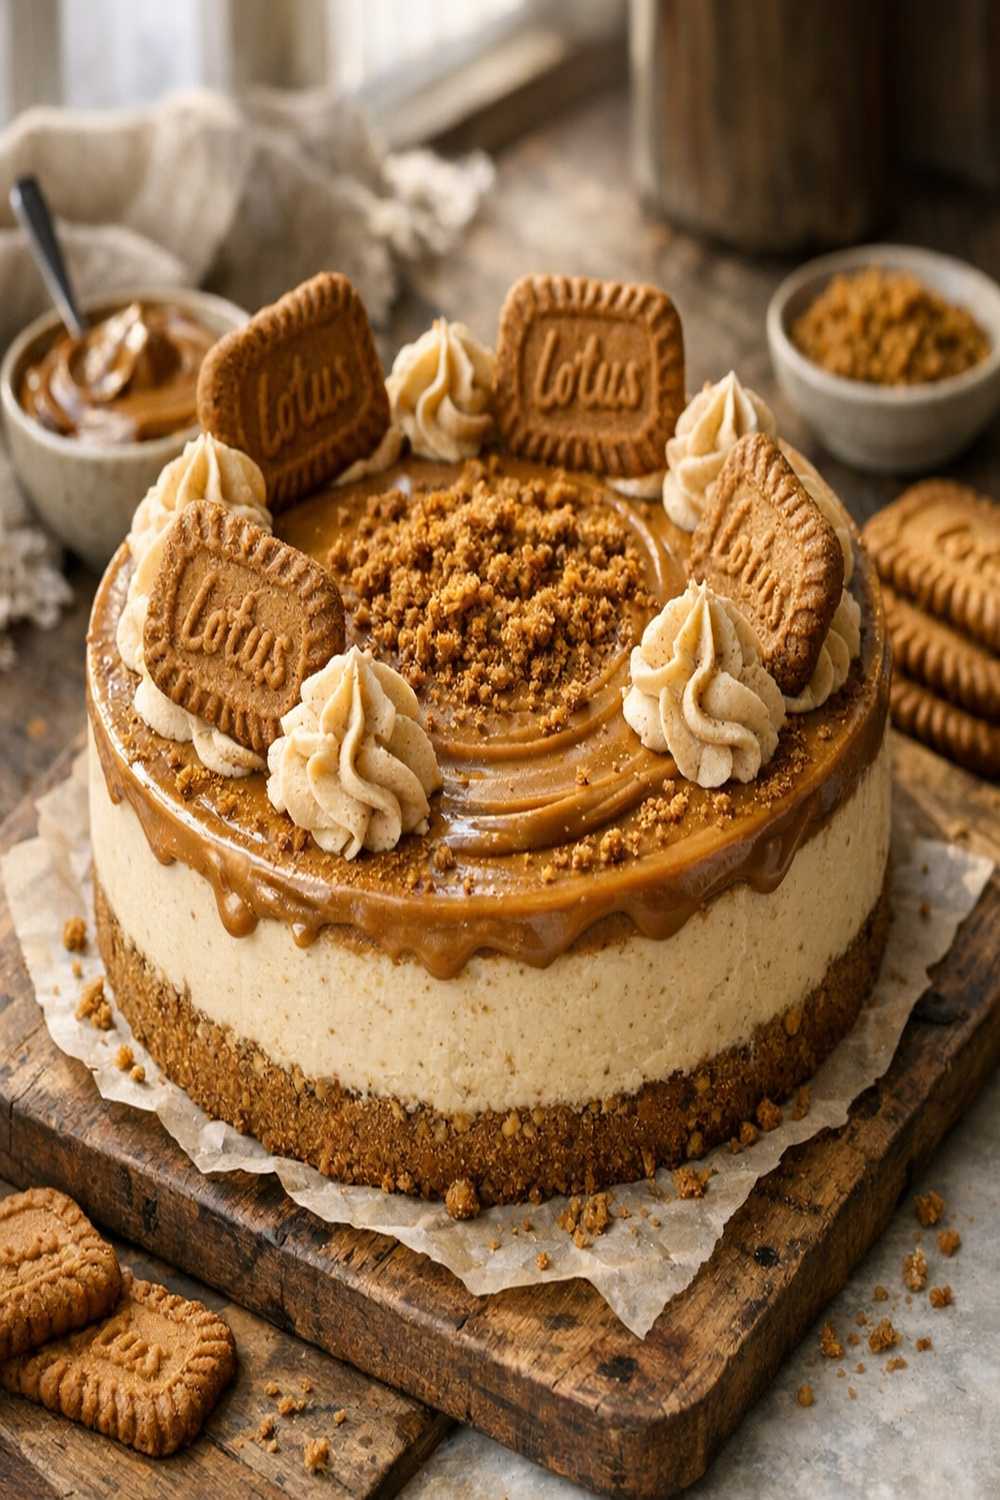
You’ve probably tried the traditional baked cheesecake that takes forever and cracks down the middle, or maybe you’ve attempted that dense, heavy version from a boxed mix. Here’s the honest truth: I spent years perfecting cheesecakes in every way imaginable until I discovered this no-bake Biscoff Cookie Cheesecake that’s become my absolute go-to for gatherings. My grandmother used to say that the best desserts are the ones that let you spend time with people instead of stuck in the kitchen, and this recipe proves her right every single time.
This isn’t just another cheesecake recipe. It’s a creamy, dreamy no-bake masterpiece with that signature caramel-spiced Biscoff flavor woven throughout, and I’m sharing exactly why this method outperforms every other cheesecake approach I’ve tested. As a registered dietitian, I’ve also balanced the indulgence with ingredient choices that feel a little less guilt-ridden, because good food should make you feel good—inside and out.
Biscoff Cookie Cheesecake Recipe: Which Method Actually Works Best?
I’ve made hundreds of cheesecakes over the years—baked versions that crack despite every precaution, slow cooker methods that somehow still turned rubbery, and those trendy instant-pot renditions that left me with a grainy texture. What I learned through all that testing is that the no-bake method with proper chilling and layering produces the most consistently silky, restaurant-quality result in a fraction of the time.
The difference comes down to technique, ingredient ratios, and understanding why each step matters. Let me break down what actually works and why I’ve completely switched my method.
The Methods Compared: An Honest Breakdown
When you’re deciding which cheesecake route to take, timing, texture, and effort all matter. I’ve tested three primary methods extensively, and here’s what actually happens with each one:
- Traditional Baked Cheesecake – You get a dense, rich crumb that some people love, but it requires precise oven temperature, water baths to prevent cracking, and a full hour of baking plus overnight chilling. The result is beautiful but finicky. Best for: when you have a full day and love that authentic New York-style density.
- Instant Pot or Slow Cooker Method – Faster than traditional baking (about 30 minutes cooking time), but you’re still fighting potential texture issues. The filling can separate or turn grainy if the temperature fluctuates. Best for: when you’re in a moderate time crunch but want to attempt something fancier than no-bake.
- No-Bake Whipped Cream Method (This Recipe) – You get silky, cloud-like texture in about 20 minutes of active work, then refrigeration does all the heavy lifting. No cracking, no temperature monitoring, no stress. The result is consistently spectacular every single time. Best for: literally everyone, especially when you want elegance without the anxiety.
Why This Version Beats the Rest
The magic of this no-bake approach comes down to three things: whipped cream aerating the filling, proper fat content from full-fat cream cheese, and enough chilling time for flavors to deepen. When you whip heavy cream with cream cheese and Biscoff spread, you’re creating tiny air pockets that make the texture feel lighter than traditional baked cheesecake, yet it stays stable and doesn’t deflate.
The sensory experience is completely different from what you get with other methods. This cheesecake has a mousse-like quality on your tongue—it melts instantly rather than requiring you to actually chew it. The caramel-vanilla notes from the Biscoff come through with clarity instead of getting muted by density. And there’s zero bitterness, zero graininess, zero guessing about whether it’ll turn out right.
From a nutrition standpoint, the whipped cream gives us volume and structure without adding as much total dairy as a baked version would require. That’s a small win that makes this feel just slightly less heavy while still being absolutely indulgent.
The Ingredients
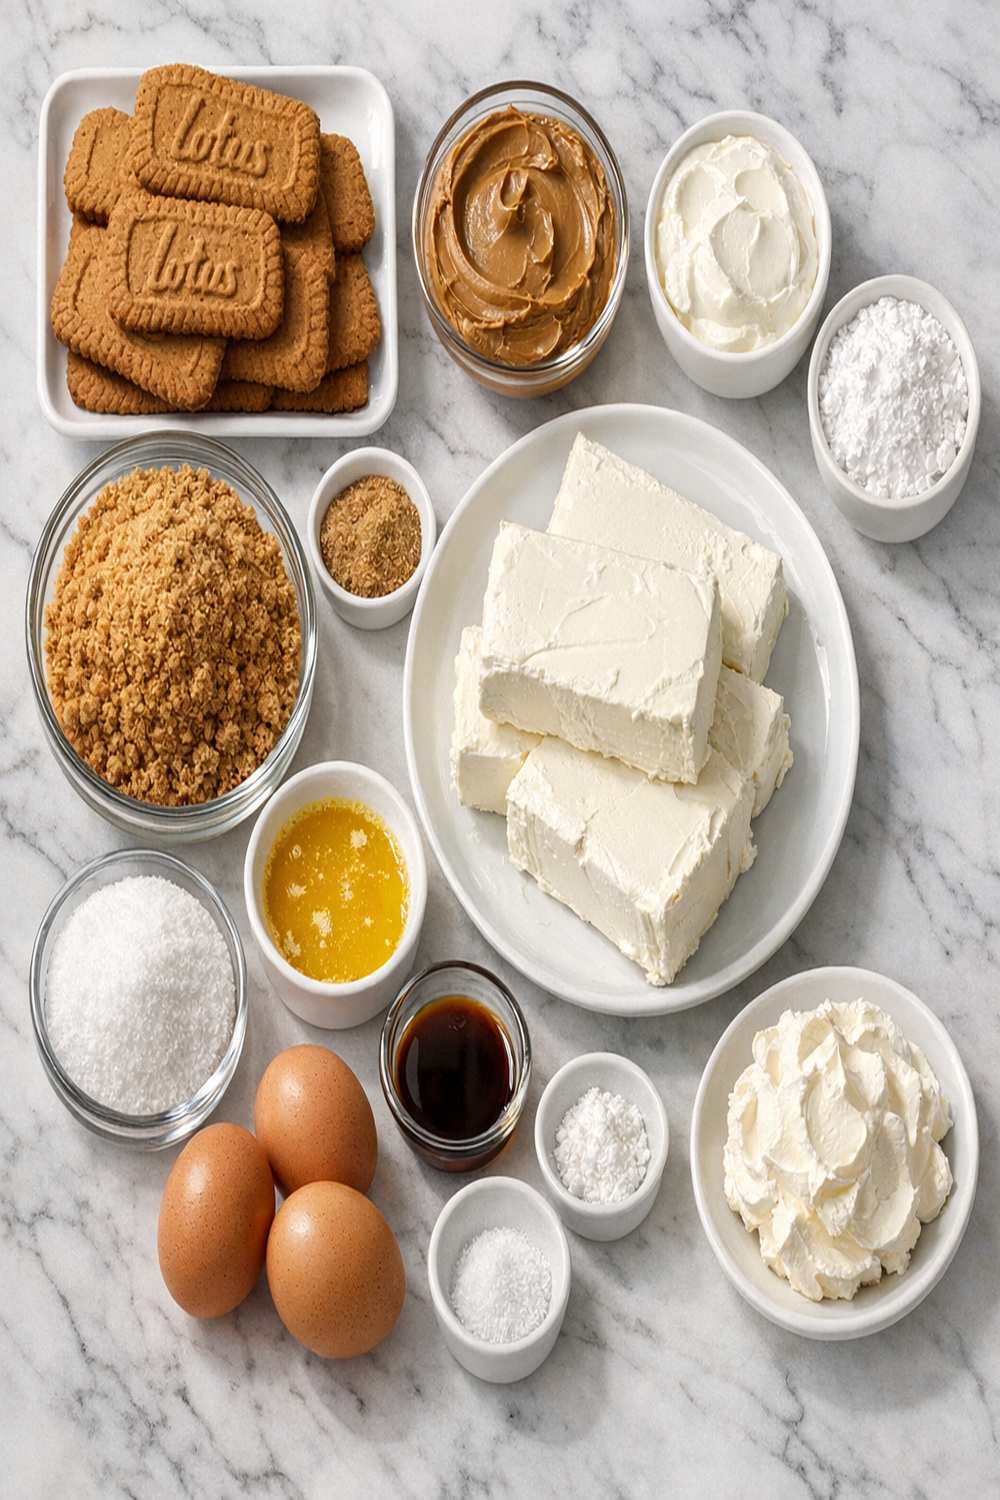
I’ve deliberately chosen ingredients that work together in a very specific way. The full-fat cream cheese is non-negotiable—light versions won’t whip properly and you’ll end up with a grainy texture instead of that silky mousse consistency. The Biscoff spread (the creamy butter version, not the crunchy) dissolves completely into the filling for even flavor distribution. And the double cream needs to be heavy enough to hold stiff peaks without turning into butter.
These ingredient choices differ from standard cheesecake recipes because we’re not relying on eggs or baking to create structure—we’re building that structure through whipping and layering, so the ratios are completely different.
- 200 grams Biscoff cookies (crushed into fine crumbs for the base)
- 300 milliliters heavy cream (cold, for proper whipping)
- 50 grams Biscoff cookies (crushed into larger, visible pieces for garnish)
- 400 grams full-fat cream cheese (room temperature for easy mixing—cold cream cheese will lump)
- Pinch of sea salt (brightens the sweet flavors and balances richness)
- 80 grams unsalted butter (melted and cooled slightly)
- 200 grams Biscoff cookie butter spread (the smooth variety works best)
- 150 grams Biscoff spread (reserved for the top layer—melted very gently)
- 1 teaspoon vanilla extract (enhances the caramel notes beautifully)
Makes one 9-inch cheesecake, approximately 12 generous servings.
How to Make the Best Version of Biscoff Cookie Cheesecake Recipe
This recipe breaks into three distinct phases: building the foundation, creating the filling, and finishing with elegance. Each phase has a specific purpose, and skipping steps or rushing will absolutely show in your final result. I’m walking you through exactly how to execute this so you get that restaurant-quality finish.
Step 1: Create Your Cookie Crumb Base
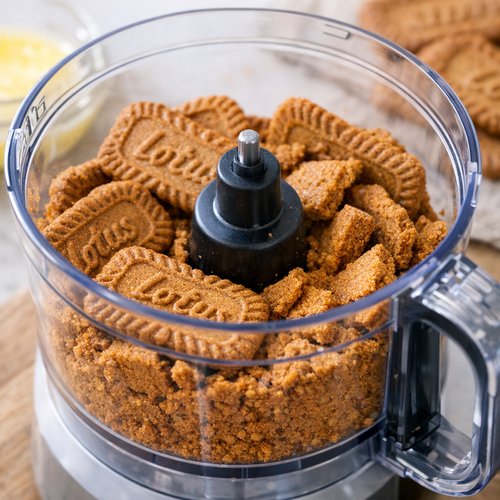
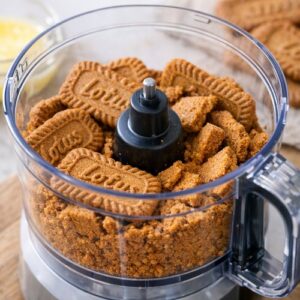
Start by placing about 200 grams of Biscoff cookies into a food processor. Pulse until you have fine crumbs—not dust, but definitely not chunky. This texture matters because it needs to pack together without turning into paste. If you don’t have a food processor, put them in a sealed bag and crush them with a rolling pin or the bottom of a measuring cup. It’s actually meditative, and you get the same result.
Pour your melted butter into the cookie crumbs and stir until every bit of crumb is coated. The mixture should resemble damp sand. Press this firmly into the bottom of a 9-inch springform pan, using the bottom of a measuring cup to make sure it’s compact and even. Don’t skip the packing step—a loose base will crumble when you slice.
Pop the base into the refrigerator while you make the filling. This gives the butter time to set and keeps everything stable when you add the wet filling on top. This is one of those small moves that separates beautiful slices from crumbly disasters.
Step 2: Whip Your Cream Cheese Mixture to Perfection
This step is where everything changes. Make sure your cream cheese is at room temperature—take it out about 30 minutes before you start. Cold cream cheese will fight you every step of the way.
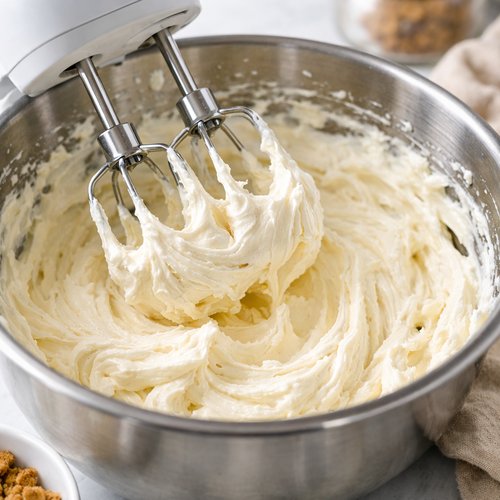
Pour your cold heavy cream into a large mixing bowl and use an electric mixer on medium-high speed. Whip until you have soft peaks that hold their shape but still have a little soft curl at the tip. This takes about 2-3 minutes with an electric mixer. If you’re whipping by hand, it’ll take about 10 minutes and your shoulders will get a workout, but it absolutely works.
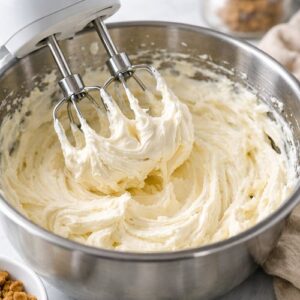
In a separate bowl, combine your room-temperature cream cheese with 200 grams of Biscoff spread and your vanilla extract. Use the mixer to beat these together until completely smooth—about 2 minutes. There should be zero lumps. If you see any graininess, keep mixing because the cream cheese needs to be fully incorporated for that silky texture.
Now here’s the critical part: fold your whipped cream into the Biscoff mixture in two additions. Use a rubber spatula and fold gently—you’re trying to maintain those air pockets you just created in the whipped cream. Overmixing deflates them, and you lose that mousse-like quality. The filling should look light, fluffy, and pale caramel-colored.
Step 3: Layer Your Filling Into the Base
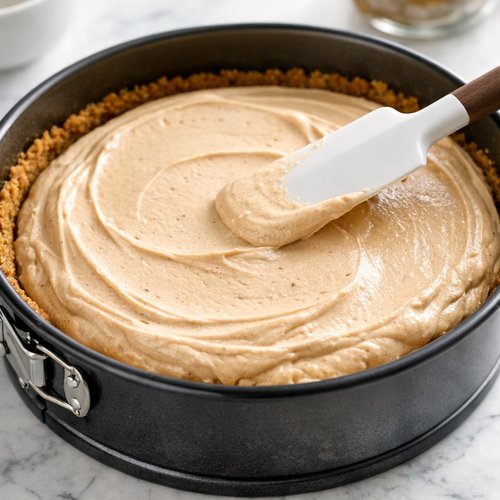
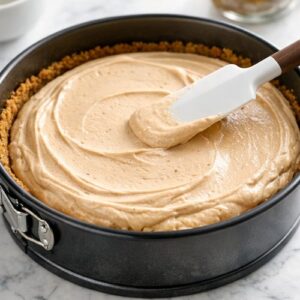
Remove your chilled base from the refrigerator. Pour the whipped Biscoff filling directly onto it and use a spatula to smooth the top into an even layer. Don’t press down—let the filling sit gently on top of the base. Take your time smoothing the surface because this is what people will see.
Cover the pan loosely with plastic wrap and refrigerate for at least 3 hours. Honestly? Overnight is even better if you have the time. This chilling period is where the magic happens—the flavors deepen, the texture sets properly, and everything melds into something greater than the individual parts.
Step 4: Add the Final Biscoff Layer
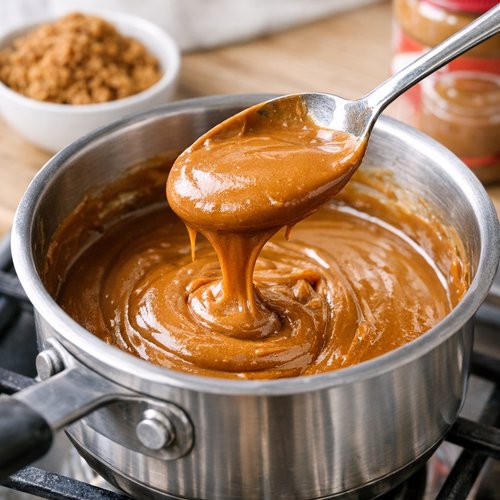
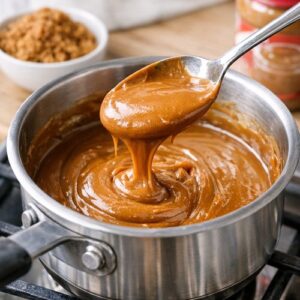
About an hour before serving, remove your cheesecake from the refrigerator. Place 150 grams of Biscoff spread into a small saucepan over very low heat. You want to warm it just enough to become pourable—never let it bubble or get hot. Stir gently until it’s smooth and flows easily.
Pour this warm Biscoff spread directly onto the center of your chilled cheesecake. Using the back of a warm spoon (run it under hot water and dry it), gently spread the caramel layer across the top in one smooth motion. Work slowly and don’t dig into the filling underneath.
Sprinkle your reserved 50 grams of crushed Biscoff cookies around the outer edge while the caramel layer is still slightly soft. This adds both visual appeal and little bursts of cookie texture in every bite.
Return to the refrigerator for at least one more hour so the top layer sets. You can technically cut it sooner, but the slices won’t be as neat and clean. Patience with this final hour means the difference between beautiful presentation and messy scoops.
Step 5: Slice and Serve With Intention
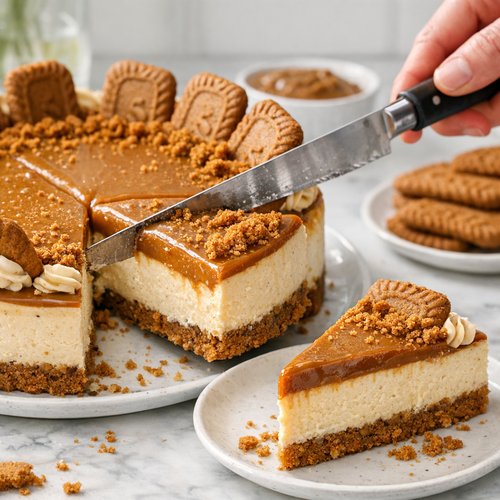
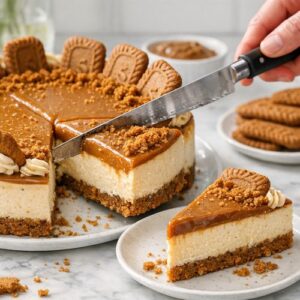
When you’re ready to serve, use a long, thin-bladed knife dipped in hot water and wiped dry between cuts. This prevents the layers from dragging and keeps your slices looking pristine. Wipe your knife between each slice—this one small step makes an enormous difference in presentation.
Serve directly from the springform pan or, if you’re showing off, carefully run a warm offset spatula around the edges and gently release the springform to reveal those perfect layers.
Side-by-Side Results: What to Expect
When you make this no-bake version, you’ll get a cheesecake with a silky, mousse-like texture that melts on your tongue instantly. The color will be a beautiful pale caramel—lighter than traditional baked cheesecake but darker than plain cream cheese. The flavor is pure caramel with vanilla undertones, not overly sweet, with little bursts of cookie crunch from the base and garnish.
Compare this to a traditional baked cheesecake, which has a denser crumb that requires actual chewing, a richer mouthfeel from eggs, and often a slightly grainy or heavy finish. The instant-pot version falls somewhere in between—denser than no-bake but lighter than traditional, though it can develop that unpleasant graininess if anything goes wrong with temperature control.
This no-bake method gives you the elegant, impressive presentation of a baked cheesecake with the ease and consistency of a mousse. That’s why once you make it this way, you’ll probably never go back.
When to Use Each Method
- You’re making cheesecake for a dinner party and want to minimize stress – Use this no-bake method. You can make it two days ahead, and there’s zero risk of failure. You’ll actually enjoy your guests instead of being anxious about cracks.
- You absolutely love dense, traditional New York-style cheesecake – Go with the traditional baked method. Some people specifically want that heavier texture, and that’s valid. This recipe won’t satisfy that craving.
- You’re short on time but still want something special – This no-bake method wins again. Total active time is under 25 minutes, and you can serve it after 3 hours of chilling versus 8+ hours for baked versions.
Can I Store Biscoff Cookie Cheesecake Recipe?
This cheesecake actually improves with time, which is wonderful news for meal planning. Store it covered in the refrigerator for up to 5 days. The flavors become more developed and the texture actually smooths out even more as it sits.
For freezing: you can freeze this cheesecake for up to 2 months, but I recommend freezing it without the top Biscoff layer. Freeze the base layer of cheesecake for 3 hours, then wrap it very tightly in plastic wrap and aluminum foil. Add the Biscoff topping after thawing in the refrigerator overnight.
Pro tip: cut your cheesecake into individual slices and freeze them separately. This way you can grab one slice at a time without defrosting the entire cake. Defrost individual slices in the refrigerator for about 2 hours before serving.
Expert’s Nutritional Tip
As a registered dietitian, I want to point out that while this is absolutely an indulgent dessert, the whipped cream method actually reduces the total fat content compared to traditional baked cheesecake. The air pockets from whipping mean you’re eating more volume with less actual cream cheese, which makes portions feel more satisfying while keeping calories reasonable for a special-occasion dessert.
The Biscoff cookies do add sugar, but they also contribute some beneficial compounds like antioxidants from the spices. This isn’t health food, but it’s a thoughtfully constructed indulgence that respects both flavor and nutrition.
Nutrition Information
Per serving (1/12 of cheesecake, approximately 110g): 380 calories, 28g fat, 32g carbohydrates, 6g protein, 24g sugar, 0.5g fiber. Based on USDA nutritional database values for component ingredients.
The primary sources of fat are cream cheese and heavy cream, both of which are full-fat dairy. The carbohydrates come primarily from the Biscoff cookies and spread, which contain added sugars. If you’re tracking macros, note that this is a dessert to be enjoyed in modest portions as part of a balanced day.
Make-Ahead Guide
Two Days Before: Make the entire cheesecake through Step 3 (before adding the Biscoff topping). Cover and refrigerate. The flavors actually benefit from this extra time to meld.
One Day Before: If you made it two days ahead, add your Biscoff topping in the morning. If starting fresh today, complete through Step 3 and refrigerate overnight.
Day Of (4 hours before serving): Remove cheesecake from refrigerator, warm and layer your Biscoff spread topping (Step 4), and refrigerate for the final hour.
30 minutes before serving: Remove from refrigerator so it comes up to a slightly cooler room temperature. This improves texture and flavor. Slice with your hot water-dipped knife right before plating.
Common Mistakes to Avoid
Mistake 1: Using cold cream cheese. This will create lumps and grainy texture instead of that silky mousse finish. Always bring cream cheese to room temperature—set it out about 30 minutes before mixing. Your mixer cannot fix cold cream cheese.
Mistake 2: Overmixing the whipped cream into the filling. I see people basically stirring the whipped cream into the Biscoff mixture like they’re making batter. This deflates your air pockets and you lose the mousse-like texture. Fold gently in two additions and stop as soon as it’s combined.
Mistake 3: Not chilling the base before adding filling. This seems unnecessary, but a warm or room-temperature base creates instability. The layers won’t set properly and you might get separation. Give it 15 minutes in the fridge—it matters.
Mistake 4: Skipping the final refrigeration after topping. I know you’re excited to eat it, but that final hour allows the layers to set completely. Cutting too early means the top layer drags across the filling and creates an ugly presentation. Patience pays off here.
Seasonal Variations
Fall/Winter Version: Add ½ teaspoon of ground cinnamon and a pinch of nutmeg to your filling. The warm spices complement the Biscoff perfectly and add a cozy, nostalgic element. Garnish with candied ginger strips instead of crushed cookies.
Spring/Summer Version: Add 1 tablespoon of fresh lemon zest to your filling for brightness and cut through the richness. The citrus plays beautifully with the caramel notes. Top with a thin layer of dulce de leche instead of pure Biscoff spread for complexity.
Holiday Version: Brush your cookie base with a little bourbon or dark rum before adding the filling—just a light brush, about 1 tablespoon total. This adds sophistication without overwhelming the Biscoff flavor.
What Can I Serve With Biscoff Cookie Cheesecake Recipe?
This cheesecake is rich enough to stand alone, but a few thoughtful accompaniments make it sing. Since it’s caramel-forward, you want something that either echoes or contrasts those flavors.
- Whipped cream with a pinch of sea salt – The coolness and slight tartness balance the richness beautifully. The salt enhances both the caramel and cookie notes.
- Fresh berry compote (raspberry or blackberry) – The tartness cuts through the sweetness and adds visual contrast. Make it simple: just berries, a splash of water, and a touch of honey simmered until jammy.
- Espresso – The bitterness from strong coffee is the perfect counterpoint to sweet caramel. Your guests will love a small espresso cup alongside their slice.
- Dulce de leche drizzle – If you want to lean fully into the caramel situation, a thin drizzle of dulce de leche alongside adds another layer of indulgence.
- Simple vanilla ice cream – Cold, plain, vanilla ice cream melting over a slice of warm cheesecake is absolutely timeless. If you want something more adventurous, try almond butter ice cream for a complementary nuttiness.

Biscoff Cookie Cheesecake Recipe
Ingredients
Method
- Start by placing about 200 grams of Biscoff cookies into a food processor. Pulse until you have fine crumbs—not dust, but definitely not chunky. This texture matters because it needs to pack together without turning into paste. If you don't have a food processor, put them in a sealed bag and crush them with a rolling pin or the bottom of a measuring cup. It's actually meditative, and you get the same result. Pour your melted butter into the cookie crumbs and stir until every bit of crumb is coated. The mixture should resemble damp sand. Press this firmly into the bottom of a 9-inch springform pan, using the bottom of a measuring cup to make sure it's compact and even. Don't skip the packing step—a loose base will crumble when you slice. Pop the base into the refrigerator while you make the filling. This gives the butter time to set and keeps everything stable when you add the wet filling on top. This is one of those small moves that separates beautiful slices from crumbly disasters.
- This step is where everything changes. Make sure your cream cheese is at room temperature—take it out about 30 minutes before you start. Cold cream cheese will fight you every step of the way. Pour your cold heavy cream into a large mixing bowl and use an electric mixer on medium-high speed. Whip until you have soft peaks that hold their shape but still have a little soft curl at the tip. This takes about 2-3 minutes with an electric mixer. If you're whipping by hand, it'll take about 10 minutes and your shoulders will get a workout, but it absolutely works. In a separate bowl, combine your room-temperature cream cheese with 200 grams of Biscoff spread and your vanilla extract. Use the mixer to beat these together until completely smooth—about 2 minutes. There should be zero lumps. If you see any graininess, keep mixing because the cream cheese needs to be fully incorporated for that silky texture. Now here's the critical part: fold your whipped cream into the Biscoff mixture in two additions. Use a rubber spatula and fold gently—you're trying to maintain those air pockets you just created in the whipped cream. Overmixing deflates them, and you lose that mousse-like quality. The filling should look light, fluffy, and pale caramel-colored.
- Remove your chilled base from the refrigerator. Pour the whipped Biscoff filling directly onto it and use a spatula to smooth the top into an even layer. Don't press down—let the filling sit gently on top of the base. Take your time smoothing the surface because this is what people will see. Cover the pan loosely with plastic wrap and refrigerate for at least 3 hours. Honestly? Overnight is even better if you have the time. This chilling period is where the magic happens—the flavors deepen, the texture sets properly, and everything melds into something greater than the individual parts.
- About an hour before serving, remove your cheesecake from the refrigerator. Place 150 grams of Biscoff spread into a small saucepan over very low heat. You want to warm it just enough to become pourable—never let it bubble or get hot. Stir gently until it's smooth and flows easily. Pour this warm Biscoff spread directly onto the center of your chilled cheesecake. Using the back of a warm spoon (run it under hot water and dry it), gently spread the caramel layer across the top in one smooth motion. Work slowly and don't dig into the filling underneath. Sprinkle your reserved 50 grams of crushed Biscoff cookies around the outer edge while the caramel layer is still slightly soft. This adds both visual appeal and little bursts of cookie texture in every bite. Return to the refrigerator for at least one more hour so the top layer sets. You can technically cut it sooner, but the slices won't be as neat and clean. Patience with this final hour means the difference between beautiful presentation and messy scoops.
- When you're ready to serve, use a long, thin-bladed knife dipped in hot water and wiped dry between cuts. This prevents the layers from dragging and keeps your slices looking pristine. Wipe your knife between each slice—this one small step makes an enormous difference in presentation. Serve directly from the springform pan or, if you're showing off, carefully run a warm offset spatula around the edges and gently release the springform to reveal those perfect layers.
FAQs
Can I make this with a food processor instead of an electric mixer?
For the whipped cream, you actually cannot get the same results with a food processor—it doesn’t create the fluffy, aerated texture you need. The motor is designed for chopping and pureeing, not aerating. Use a handheld or stand mixer for the cream.
However, you can absolutely use a food processor to mix the cream cheese and Biscoff spread together until smooth. Just transfer that mixture to a bowl, fold in your separately whipped cream by hand, and you’re good.
What if I can’t find Biscoff cookies or spread?
Biscoff has become more widely available (you can find it in most grocery stores now, usually near the peanut butter), but if your store doesn’t carry it, look for similar caramel spice cookies. Stroopwafels work in a pinch, or you could use a high-quality caramel sauce blended with a little creamy peanut butter as a substitute for the spread.
That said, the recipe is specifically built around Biscoff’s flavor profile, so substitutions will change the final taste. I’d recommend special-ordering online if you can’t find it locally—it’s worth the small effort for the authentic flavor.
How do I know when the cream is whipped to the right consistency?
Soft peaks mean the cream holds a shape but the tip of the peak curls gently over itself when you lift the beater. It should look fluffy but still slightly glossy. If you whip too far and get stiff peaks, the texture becomes grainy and almost curdled. Stop as soon as you see soft peaks forming—you can’t undo over-whipped cream, so better to be slightly under than over.
Can I make this in a regular cake pan instead of a springform?
Technically yes, but you’ll have trouble getting it out without destroying it. Springform pans are specifically designed for cheesecake because the removable sides let you release it cleanly. If you don’t have one, you could line a regular pan with plastic wrap, make the cheesecake, then invert it onto a serving plate and carefully remove the plastic. It’s messier and riskier than just getting a springform pan.
A 9-inch springform pan costs about $10-15 and lasts for decades, so it’s honestly worth the investment if you make cheesecake more than once.
Why does my cheesecake have a slightly grainy texture?
This usually means one of three things: your cream cheese wasn’t fully at room temperature when mixed, you overmixed the filling, or the heavy cream was whipped too far before folding in. All three create tiny fat particles that feel grainy on your tongue.
To fix it next time: always bring cream cheese to room temperature, fold the whipped cream gently and stop immediately when combined, and whip cream to soft peaks only. If your cheesecake already came out grainy, you can still eat it (it tastes fine), but the texture won’t be that smooth mousse experience you’re going for.
Can I skip the Biscoff topping layer?
Absolutely! You can stop after Step 3 and just serve it with crushed Biscoff cookies on top, or leave it plain and let the filling be the star. The topping layer adds visual elegance and another textural element, but it’s not essential to the cheesecake being delicious. Some people prefer the simplicity of just the filling without the extra sweetness on top.
More Recipes You’ll Love
- this simple cake – A ridiculously simple chocolate dessert for when you need something fast
- this simple cake – A lower-sugar baked cake option if you want to balance out indulgent desserts
- 3 Ingredient Nutella Recipe – Another no-fuss dessert with that same silky texture appeal
- Almond Joy Recipe – A different take on no-bake desserts with coconut and chocolate
Final Thoughts on This Biscoff Cookie Cheesecake
This recipe represents everything I love about cooking: simple ingredients, straightforward technique, and results that look and taste like you spent all day on them. It’s the kind of dessert that brings people together—not because you stressed over it, but because you had time and energy to actually be present while serving it.
My grandmother taught me that the best gatherings aren’t remembered for the perfection of the food, but for the care behind it. This cheesecake proves you can create something restaurant-quality without sacrificing that time with the people you love. Make it ahead, breathe easy, and enjoy watching faces light up when they take that first bite.
Enjoy your cooking journey!
META DESCRIPTION: Make perfect Biscoff Cookie Cheesecake with this no-bake recipe. Silky mousse texture, minimal effort, 3-hour chill time. Step-by-step guide from a registered dietitian.