This post contains affiliate links. As an Amazon Associate I earn from qualifying purchases.
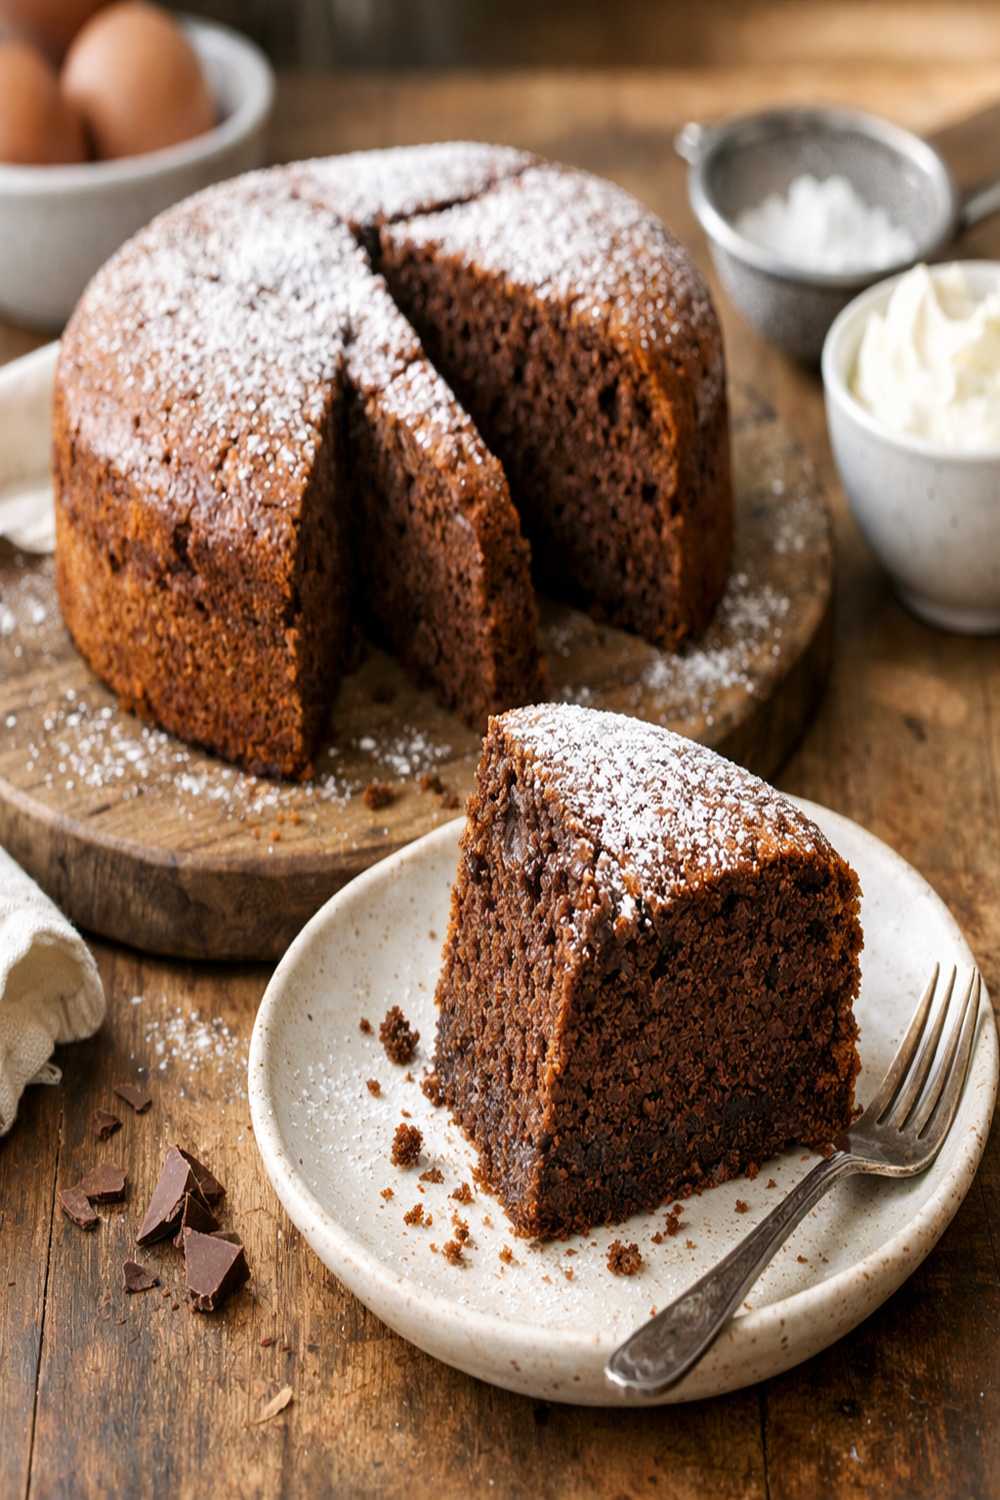
Y’all, I’m about to share something that changed my whole perspective on simple desserts. This 2 ingredient chocolate cake is the kind of recipe that reminds me why I fell in love with cooking in the first place. It pairs beautifully with morning coffee, afternoon tea, or as the grand finale to a family dinner. If you’re looking for other decadent yet straightforward treats, you might also enjoy my this simple cake, which offers another way to keep things simple without sacrificing that rich, satisfying flavor.
The Day My Grandmother Taught Me That Less Really Is More
I’ll never forget watching my grandmother pull a cake out of her old avocado-green oven back in the ’90s. She’d made it with just chocolate and eggs—nothing else. I was maybe eight years old, standing on a stool in her San Antonio kitchen, and I asked her where all the other stuff was. She smiled and said, “Kathleen, sometimes the best things in life don’t need explaining.”
That cake was impossibly fudgy, almost mousse-like in the center, with a delicate crumb structure that defied the fact that it contained barely anything at all. She never wrote down the recipe. It lived in her hands, in her instinct, in that kitchen that always smelled like cinnamon and possibility. When she passed, I spent months trying to recreate it from memory, and this recipe is as close as I’ve ever gotten.
It took me years as a registered dietitian to understand the science behind why it worked. But today, I’m sharing it with you not because it’s trendy or Instagram-worthy, but because it’s honest, it’s beautiful, and it carries the kind of love that only comes from true simplicity.
What Is a 2 Ingredient Chocolate Cake Recipe?
This isn’t your traditional layer cake situation. What we’re making here is a flourless chocolate cake—sometimes called a molten chocolate cake or chocolate torte—that relies on the emulsifying power of eggs and the richness of quality chocolate to create its structure.
The magic happens when you whip egg whites until they’re fluffy and cloud-like, then fold in melted chocolate. There’s no flour, no leavening powder, no vanilla extract or salt. Just those two pure ingredients working together through heat and technique to create something that feels like it took hours to prepare.
This recipe has roots in French cuisine, where they’ve been making flourless chocolate cakes for centuries. But versions of it appear in kitchens across the American South, where home cooks discovered that sometimes the simplest approach yields the most elegant results. It’s the culinary equivalent of a little black dress—timeless, versatile, and endlessly forgiving.
Why You’ll Love This 2 Ingredient Chocolate Cake Recipe
- Nutrient-dense compared to traditional cakes – You’re getting the antioxidants from quality chocolate and the complete protein from eggs, making this a surprisingly more balanced dessert option than flour-heavy alternatives.
- Comes together in under an hour – From mixing bowl to cooling rack, you’re looking at roughly 40 minutes. That’s faster than many cookie recipes and requires far fewer steps.
- Pantry-friendly for last-minute entertaining – If you keep quality chocolate and eggs on hand, you can make an elegant dessert with virtually no advance notice. Perfect for those moments when unexpected guests arrive.
- Naturally gluten-free and grain-free – Perfect for folks managing celiac concerns or simply avoiding wheat. The structure comes purely from the protein network in eggs, making it naturally suitable for many dietary needs.
- Impressive yet incredibly simple – This is the kind of dessert that makes people ask for your secret. When you tell them there are only two ingredients, their jaws drop. It feels like you’ve done something far more complicated than you actually have.
- Minimal ingredients mean maximum flavor – There’s nowhere for mediocre ingredients to hide. When you’re working with just chocolate and eggs, quality matters profoundly. Every element shines through without competition.
The Ingredients
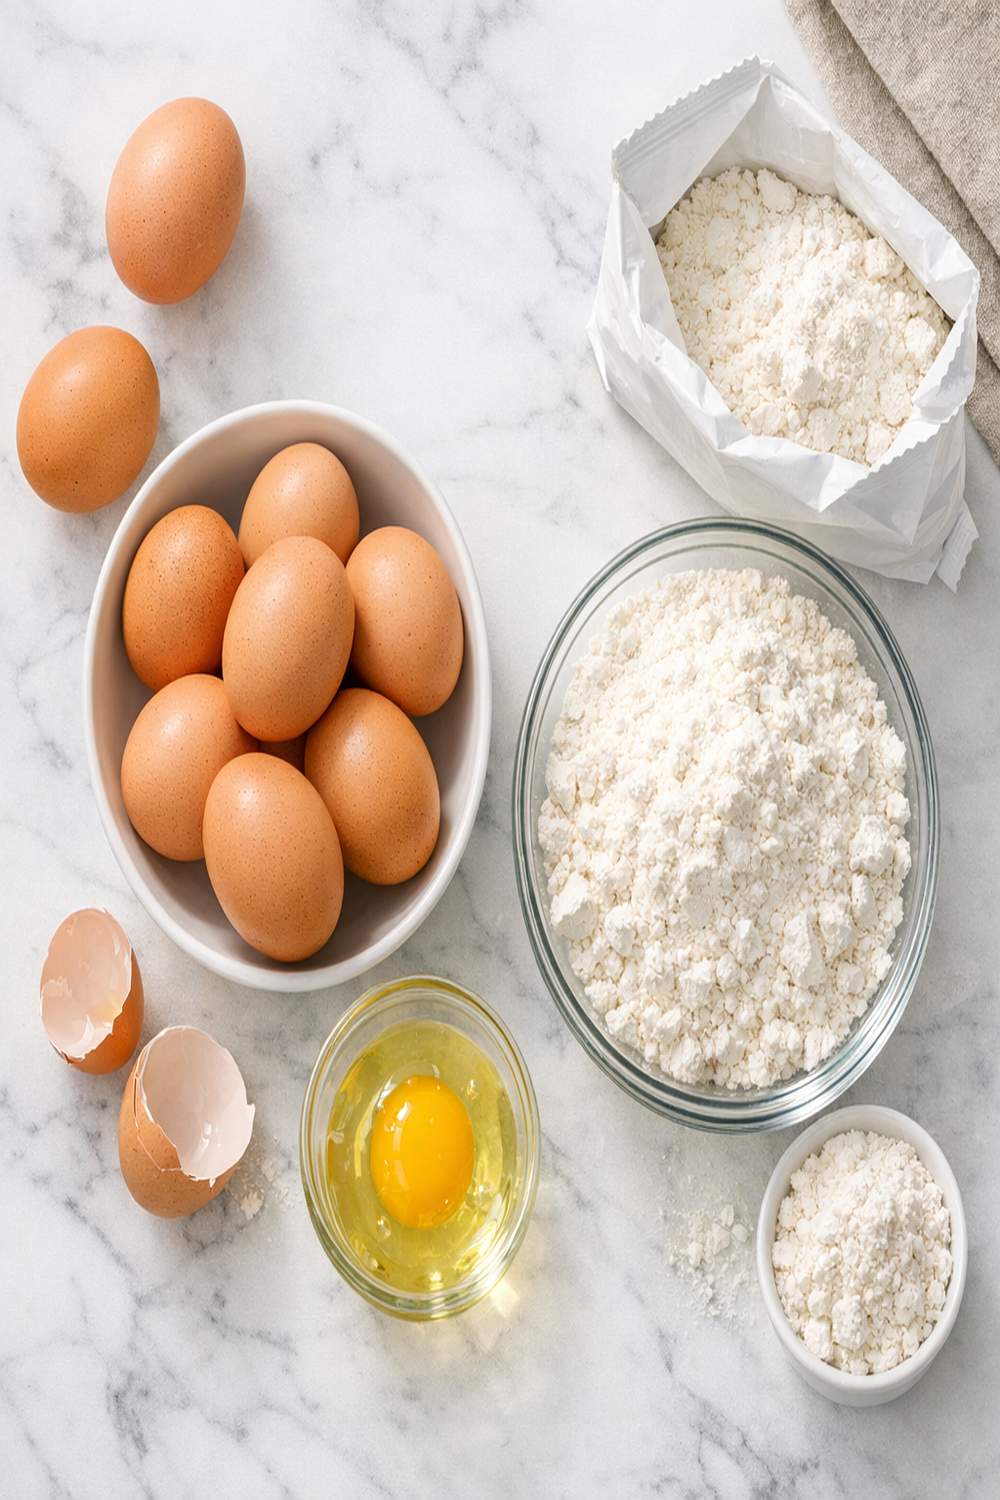
Before we dive into the how, let’s talk about the what. I’m particular about both of these ingredients, and as a registered dietitian, I’ve learned that in minimalist cooking, ingredient quality isn’t optional—it’s essential. These two simple elements are your entire canvas, so choose them with intention.
- ½ teaspoon pure vanilla extract (optional, but adds subtle depth to the chocolate notes)
- ¼ teaspoon fine sea salt (enhances chocolate flavor and stabilizes the meringue)
- 6 large eggs (room temperature, separated—this is crucial for volume and stability)
- 1½ cups semi-sweet or dark chocolate chips (or chopped chocolate for faster melting)
A note on my additions: Technically, this is a “2 ingredient” cake, but I’ve included salt and vanilla as optional enhancements. If you want to stay true to the purest form—just chocolate and eggs—absolutely skip them. The cake will still be magnificent. I include them because they amplify what’s already there, much like how a pinch of salt in a sauce doesn’t announce itself but makes everything taste more like itself.
Makes: One 6×6-inch square cake (serves 4-6 people, depending on how generous you’re feeling)
How to Make a 2 Ingredient Chocolate Cake Recipe?
This recipe is all about technique. The steps are few, but they need your attention and intention. I like to think of it as meditative cooking—each motion has a purpose, each moment matters.
Step 1: Prepare Your Workspace and Oven
Start by positioning your oven rack to the middle position and preheating your oven to 350°F (175°C). While it’s warming up, grease a 6×6-inch square baking pan with a light coating of butter or cooking spray. Line the bottom with parchment paper if you’re feeling extra careful—this makes removal easier and prevents sticking.
Make sure you have room temperature eggs ready. This matters more than you might think. Cold eggs won’t whip to proper volume, and you need that airiness to create the cake’s structure. I take mine out about 30 minutes before I start cooking.

Step 2: Melt Your Chocolate Gently
This is where patience becomes your ingredient. Place your chocolate chips in a microwave-safe bowl. Microwave in 30-second intervals, stirring between each interval, until the chocolate is completely melted and smooth. This usually takes between 60-90 seconds total, depending on your microwave’s power.
Alternatively, you can use a double boiler method—place chocolate over a bowl of barely simmering water, stirring occasionally until silky. This method takes longer but gives you more control and reduces the risk of overheating the chocolate, which can make it grainy and bitter.
Once melted, set the chocolate aside to cool for 5-10 minutes. You want it warm but not hot—it should feel comfortable to touch on the outside of the bowl. If it’s too hot, it’ll cook your egg yolks when you fold them in. If it’s too cool, it won’t incorporate smoothly.

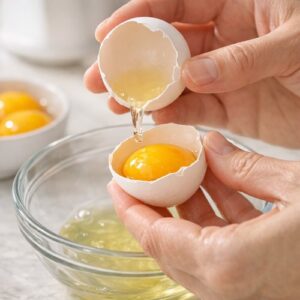
Step 3: Separate Your Eggs With Precision
Now comes the technical part that makes all the difference. Separate your eggs carefully, keeping the yolks completely free from any white. Even a tiny bit of yolk will prevent your whites from reaching proper volume—fats and proteins don’t play nicely together when you’re trying to create air bubbles.
I use the shell-to-shell method: crack an egg, pour the yolk between the two shell halves, letting the white drip into a bowl below. It’s less wasteful than other methods and gives you better control. Transfer the yolk to a separate small bowl.
Place your egg whites in a completely clean, dry mixing bowl. Even a trace of grease will sabotage your meringue. Some folks use a copper bowl for this step, which creates an even more stable foam—a lovely touch if you have one.

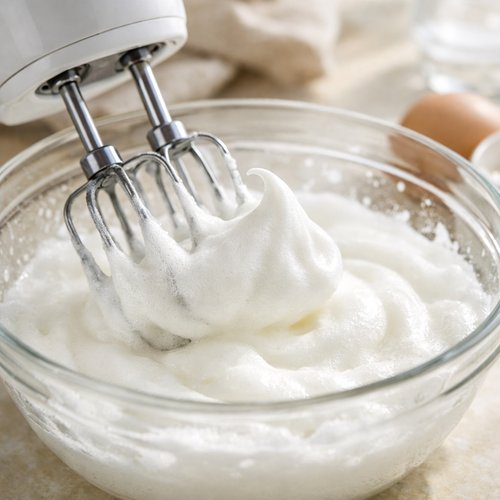
Step 4: Whip Your Egg Whites to Medium Peaks
Using an electric mixer on medium-high speed, beat your egg whites until they transform from a clear liquid into a thick, pale foam. You’re looking for medium peaks—when you lift the beater, the peaks should stand up but gently fold over at the tips. This usually takes 3-4 minutes, depending on your mixer’s power.
Don’t overbeat. If you go too far, you’ll end up with dry, separated egg whites that look grainy. Once you hit medium peaks, you’re done. The whites should look like fluffy clouds—gorgeous and full of promise.
This is the moment I always pause and appreciate what’s happening. Those billions of tiny air bubbles are about to become the structure of your cake. It’s pure food science and pure magic all at once.
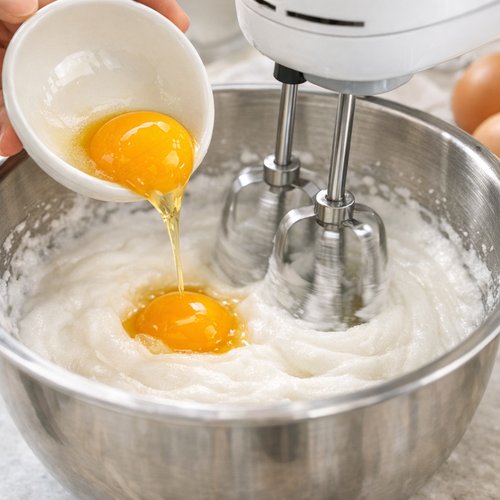
Step 5: Incorporate the Yolks One at a Time
With the mixer still running on medium speed, add your egg yolks one at a time, waiting about 20-30 seconds between each addition. This allows each yolk to fully incorporate before you introduce the next one.
As you add the yolks, the mixture will initially look a bit broken or separated—don’t panic. This is completely normal. Keep beating, and it will gradually come back together into a glossy, pale yellow mixture. The whole process, from first yolk to fully incorporated last yolk, takes about 2-3 minutes.
You’ll know it’s ready when the mixture is completely smooth and shiny, with no visible streaks of white. This is your emulsion, and it’s beautiful.
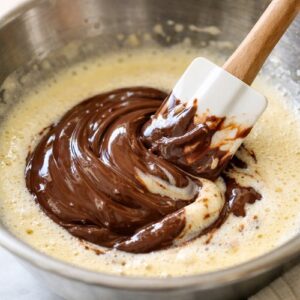
Step 6: Fold In the Melted Chocolate
Here’s where your gentle touch matters most. Pour your cooled melted chocolate into the egg mixture. Using a rubber spatula, gently fold—don’t stir, don’t beat—the chocolate into the eggs.
A fold is different from a stir. You’re moving the spatula down through the middle of the mixture, across the bottom, up the side, and over the top, rotating the bowl as you go. This keeps all those beautiful air bubbles intact while evenly distributing the chocolate.
After about 8-10 folds, your batter should be uniformly chocolate-colored and smooth. Stop folding once you see no white streaks. Overmixing at this stage deflates those precious air bubbles and results in a denser cake.

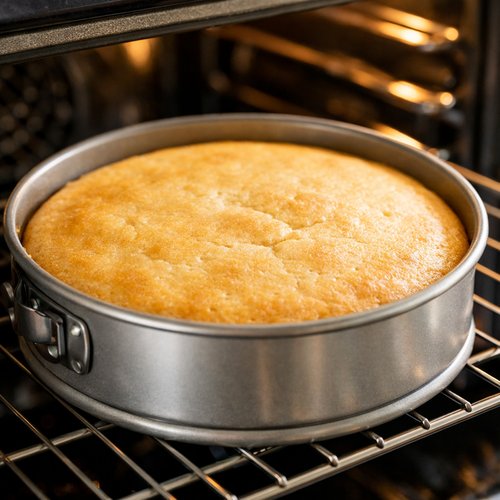
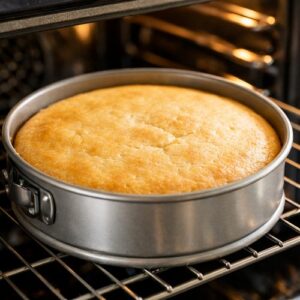
Step 7: Bake Until Just Set
Pour your batter into your prepared pan, using your spatula to smooth the top gently. Place in your preheated 350°F oven for 28-32 minutes. The exact time depends on your oven’s personality, so I suggest checking at the 25-minute mark.
You’re looking for a cake that’s set around the edges but still has a slight jiggle in the very center when you gently shake the pan. A toothpick inserted near the center should come out with some moist crumbs clinging to it—not completely clean, and definitely not raw batter.
The top should look set and might have some small cracks—this is normal and actually desirable. It means you’ve created that magical fudgy center we’re after.
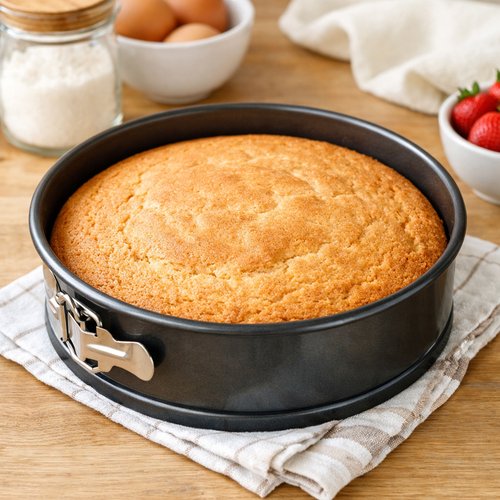
Step 8: Cool Completely Before Serving
Remove the cake from the oven and let it cool completely in the pan. This takes at least 1-2 hours at room temperature, though you can speed this by placing it in the refrigerator for 30-45 minutes.
As it cools, it firms up considerably. The center, which seemed almost mousse-like when hot, becomes more cake-like while maintaining that gorgeous fudgy texture.
Once cooled, you can invert the cake onto a serving plate, slice it into squares, or keep it in the pan for easy serving. If you’d like to add frosting or a ganache on top, this is the perfect time. Some folks dust it with cocoa powder or powdered sugar for a refined finish.
Expert’s Nutritional Insight
As a registered dietitian, I want to share something that often surprises people: this cake, despite being pure indulgence, actually contains some legitimate nutritional value. Those eggs provide complete proteins with all nine essential amino acids, which support muscle maintenance and satiety. The chocolate—especially if you use dark chocolate—contains flavonoids and antioxidants that research has consistently linked to cardiovascular benefits.
That said, this is dessert. It’s meant to be savored in small portions as part of an overall balanced diet. But if you’re going to have chocolate cake, this version at least delivers real ingredients and real nutrition alongside the real pleasure. One modest slice with a cup of strong coffee or herbal tea can be part of a perfectly balanced day.
Tips and Tricks
- Quality chocolate makes an enormous difference – Use chocolate you actually enjoy eating on its own. If you wouldn’t eat it as a bar, don’t use it in your cake. The difference between good chocolate and mediocre chocolate is immediately apparent in this recipe with so few ingredients hiding the flavor.
- Don’t skip separating the eggs properly – This is genuinely the hardest part of the recipe, but it’s non-negotiable. Any yolk contamination prevents proper whipping. If you accidentally get yolk in your whites, start over with a fresh egg white.
- Use room temperature eggs – Cold eggs won’t whip to proper volume, and you’ll end up with a denser cake. Plan ahead and let your eggs sit out for 30 minutes.
- Have all ingredients prepped before you start – Since this comes together quickly, get your chocolate melted, eggs separated, and oven preheated before you begin the actual mixing. There’s no time to scramble once you’ve whipped those egg whites.
- Don’t open the oven door repeatedly – Every time you open the door, you release heat and disrupt the baking process. Peek through the window after 25 minutes, and trust the timing from there.
- Invest in an accurate oven thermometer – Many home ovens run hot or cold without the owner knowing. An inexpensive oven thermometer is invaluable for this recipe, where precise temperature matters.
Make-Ahead Guide
One of my favorite things about this cake is how beautifully it handles advance preparation. This is perfect for meal planning and entertaining without last-minute stress.
The Day Before: You can bake this cake up to 24 hours in advance. Once fully cooled, store it tightly covered at room temperature or in the refrigerator. I recommend refrigeration if your kitchen is warm. The cake actually develops slightly deeper chocolate flavor as it sits, so don’t hesitate to make it a day ahead.
The Morning Of: If serving for dinner, bake it in the morning and let it rest all day. Remove from refrigeration about 30 minutes before serving to bring it back to room temperature. This actually improves the texture and chocolate flavor perception.
Freezing for Later: Wrap the fully cooled cake tightly in plastic wrap, then place in a freezer bag. It keeps beautifully for up to 3 months. Thaw in the refrigerator overnight, then bring to room temperature before serving. Some folks even prefer it slightly chilled—it becomes almost like chocolate mousse cake.
Preparation Tasks You Can Do Ahead: Separate your eggs the morning of, cover and refrigerate the whites and yolks separately, and you’re ready to bake whenever you like. You can also melt your chocolate ahead and let it cool—it reheats beautifully when folded into the egg mixture.
Common Mistakes to Avoid
- Using cold eggs – This is the number one problem I see. Cold eggs won’t whip properly, and you’ll lose volume. Set them out 30 minutes ahead. No shortcuts here.
- Contaminating the egg whites – Even the tiniest bit of yolk or grease prevents proper whipping. If this happens, start with fresh eggs. It’s worth the few extra seconds of care on the front end.
- Overmixing after adding chocolate – I see folks go full mixer speed, deflating all those beautiful bubbles. Fold gently by hand. This is one of the few times in baking where less effort yields better results.
- Baking too long – This cake continues cooking as it cools. If you overbake it, the center becomes dry and cakey rather than fudgy. That slight jiggle in the center is your sweet spot. Trust it.
Seasonal Variations
Spring: Add a tiny touch of fresh mint extract (just ⅛ teaspoon) along with the vanilla for a sophisticated mint-chocolate cake. You could also dust the finished cake with edible flower petals for a garden-party vibe.
Summer: Serve with fresh raspberries or strawberries on the side. The bright fruit cuts through the richness beautifully. You could also make this recipe smaller and serve it chilled as an elegant mousse-cake hybrid.
Fall: Stir a touch of espresso powder (½ teaspoon) into the melted chocolate to deepen and intensify the chocolate flavor. The coffee notes remind me of autumn mornings in San Antonio.
Winter: Add ¼ teaspoon of ground cinnamon and ⅛ teaspoon of cayenne pepper to the melted chocolate for a warming spiced chocolate cake. It’s deeply comforting during the cold months.
Can I Store This 2 Ingredient Chocolate Cake Recipe?
Absolutely, and it stores beautifully in multiple ways depending on your timeline. At room temperature, covered tightly with plastic wrap or stored in an airtight container, this cake keeps for 2-3 days. It remains moist and delicious, though the texture firms up slightly as it sits.
In the refrigerator, properly covered, it lasts up to 5 days. In fact, many people prefer it chilled straight from the fridge, where the chocolate flavor becomes even more intense and the texture almost mousse-like. Bring it to room temperature for 20-30 minutes before serving if you want to taste it at its optimal flavor level.
For freezer storage, wrap the cooled cake tightly in plastic wrap, then place in a freezer-safe container or bag. It keeps beautifully for up to 3 months. Thaw overnight in the refrigerator, then bring to room temperature before serving.
I don’t recommend storing this cake uncovered, as it dries out more quickly than traditional cakes. The minimal ingredient list means there’s nothing to help lock in moisture over time, so proper wrapping is important.
Nutrition Information
Per serving (based on 6 servings, using USDA data): This cake contains approximately 280 calories, 18 grams of fat, 28 grams of carbohydrates, and 6 grams of complete protein. There’s roughly 3 grams of dietary fiber from the chocolate and essentially 0 grams of sodium (unless you add the salt, which adds minimal amounts).
The beauty here is that you’re getting antioxidant flavonoids from quality chocolate—particularly if you use dark chocolate—and the choline and amino acids from eggs, which support brain health and muscle maintenance. This isn’t health food, but it’s not nutritionally empty either. It’s one of those rare desserts that feels indulgent while delivering actual nutritional benefits alongside the pleasure.
For context, according to USDA dietary guidelines, a serving of this cake as part of a balanced diet—perhaps with fresh fruit and a protein-rich breakfast—fits reasonably into most people’s daily nutritional needs.
What Can I Serve With This 2 Ingredient Chocolate Cake Recipe?
The beauty of this cake’s simplicity is that it pairs with virtually anything. I love serving it with fresh fruit, whipped cream, or alongside complementary flavors. Since you enjoyed the minimalist approach here, you might also explore my Almond Joy Recipe, which brings together coconut and chocolate in an equally straightforward way.
- Whipped cream or crème fraîche – A dollop of unsweetened whipped cream or tangy crème fraîche provides textural contrast and cuts through the richness perfectly. I whip my own with just a touch of vanilla and powdered sugar.
- Fresh berries – Raspberries, strawberries, or blackberries alongside each slice add brightness and natural sweetness. The tartness of raspberries particularly complements dark chocolate.
- Strong coffee or espresso – Honestly, this cake and a cup of strong black coffee or a shot of espresso is all the accompaniment you need. The bitterness in coffee echoes the cocoa notes beautifully.
- Homemade chocolate ganache – If you want to gild the lily, you can drizzle the cooled cake with a simple ganache made from chocolate and cream. It takes it from elegant to absolutely showstopping.
- Salted caramel drizzle – A thin line of salted caramel over each slice adds sophistication and plays beautifully against the chocolate. The salt amplifies flavors in unexpected ways.
- Vanilla ice cream – Serve a still-warm slice with a scoop of quality vanilla ice cream for that ultimate contrast of temperatures and textures.
Substitutes
- Dark chocolate instead of semi-sweet – Use 60% cacao or higher for a deeper, more sophisticated flavor. It may require slightly less baking time due to different cocoa butter content, so watch carefully. The result is more intensely chocolatey.
- Milk chocolate for a sweeter cake – If you prefer sweeter desserts, milk chocolate works beautifully. The texture remains the same, but the flavor becomes creamier and less intense. You might need to reduce baking time slightly.
- Chopped chocolate bars instead of chips – Quality chocolate bars often melt more smoothly than chips, which sometimes contain stabilizers. Chop them roughly and melt using the same method. The result is often silkier batter.
- European-style butter instead of cooking spray – For an ultra-moist cake, butter your pan instead of using cooking spray. Some folks swear this adds subtle richness, though any fat works for pan preparation.
2 Ingredient Cake Recipe
Ingredients
Method
- Start by positioning your oven rack to the middle position and preheating your oven to 350°F (175°C). While it’s warming up, grease a 6×6-inch square baking pan with a light coating of butter or cooking spray. Line the bottom with parchment paper if you’re feeling extra careful—this makes removal easier and prevents sticking. Make sure you have room temperature eggs ready. This matters more than you might think. Cold eggs won’t whip to proper volume, and you need that airiness to create the cake’s structure. I take mine out about 30 minutes before I start cooking.

- This is where patience becomes your ingredient. Place your chocolate chips in a microwave-safe bowl. Microwave in 30-second intervals, stirring between each interval, until the chocolate is completely melted and smooth. This usually takes between 60-90 seconds total, depending on your microwave’s power. Alternatively, you can use a double boiler method—place chocolate over a bowl of barely simmering water, stirring occasionally until silky. This method takes longer but gives you more control and reduces the risk of overheating the chocolate, which can make it grainy and bitter. Once melted, set the chocolate aside to cool for 5-10 minutes. You want it warm but not hot—it should feel comfortable to touch on the outside of the bowl. If it’s too hot, it’ll cook your egg yolks when you fold them in. If it’s too cool, it won’t incorporate smoothly.

- Now comes the technical part that makes all the difference. Separate your eggs carefully, keeping the yolks completely free from any white. Even a tiny bit of yolk will prevent your whites from reaching proper volume—fats and proteins don’t play nicely together when you’re trying to create air bubbles. I use the shell-to-shell method: crack an egg, pour the yolk between the two shell halves, letting the white drip into a bowl below. It’s less wasteful than other methods and gives you better control. Transfer the yolk to a separate small bowl. Place your egg whites in a completely clean, dry mixing bowl. Even a trace of grease will sabotage your meringue. Some folks use a copper bowl for this step, which creates an even more stable foam—a lovely touch if you have one.
- Using an electric mixer on medium-high speed, beat your egg whites until they transform from a clear liquid into a thick, pale foam. You’re looking for medium peaks—when you lift the beater, the peaks should stand up but gently fold over at the tips. This usually takes 3-4 minutes, depending on your mixer’s power. Don’t overbeat. If you go too far, you’ll end up with dry, separated egg whites that look grainy. Once you hit medium peaks, you’re done. The whites should look like fluffy clouds—gorgeous and full of promise. This is the moment I always pause and appreciate what’s happening. Those billions of tiny air bubbles are about to become the structure of your cake. It’s pure food science and pure magic all at once.

- With the mixer still running on medium speed, add your egg yolks one at a time, waiting about 20-30 seconds between each addition. This allows each yolk to fully incorporate before you introduce the next one. As you add the yolks, the mixture will initially look a bit broken or separated—don’t panic. This is completely normal. Keep beating, and it will gradually come back together into a glossy, pale yellow mixture. The whole process, from first yolk to fully incorporated last yolk, takes about 2-3 minutes. You’ll know it’s ready when the mixture is completely smooth and shiny, with no visible streaks of white. This is your emulsion, and it’s beautiful.

- Here’s where your gentle touch matters most. Pour your cooled melted chocolate into the egg mixture. Using a rubber spatula, gently fold—don’t stir, don’t beat—the chocolate into the eggs. A fold is different from a stir. You’re moving the spatula down through the middle of the mixture, across the bottom, up the side, and over the top, rotating the bowl as you go. This keeps all those beautiful air bubbles intact while evenly distributing the chocolate. After about 8-10 folds, your batter should be uniformly chocolate-colored and smooth. Stop folding once you see no white streaks. Overmixing at this stage deflates those precious air bubbles and results in a denser cake.
- Pour your batter into your prepared pan, using your spatula to smooth the top gently. Place in your preheated 350°F oven for 28-32 minutes. The exact time depends on your oven’s personality, so I suggest checking at the 25-minute mark. You’re looking for a cake that’s set around the edges but still has a slight jiggle in the very center when you gently shake the pan. A toothpick inserted near the center should come out with some moist crumbs clinging to it—not completely clean, and definitely not raw batter. The top should look set and might have some small cracks—this is normal and actually desirable. It means you’ve created that magical fudgy center we’re after.
- Remove the cake from the oven and let it cool completely in the pan. This takes at least 1-2 hours at room temperature, though you can speed this by placing it in the refrigerator for 30-45 minutes. As it cools, it firms up considerably. The center, which seemed almost mousse-like when hot, becomes more cake-like while maintaining that gorgeous fudgy texture. Once cooled, you can invert the cake onto a serving plate, slice it into squares, or keep it in the pan for easy serving. If you’d like to add frosting or a ganache on top, this is the perfect time. Some folks dust it with cocoa powder or powdered sugar for a refined finish.

Notes
FAQs
Can I add flour to make it more like a traditional cake?
You absolutely can, though I’d encourage you to try it as-is first. If you want to add flour, start with ¼ cup all-purpose flour folded in gently after the chocolate. It will create a cake with a lighter, less dense crumb. But truthfully, the whole magic of this recipe is that absence of flour. The structure comes entirely from eggs, which creates that uniquely luxurious texture. If you want traditional cake, this might not be your recipe.
Why does my cake sink in the middle?
This is actually somewhat normal and not necessarily a mistake. The center stays slightly underbaked on purpose—that’s the fudgy texture we’re after. However, if it sinks significantly and becomes a crater, you likely underbaked it. Try adding a couple extra minutes of baking time and look for a more set top. The jiggle should be subtle, not dramatic. Your oven temperature might also be running low, so invest in that oven thermometer I mentioned.
Can I make this dairy-free?
The recipe itself is already dairy-free—just chocolate and eggs. However, if you want to serve it with dairy-free accompaniments, skip the whipped cream and go with coconut cream (the thick part from a can of full-fat coconut milk) or a dairy-free alternative. Some folks even serve it with a vegan chocolate ganache made from coconut cream and chocolate.
What’s the difference between this and a traditional flourless chocolate cake?
Traditional flourless chocolate cakes often include butter, sugar, and sometimes chocolate liqueur or coffee. This version strips it down even further—just chocolate and eggs. The result is more intensely chocolate-forward and has a different texture: more airy and mousse-like rather than dense and fudgy. Both are delicious, but they’re definitely different animals.
Can I double the recipe to make a larger cake?
You can! Double all the ingredients and use a 9-inch square pan or 9-inch round pan instead. You’ll need to increase the baking time to approximately 35-40 minutes. Watch carefully, as larger cakes can vary more in baking time depending on your oven. The jiggle test still applies—you’re looking for a slight movement in the center, not a full jiggle. Let it cool longer too, as a thicker cake takes more time to set.
More Recipes You’ll Love
- Allulose Cake Recipe – Another beautiful minimalist cake option if you’re watching sugar intake, this recipe proves that simple ingredients can still deliver maximum satisfaction.
- Almond Joy Recipe – If you love chocolate but want to explore different flavor combinations, this brings together chocolate, coconut, and almonds in an equally straightforward way.
- Almond Flour Banana Nut Bread Recipe – For another grain-free baking adventure, this recipe shows how alternative flours can create beautiful results with minimal fuss.
- Almond Butter Recipe – Explore the art of making pantry staples from scratch, much like how this cake celebrates ingredient simplicity.
Final Thoughts
My grandmother would be so proud that this recipe lives on in kitchens beyond her own. There’s something sacred about food this simple, this honest, this true. In a world obsessed with complexity and trending flavors, there’s rebellion in making something with just two ingredients and letting them speak for themselves.
This cake has taught me—and I hope it teaches you—that elegance doesn’t require a long ingredient list. Sometimes it requires exactly the opposite. Sometimes it requires knowing what to leave out, trusting that what remains will be enough. It will be more than enough. It will be perfect.
Bake this for someone you love. Serve it with strong coffee and an unhurried afternoon. Watch their face when they ask what’s in it and you tell them. That moment of surprise and delight? That’s the real magic. That’s where the love lives.
Enjoy your cooking journey!