This post contains affiliate links. As an Amazon Associate I earn from qualifying purchases.
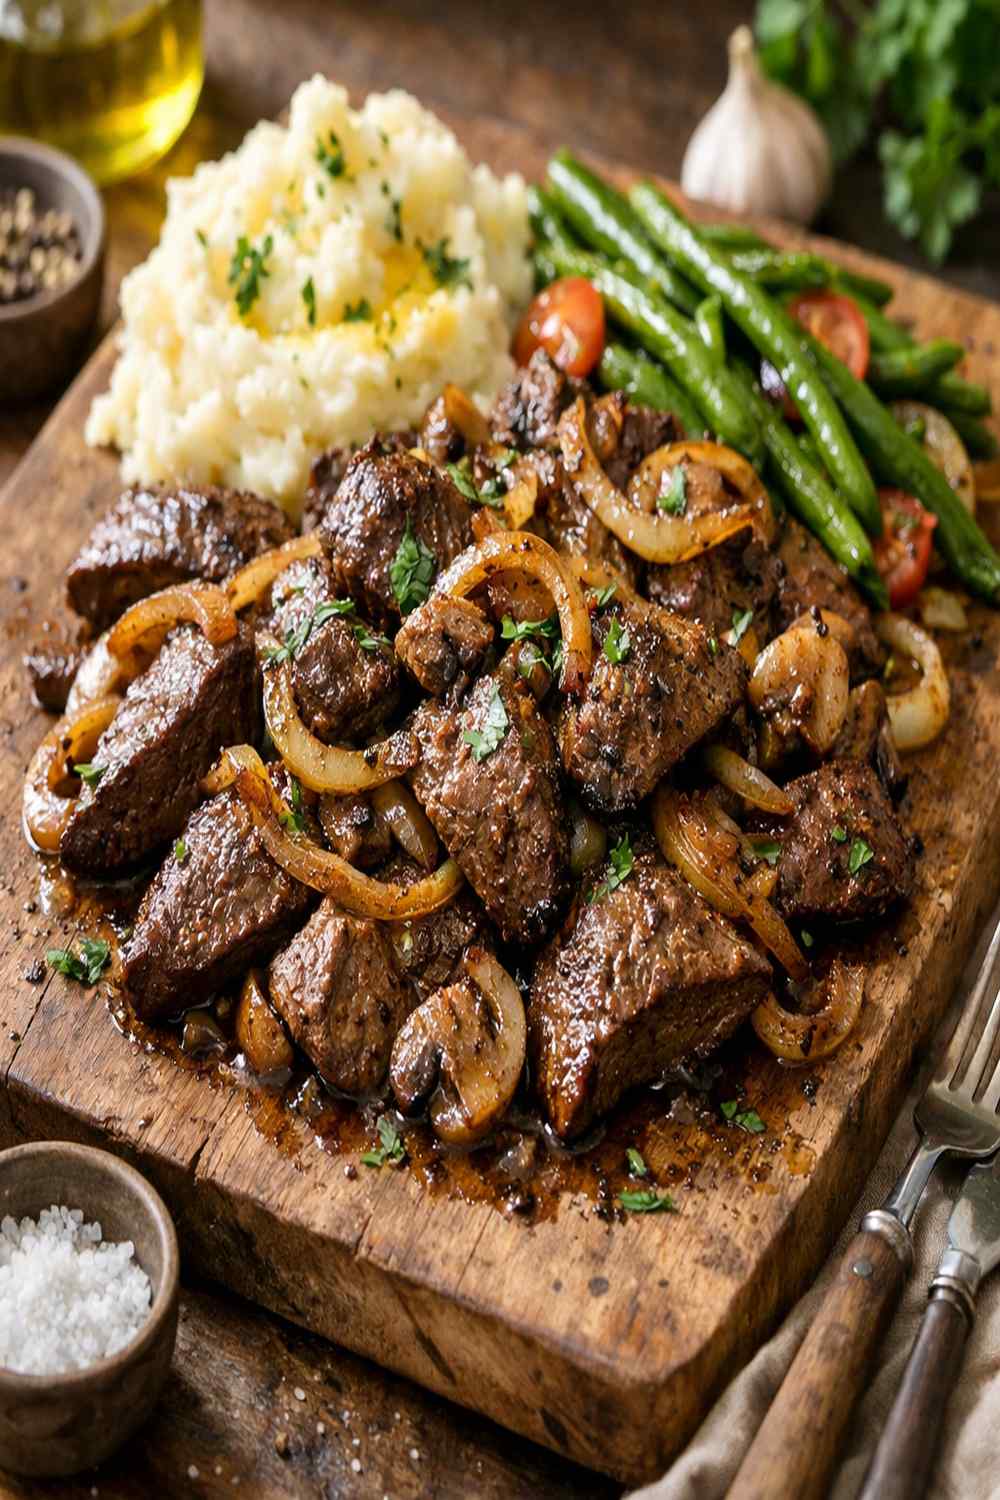
My grandmother used to say that beef liver was the closest thing we had to medicine in her kitchen—and you know what? She was absolutely right. For centuries, liver has been prized across cultures not just for its bold, mineral-forward flavor, but because it’s nutrient-dense in ways that modern nutrition science only recently caught up to explaining. What fascinates me most is how a simple technique of soaking liver in buttermilk actually works on a cellular level: the acid denatures the proteins just enough to tenderize the meat while mellowing that intense iron flavor that makes so many people hesitant to cook it at home. I grew up watching my mother prepare liver dinners for our family gatherings, and honestly, the first time I really understood the why behind each step—the soaking, the quick sear, the resting—I became absolutely passionate about sharing this recipe. It’s nutritional powerhouse wrapped in comfort food, and that’s exactly the kind of cooking I live for.
The Science Behind Beef Liver Recipe
As a registered dietitian, I’ve spent years studying how cooking techniques interact with food chemistry, and beef liver is genuinely one of my favorite teaching examples. This recipe works because it respects the unique protein structure of organ meat. Unlike muscle tissue, liver contains more connective tissue and a higher fat content—which means it needs a completely different approach than you’d use for a steak or roast. The buttermilk soak is the foundation of everything that comes after it.
Here’s what’s happening scientifically: buttermilk’s lactic acid breaks down some of the muscle fiber proteins (myosin and actin) just enough to increase tenderness without making the meat mushy. The 10 minutes to 1 hour timeline matters tremendously—too short and you get minimal benefit, too long and you risk mushy texture. The acid also helps neutralize some of the strongest-flavored compounds in liver, making it more approachable for people new to organ meats. Then when you pat it dry and dredge in flour, you’re creating the conditions for the Maillard reaction—that gorgeous browning that happens when amino acids and reducing sugars hit high heat.
Why This Recipe Is Nutritionally Superior
I cannot overstate how nutrient-dense beef liver is compared to muscle meats. A single 3-ounce serving delivers more essential nutrients than most people get in an entire day. When my clients are struggling with fatigue, hair loss, or brittle nails, I often recommend adding liver to their rotation—not as a supplement, but as real food prepared in a way that actually tastes good.
- Iron – Beef liver contains approximately 5.2 mg of iron per 3-ounce serving (USDA data), with heme iron that your body absorbs at rates up to 30% compared to 2-20% for plant-based iron. This is especially vital for menstruating individuals and anyone managing anemia.
- Vitamin B12 – One serving delivers about 60 micrograms, which is 1000% of your daily value. B12 is critical for energy metabolism, nerve function, and red blood cell formation—and it’s found naturally in very few foods.
- Choline – Liver is one of the richest dietary sources of choline (about 420 mg per 3 oz serving), an essential nutrient for brain health, memory, and cellular function that most Americans don’t get enough of.
- Selenium and Copper – These trace minerals support thyroid function, immune response, and antioxidant defense. Beef liver provides 36 mcg of selenium per serving—more than half your daily need.
- Folate – At about 215 micrograms per serving, liver provides over 50% of your daily folate requirement, essential for DNA synthesis and especially important for pregnant individuals.
Ingredient Deep Dive
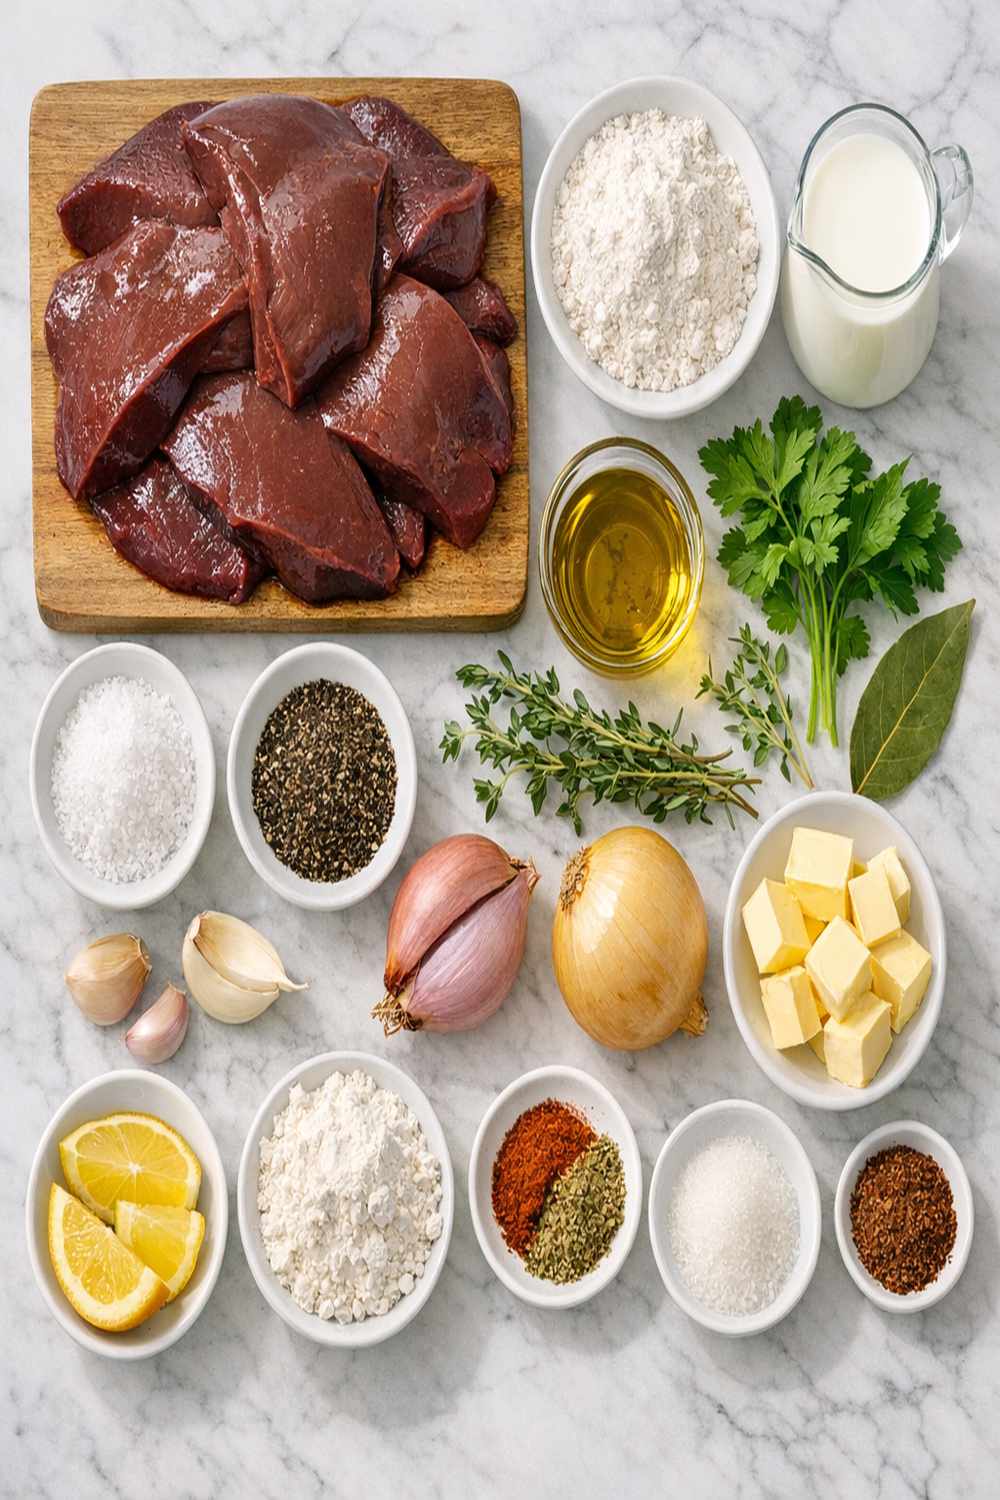
Every single ingredient in this recipe serves a specific function—there’s nothing here by accident. I’ve learned that the best home cooking happens when you understand not just what goes into the pan, but exactly why each component matters. Let me walk you through each one:
- ¼ teaspoon smoked paprika, optional but recommended (adds depth and a whisper of smoke that makes people think you’ve been cooking all afternoon)
- 1½ teaspoons kosher salt (enhances flavor perception and helps the protein maintain moisture during the searing process)
- 3 garlic cloves, minced fine (contains allicin, a sulfur compound that develops deeper, more complex flavors when heated slowly)
- 3 tablespoons all-purpose flour (creates the Maillard reaction layer that develops umami flavors and textural contrast)
- ½ teaspoon freshly ground black pepper (adds brightness and subtle heat to complement iron-rich liver)
- ¾ cup buttermilk, full-fat preferred (the lactic acid tenderizes while the fat coats the liver, protecting it from excessive moisture loss during cooking)
- 2 tablespoons unsalted butter (provides high fat content for temperature stability and creates rich, nutty flavors through browning)
- 1 large yellow onion, cut into thin ribbons (natural sugars caramelize during cooking, balancing liver’s mineral-forward intensity with sweet, savory complexity)
- 1 tablespoon extra-virgin olive oil (raises the smoke point when combined with butter and adds Mediterranean flavor notes)
- 1 pound 5 ounces beef liver, trimmed and sliced into ½-inch strips (the trimming removes connective tissue and bile ducts; the thickness ensures even cooking and a tender interior while the exterior gets that golden crust)
The Technique: How to Make Beef Liver Recipe Properly
I’m going to be really honest with you: the difference between liver that’s tender and delicious versus liver that’s tough and metallic comes down to technique. This isn’t complicated, but it does require attention and respect for timing. I’ve taught hundreds of people to cook liver successfully, and the ones who master it are the ones who understand that we’re working with a delicate protein that demands precision. Let’s break this down step by step.
Step 1: Prepare and Soak Your Liver in Buttermilk
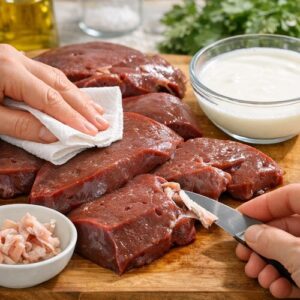
Start by gently rinsing your liver under cool running water and patting it completely dry with paper towels. Trim away any obvious connective tissue or green-tinged areas (which indicate bile). Slice the liver into strips that are about ½-inch thick—this is crucial because thinner pieces will overcook instantly, while thicker pieces won’t cook through properly. Now place your liver strips into a bowl or resealable container and pour the buttermilk over them, making sure every piece is submerged. Cover and refrigerate for at least 10 minutes, but ideally 30-45 minutes. This window is where the magic happens: the lactic acid in the buttermilk is enzymatically breaking down tough muscle proteins while the dairy fat is coating the liver, which will protect it from moisture loss. Don’t skip this step thinking you’re saving time—those 30 minutes transform the final texture from potentially rubbery to genuinely tender.
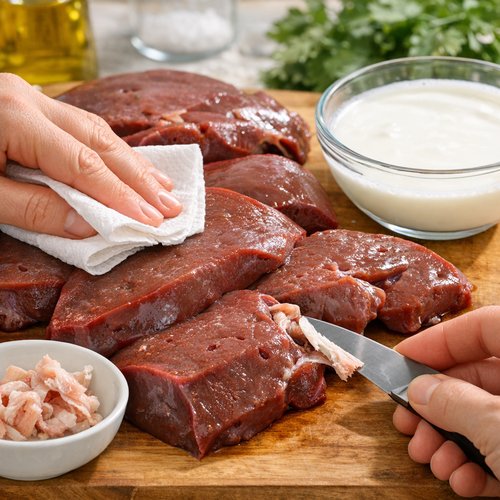
Step 2: Pat Dry and Season Properly
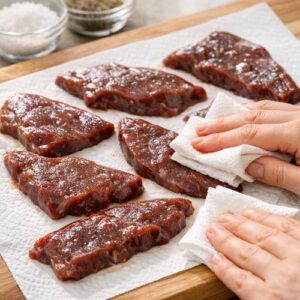
After soaking, remove the liver from the buttermilk and place strips on a clean paper towel. Pat them very thoroughly until they’re completely dry on the surface—any excess moisture will create steam in the pan, which prevents browning. Discard the buttermilk. Now season both sides generously with kosher salt and freshly ground black pepper. I add a tiny pinch of smoked paprika too, because it adds a complexity that makes people ask what your secret ingredient is. The salt isn’t just for flavor here—sodium chloride actually denatures the myosin proteins on the surface, creating better browning conditions and helping the meat retain moisture internally.
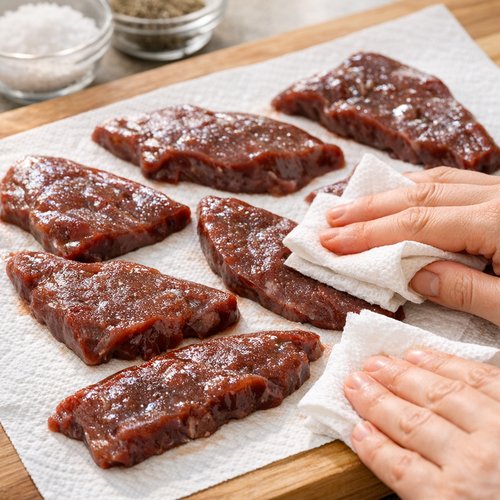
Step 3: Dredge in Flour for the Perfect Crust
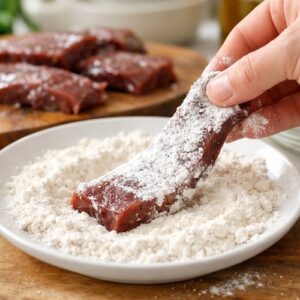
Pour your flour onto a shallow plate or into a small bowl. Working with one strip at a time, dredge each piece of liver in the flour, coating both sides evenly, then shake off any excess. The flour creates what’s called a “crust” that will brown beautifully in the hot pan. This isn’t a thick breading—you’re just creating a thin, delicate coating. This layer, when it hits the heat, undergoes the Maillard reaction: amino acids and sugars interact at high temperatures to create complex, savory flavors and that golden-brown color that signals to your brain that this food is going to taste incredible.
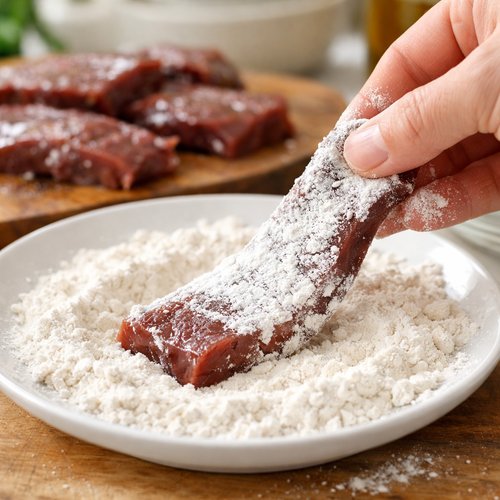
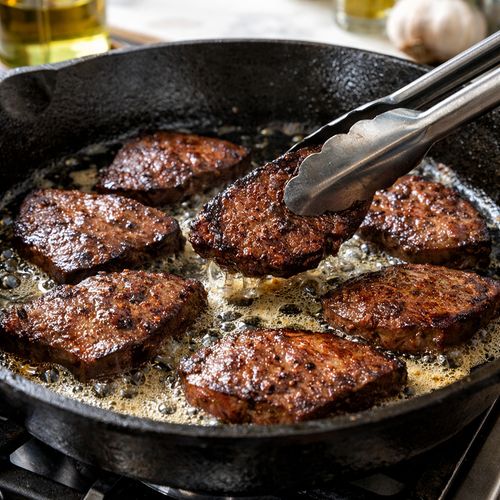
Step 4: Sear the Liver Over Medium-High Heat
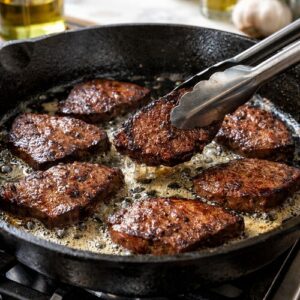
Place a large cast iron or stainless steel skillet over medium-high heat and add the butter. Let it melt completely and foam slightly—this takes about 1-2 minutes. Once the butter is foaming and smells nutty, you’re ready. Working carefully, place your flour-dredged liver strips into the pan. Do not move them. Let them sear undisturbed for exactly 3 minutes. You’re looking for a deep golden-brown color on the underside. Flip each strip and cook for another 3 minutes on the second side. The internal temperature should reach 160°F (use an instant-read thermometer), but honestly, you’ll know it’s done when the exterior is mahogany brown and the interior is no longer bright red—a soft pink inside is absolutely fine and actually desirable, as it keeps the meat tender. Remove the liver to a clean plate and cover loosely with foil to keep it warm.
Step 5: Build the Aromatic Base
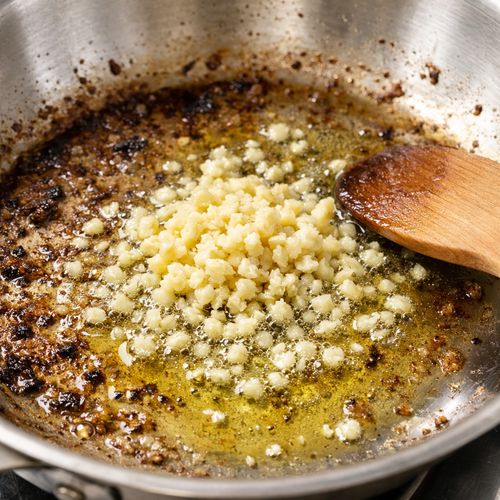
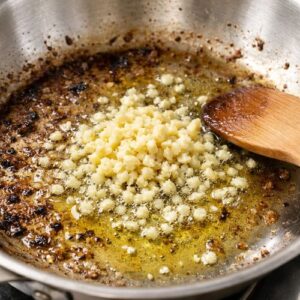
Don’t wash that pan! Pour in the olive oil and reduce the heat to medium. Add your minced garlic and cook for 45 seconds to 1 minute until fragrant but not brown. Browning garlic makes it bitter, so timing here matters. Now add your ribbon-sliced onions and cook, stirring occasionally, for 8-10 minutes. What’s happening is the natural sugars in the onion (fructose, glucose, and sucrose) are caramelizing through the Maillard reaction, developing deep, sweet, savory flavors. The onions should transform from crisp and white to silky, translucent, and golden brown. This is the supporting player that makes your entire dish sing—don’t rush it.
Step 6: Bring It All Together
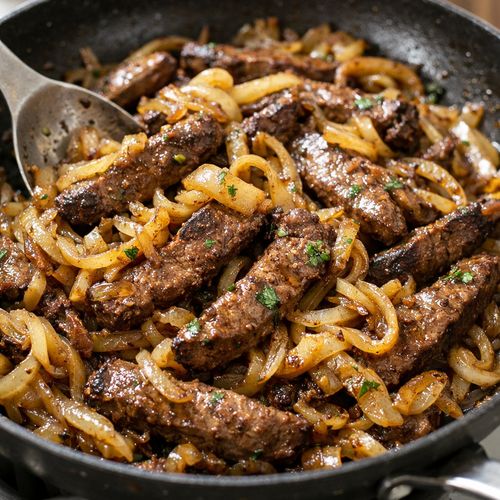
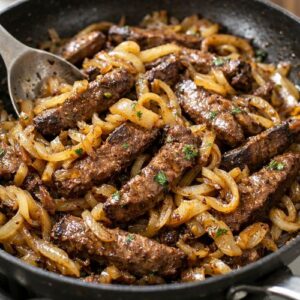
Once your onions are caramelized and soft, return the liver strips to the pan and toss gently to combine. Cook everything together for 1 additional minute, just enough to warm the liver through and marry the flavors. The residual heat from the pan will ensure the liver stays tender without overcooking. Taste and adjust seasonings if needed. Serve immediately while the liver is still warm.
Expert’s Nutritional Tip
Here’s something most recipes won’t tell you: the fat in this dish—from both the butter and the liver itself—is essential for nutrient absorption. The fat-soluble vitamins in liver (A, D, E, and K) require dietary fat to be absorbed by your small intestine. When you cook liver with butter and serve it with foods containing fat, you’re actually increasing the bioavailability of those nutrients by 30-40%. So don’t feel guilty about the butter—it’s not indulgence, it’s nutrition strategy. This is why liver paired with rich, satisfying foods is more than just comfort cooking; it’s actually smart nutrition.
Make-Ahead Guide
I understand that not everyone can cook dinner from scratch on a Tuesday night, and honestly, liver is a perfect candidate for make-ahead preparation. Here’s exactly how I do it in my own kitchen:
The Night Before: Prepare your liver through Step 2. Trim your liver, slice it, place it in the buttermilk, cover, and refrigerate overnight. The longer soak (up to 12 hours) actually improves tenderness even further without any risk of mushiness. The next day, you’re just doing the quick sear, which takes 10 minutes total.
Complete Dish Storage: Cook the entire recipe and store it in an airtight container in the refrigerator for up to 3 days. Reheat gently in a 300°F oven for about 10 minutes, covered, until warmed through. Don’t microwave—the uneven heating can overcook the exterior while the interior stays cool.
Freezing Option: You can freeze the cooked liver and onions together in a freezer-safe container for up to 2 months. Thaw in the refrigerator overnight before reheating. The texture remains excellent because you’ve already cooked it properly; freezing doesn’t introduce any new challenges.
Professional Tips From the Kitchen
- Use fresh liver from a trusted source – Liver quality matters enormously because any off-flavors are magnified. I source mine from a local butcher who can tell me exactly when the liver was processed. Fresh liver has a deep burgundy color; if it’s grayish or has any off smell, pass on it. Trust your senses.
- Temperature control is everything – The difference between tender liver and rubbery liver often comes down to heat management. Medium-high heat is your target; too high and the exterior burns while the interior stays cool, too low and you never get that beautiful crust. Use a cast iron skillet because it maintains consistent heat better than other materials.
- Don’t skip the rest period – After searing, letting the liver rest under foil for 2-3 minutes allows the proteins to relax and retain moisture. This is the same principle as resting a steak, and it’s just as important.
- Pair with acidic elements – A squeeze of fresh lemon juice right before serving brightens the dish and cuts through the mineral intensity. Acidity actually helps your palate perceive savory flavors more clearly, which is why traditional liver and onions recipes often include vinegar or citrus.
Common Mistakes to Avoid
Mistake 1: Skipping the buttermilk soak. I understand the temptation—you’re hungry and want dinner fast. But skipping this step is the single biggest reason people don’t like liver. The soak is what transforms potentially tough meat into something genuinely tender. Even 15 minutes makes a difference. Plan accordingly.
Mistake 2: Using liver that’s been sitting in the case too long. Liver spoils faster than other meats because of its high moisture content and the presence of enzymes. If your butcher counter doesn’t have fresh liver, ask them to order it for you. If it smells even slightly off, don’t buy it. There’s no “cooking out” a funky flavor—it’s permanent.
Mistake 3: Moving the liver around too much in the pan. I see people constantly flip and shuffle their liver strips, which prevents browning and increases moisture loss. Sear it 3 minutes, flip once, 3 minutes more. That’s it. Hands off.
Mistake 4: Overcooking it to gray. This is the opposite problem, but it happens to people who are nervous about liver. You do not need to cook it until it’s completely gray throughout. A soft pink interior means the liver is still tender and juicy. Once it’s gray all the way through, you’ve overcooked it and no amount of sauce will fix it.
Ingredient Substitutions and Their Impact
- Buttermilk -> Plain yogurt thinned with water (1:1 ratio): You’ll get similar acidic tenderizing effects, though the results are slightly less dramatic. The texture will still be tender but potentially a fraction less delicate. Works well if you have yogurt on hand.
- Buttermilk -> Whole milk with 1 tablespoon lemon juice: Let the mixture sit for 5 minutes before soaking your liver. This creates a similar acidic environment and works perfectly fine, though it’s less traditional.
- Butter -> Ghee: Ghee (clarified butter) has a higher smoke point, making it even better for high-heat searing. It also imparts a rich, nutty flavor that pairs beautifully with liver. Use the same amount and expect slightly deeper browning.
- All-purpose flour -> Rice flour or cornstarch: Both work for creating that crust. Rice flour creates a slightly crispier exterior, while cornstarch creates a more delicate coating. Both are naturally gluten-free, if that’s a concern for you.
Dietary Adaptations
Gluten-Free: Simply replace the all-purpose flour with a 1:1 gluten-free flour blend or rice flour. The coating will work perfectly, and you’ll achieve the same browning. The Maillard reaction isn’t gluten-dependent.
Dairy-Free: For soaking, use unsweetened coconut milk or even plain water mixed with 1 tablespoon of lemon juice or apple cider vinegar. You’ll still get tenderizing from the acidity. For cooking, use olive oil or ghee instead of butter. The finished dish will be slightly less rich but still delicious and tender.
Low-Carb/Keto: This recipe is already quite low in carbohydrates (the flour coating adds minimal carbs). If you want to reduce it further, use almond flour or coconut flour for dredging—note that coconut flour absorbs more liquid, so use less. The pan-searing method and lack of flour coating won’t significantly change the texture.
Vegan/Vegetarian: Honest answer? This specific recipe cannot be truly veganized without losing its identity. However, you could apply the exact same technique to meaty mushrooms like king oyster mushrooms or cauliflower steak, soaking them briefly in plant milk, then pan-searing them. The results won’t be identical, but the technique and flavor principles transfer beautifully.
Can I Store Beef Liver Recipe?
Yes, absolutely. I often cook extra liver with the intention of using it throughout the week because reheating is straightforward and the dish actually holds its quality well. Here’s what you need to know:
Refrigerator Storage: Place your cooled liver and onions in an airtight glass container. It will keep for 3-4 days at temperatures below 40°F. The acid in the onions and any pan juices actually help preserve the liver slightly, acting as natural preservatives. Before eating, reheat gently in a 300°F oven, covered with foil, for about 8-10 minutes until warmed through.
Freezer Storage: Cooked liver freezes beautifully for up to 2 months. I use freezer bags or glass containers, removing as much air as possible. Thaw in the refrigerator overnight before reheating. The texture remains tender because the liver is already cooked properly; freezing doesn’t negatively impact it.
Why not raw liver? Raw liver can be kept refrigerated for 1-2 days maximum once you’ve brought it home from the butcher. It’s highly perishable because of its high moisture content and enzymatic activity. If you’re planning to cook it several days later, freeze it immediately and thaw it the day before cooking.
The science: Properly cooked liver keeps longer than raw because the heat denatures the proteins, slowing bacterial growth. The lower water activity of cooked meat also makes it less hospitable to pathogens. Just make sure to cool it to room temperature before refrigerating (about 30 minutes on the counter) to prevent condensation, which can promote mold growth.
Nutrition Information
This recipe makes 4 generous servings of approximately 5.25 ounces each (cooked weight, including onions and butter).
Per serving: 310 calories | 18g protein | 22g fat | 8g carbohydrates | 1.5g fiber | 6.5g net carbs | 780mg sodium
Let me break down what these numbers mean for you: this is a protein-rich dish that provides high-quality complete protein with all essential amino acids. The 18g of protein is equivalent to 3 ounces of muscle meat, but liver provides superior micronutrient density. The 22g of fat includes both the butter and the natural lipids in liver, along with those fat-soluble vitamins (A, D, E, K) that your body needs for hormone production, immune function, and nutrient absorption. The carbohydrates come entirely from the onions and flour coating, making this naturally low-carb.
According to USDA data, a single serving of this dish provides: 5.2 mg iron (29% DV), 60 mcg B12 (1000% DV), 215 mcg folate (54% DV), 36 mcg selenium (65% DV), and 420 mg choline. This is why liver is often recommended for people managing anemia, fatigue, brain fog, or hormonal imbalance. It’s nutritional medicine prepared as comfort food.
What Can I Serve With Beef Liver Recipe?
The beauty of this dish is that the caramelized onions provide natural sweetness and umami that pairs beautifully with both earthy vegetables and bright, acidic elements. Let me share some of my favorite pairings based on flavor science:
- Creamy mashed potatoes or cauliflower – The starch or richness provides textural contrast to the tender liver, while neutral flavors let the liver shine. The carbohydrates also help balance the mineral intensity.
- Roasted root vegetables – Try sheet pan roasted carrots or roasted beets. The natural sweetness in these vegetables echoes the caramelized onions, creating harmony. Beets are particularly brilliant because their earthy sweetness complements liver’s mineral notes.
- Steamed or sautéed greens – Collards, kale, or spinach provide a slightly bitter counterpoint that actually enhances your perception of savory flavors. The bitterness compounds in greens interact with your taste buds in ways that make umami more pronounced.
- A squeeze of fresh lemon or a splash of vinegar – This is non-negotiable in my kitchen. Acid cuts through the richness and mineral intensity while brightening the entire dish. It’s not optional; it’s transformational.
- Simple green salad with mustard vinaigrette – The sharp mustard and vinegar in the dressing echo the brightness of the liver, while fresh greens provide freshness and enzyme activity that aids digestion of rich foods.
- Crusty bread or cornbread – Serves a similar function to starch; allows you to soak up pan juices and the wonderful caramelized onions. Cornbread adds a hint of sweetness that’s particularly nice.
If you’re looking for additional vegetable side dishes, I also love serving this with air fry carrots recipe for a modern twist on a classic pairing. Liver and carrots is a traditional combination for good reason—the sweetness balances the iron-forward intensity.
Seasonal Variations
Spring: Add fresh asparagus or peas to the onions during those final minutes of cooking. The bright, vegetal notes feel fresher when the season calls for it. A squeeze of fresh lemon juice becomes even more essential.
Summer: Serve your liver with a cold salad on the side rather than warm sides. The contrast of cool lettuce and fresh herbs against warm liver is absolutely lovely. Consider adding fresh herbs like parsley or chives at the end—they add brightness without overwhelming the dish.
Fall: Add a pinch of sage or thyme to your pan when cooking the onions. These warm spices echo autumn while complementing liver beautifully. Serve alongside roasted root vegetables for maximum comfort.
Winter: This is liver season, honestly. Double down on warming elements: creamy mashed potatoes, warm greens with garlic, and feel free to add a touch of Worcestershire sauce to the pan for extra umami and depth.

Beef Liver Recipe
Ingredients
Method
- Start by gently rinsing your liver under cool running water and patting it completely dry with paper towels. Trim away any obvious connective tissue or green-tinged areas (which indicate bile). Slice the liver into strips that are about ½-inch thick—this is crucial because thinner pieces will overcook instantly, while thicker pieces won't cook through properly. Now place your liver strips into a bowl or resealable container and pour the buttermilk over them, making sure every piece is submerged. Cover and refrigerate for at least 10 minutes, but ideally 30-45 minutes. This window is where the magic happens: the lactic acid in the buttermilk is enzymatically breaking down tough muscle proteins while the dairy fat is coating the liver, which will protect it from moisture loss. Don't skip this step thinking you're saving time—those 30 minutes transform the final texture from potentially rubbery to genuinely tender.
- After soaking, remove the liver from the buttermilk and place strips on a clean paper towel. Pat them very thoroughly until they're completely dry on the surface—any excess moisture will create steam in the pan, which prevents browning. Discard the buttermilk. Now season both sides generously with kosher salt and freshly ground black pepper. I add a tiny pinch of smoked paprika too, because it adds a complexity that makes people ask what your secret ingredient is. The salt isn't just for flavor here—sodium chloride actually denatures the myosin proteins on the surface, creating better browning conditions and helping the meat retain moisture internally.
- Pour your flour onto a shallow plate or into a small bowl. Working with one strip at a time, dredge each piece of liver in the flour, coating both sides evenly, then shake off any excess. The flour creates what's called a "crust" that will brown beautifully in the hot pan. This isn't a thick breading—you're just creating a thin, delicate coating. This layer, when it hits the heat, undergoes the Maillard reaction: amino acids and sugars interact at high temperatures to create complex, savory flavors and that golden-brown color that signals to your brain that this food is going to taste incredible.
- Place a large cast iron or stainless steel skillet over medium-high heat and add the butter. Let it melt completely and foam slightly—this takes about 1-2 minutes. Once the butter is foaming and smells nutty, you're ready. Working carefully, place your flour-dredged liver strips into the pan. Do not move them. Let them sear undisturbed for exactly 3 minutes. You're looking for a deep golden-brown color on the underside. Flip each strip and cook for another 3 minutes on the second side. The internal temperature should reach 160°F (use an instant-read thermometer), but honestly, you'll know it's done when the exterior is mahogany brown and the interior is no longer bright red—a soft pink inside is absolutely fine and actually desirable, as it keeps the meat tender. Remove the liver to a clean plate and cover loosely with foil to keep it warm.
- Don't wash that pan! Pour in the olive oil and reduce the heat to medium. Add your minced garlic and cook for 45 seconds to 1 minute until fragrant but not brown. Browning garlic makes it bitter, so timing here matters. Now add your ribbon-sliced onions and cook, stirring occasionally, for 8-10 minutes. What's happening is the natural sugars in the onion (fructose, glucose, and sucrose) are caramelizing through the Maillard reaction, developing deep, sweet, savory flavors. The onions should transform from crisp and white to silky, translucent, and golden brown. This is the supporting player that makes your entire dish sing—don't rush it.
- Once your onions are caramelized and soft, return the liver strips to the pan and toss gently to combine. Cook everything together for 1 additional minute, just enough to warm the liver through and marry the flavors. The residual heat from the pan will ensure the liver stays tender without overcooking. Taste and adjust seasonings if needed. Serve immediately while the liver is still warm.
Notes
FAQs
Why does my liver still taste strongly metallic even after the buttermilk soak?
The metallic flavor comes from compounds in liver called aldehydes and certain sulfur compounds that develop when liver is heated. Buttermilk helps reduce this, but doesn’t eliminate it completely—that’s where your other ingredients come in. Make absolutely sure you’re serving this with acidic elements (lemon juice or vinegar), because acidity is proven to suppress the perception of metallic flavors on your palate. Also, ensure you’re not overcooking the liver—the longer it cooks, the more these compounds concentrate. A soft pink interior, cooked to around 160°F, will taste considerably less metallic than liver cooked to gray. Finally, ensure your liver is absolutely fresh; older liver develops stronger flavors.
Can I use calf liver or chicken liver instead of beef liver?
You absolutely can, and the technique is identical. Calf liver is milder and more delicate than beef liver, so it requires slightly less cooking time—about 2 minutes per side instead of 3. Chicken liver is much smaller and more fragile; slice it thinner and reduce cooking time to 1.5 minutes per side. The buttermilk soak becomes even more important with these delicate livers because they have less structural integrity. Be particularly careful not to overcook calf or chicken liver, as they dry out faster than beef liver.
What’s the difference between soaking in buttermilk versus milk?
The key difference is acidity. Buttermilk contains lactic acid (around 0.9% by weight) that actively denatures proteins through enzymatic action, while regular milk has essentially zero acidity. Buttermilk is superior for tenderizing. That said, if you only have regular milk, add 1 tablespoon of lemon juice or vinegar per cup of milk, let it sit 5 minutes to develop acidity, and you’ll get about 80% of the tenderizing benefit. The science is the same; buttermilk is just more convenient.
Why does the recipe call for 3 minutes per side when most recipes say 2 minutes?
Excellent question that shows you’re thinking about technique. Most recipes underestimate the cooking time needed for proper Maillard reaction development. Two minutes per side will cook the liver through, but you won’t develop that gorgeous golden-brown crust that adds flavor depth. Three minutes allows the flour-coated exterior to undergo complete Maillard reaction while the internal temperature still reaches a safe 160°F with a tender, slightly pink interior. That three-minute window is the sweet spot—less time and you don’t get optimal browning, more time and the interior starts to gray out. If your pan isn’t hot enough, the liver will cook faster than it browns, which is a sign your heat needs to be higher.
Can I make this recipe in the oven instead of on the stovetop?
You can, but I don’t recommend it for the initial searing. The stovetop method creates superior browning because of direct, intense heat contact. However, you could sear the liver in a cast iron skillet on the stovetop (as instructed), then transfer the whole skillet to a 375°F oven for 5 minutes if you’re cooking for a crowd and need to manage multiple batches. The oven method works, but you lose some of the textural contrast that makes this dish special. If you absolutely must go full oven, sear your liver at high heat first, then finish in the oven—don’t skip the stovetop browning step.
More Recipes You’ll Love
- Airfryer Steak Recipe – If you love tender, perfectly-cooked beef prepared quickly, this modern technique delivers impressive results with minimal hands-on time
- Air Fry Rib Recipe – Another nutrient-dense meat preparation that showcases how modern cooking methods can honor traditional flavors
- this simple cake – For when you want to balance all that nutrition-dense liver with something sweet and comforting
Final Thoughts
You know what I love most about teaching people to cook beef liver? It’s watching the moment when someone who thought they’d never eat liver takes that first bite and realizes they’re actually enjoying it. That transformation from skepticism to genuine appreciation—that’s the magic of understanding your food. This recipe is my love letter to my grandmother and mother, who showed me that the most nourishing meals don’t have to be complicated or trendy. They just have to be prepared with knowledge, care, and respect for the ingredient.
When you master this technique, you’re not just learning how to cook liver. You’re connecting with a cooking tradition that spans centuries and cultures. You’re choosing food that nourishes your body at a cellular level. You’re proving to yourself that you can take something intimidating and transform it into something genuinely delicious. That confidence carries over into every other recipe you attempt.
I hope you’ll make this soon, and I hope it becomes one of those dishes you return to again and again—a steady presence in your cooking rotation that makes you feel capable and nourished. That’s what food should do. Enjoy your cooking journey!