This post contains affiliate links. As an Amazon Associate I earn from qualifying purchases.
Learning to make baked barramundi isn’t just about this one beautiful dinner—it’s about mastering a technique that unlocks dozens of other recipes. Once you understand how to properly bake delicate white fish with aromatics and gentle heat, you’ll never feel intimidated by seafood again. I’m talking about those restaurant-quality fillets that flake perfectly, stay moist, and taste like you spent hours in the kitchen when really you spent twenty minutes. This is the foundational technique my mother taught me during those precious afternoons in her kitchen, and it’s transformed how I approach cooking fish for family gatherings.
What makes this technique so powerful is that it teaches you temperature control, moisture management, and flavor layering—three skills that ripple across everything from perfectly cooked proteins to roasted vegetables. Whether you’re cooking for two or feeding a crowd, this method scales beautifully and keeps the pressure off.
Master the Low-Heat Baking Technique That Professional Chefs Depend On
I’ll never forget the first time my mother pulled a whole fish from the oven that was somehow perfectly opaque and tender at the same time. I’d been overcooking fish my entire life, turning it dry and stringy without understanding why. She smiled and said, “Kathleen, you’re fighting the fish instead of working with it.” That moment changed everything.
The technique we’re learning here is low-temperature baking with aromatics—a method that uses gentle, even heat combined with a flavorful oil coating to steam the fish from the outside while protecting its delicate proteins. It’s the same technique fancy restaurants use, but we’re adapting it for home kitchens where real life happens and perfection isn’t the goal—delicious, moist fish is.
The Core Technique Explained
At its heart, this is a moist-heat cooking method with an aromatic oil barrier. Here’s the science that matters: fish fillets are delicate because they contain less connective tissue than other proteins. When you expose them to high, dry heat, those proteins contract too quickly and squeeze out moisture, leaving you with something dry and disappointing.
But when you coat the fish with an emulsified oil mixture and bake it at a moderate temperature, something magical happens. The oil creates a protective layer that regulates heat transfer, keeping the interior at just the right temperature to cook through while staying moist. The aromatics—citrus zest, herbs, salt—penetrate the exterior and create layers of flavor without any extra effort.
The gentle heat also means you have a wider window of doneness. With high-heat cooking, your fish can go from perfect to overcooked in 30 seconds. With this method, you’ve got a comfortable margin of safety, which is why it’s so forgiving for home cooks.
What This Technique Unlocks
Once you master low-temperature aromatic baking, you’ll be able to confidently cook:
- Whole roasted branzino or sea bass – uses the same principle with slightly longer cooking times
- Herb-crusted salmon fillets – builds on the aromatic coating technique with heartier herbs
- Baked cod with olive tapenade – demonstrates how to add textured toppings without losing moisture
- Pan-seared then oven-finished halibut – introduces the hybrid method of starting stovetop and finishing in the oven
- Whole roasted chicken breasts with aromatics – the exact same heat management principle applied to poultry
- Baked tilapia with citrus and herbs – the budget-friendly version that teaches technique without premium ingredients
The Ingredients—Chosen to Teach the Technique
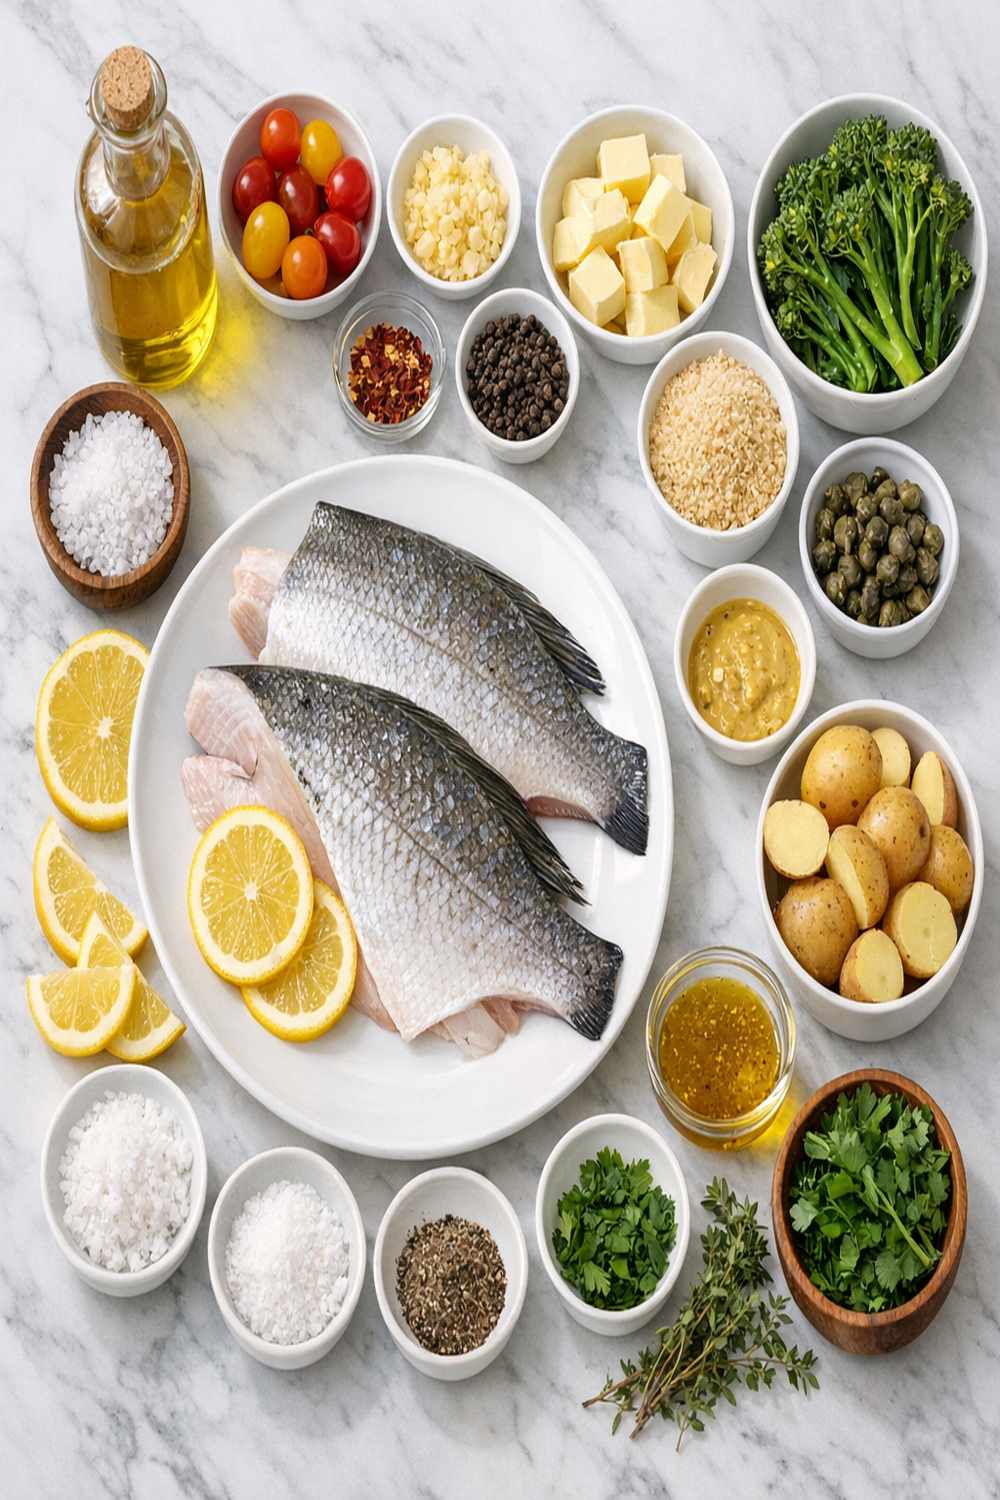
Every ingredient here serves a specific teaching purpose. I’ve chosen them to demonstrate how simple components create restaurant-quality results when technique is right. Notice we’re not using complicated sauces or fancy techniques—just pure ingredient quality and proper execution.
- 1 teaspoon fine sea salt (dissolved into the oil, it seasons from the outside in)
- 3 tablespoons extra-virgin olive oil (this is your heat conductor and flavor carrier—don’t use regular olive oil here)
- ½ teaspoon freshly cracked black pepper (cracked fresh, not pre-ground—better flavor and texture)
- Sea salt flakes for finishing (Maldon salt adds a final textural surprise and burst of clean salt flavor)
- 2 tablespoons fresh lemon juice (added just before serving for brightness that baking softens)
- 4 barramundi fillets, 4 to 5 ounces each (skin-on works beautifully and adds protection during cooking; skinless works too if that’s what you prefer)
- 2 teaspoons dried Italian parsley (fresh would overpower; dried herbs are more subtle and forgiving in baking)
- 1 lemon, zest only, finely grated (the bright, volatile oils are what make this sing without overwhelming delicate fish)
The Masterclass: How to Make Baked Barramundi Recipe
What I love about teaching this recipe is how it removes all the guesswork from cooking fish. Follow these steps carefully, and you’ll understand not just what to do, but why each step matters. This is how technique becomes second nature.
Step 1: Prepare Your Oven and Baking Surface
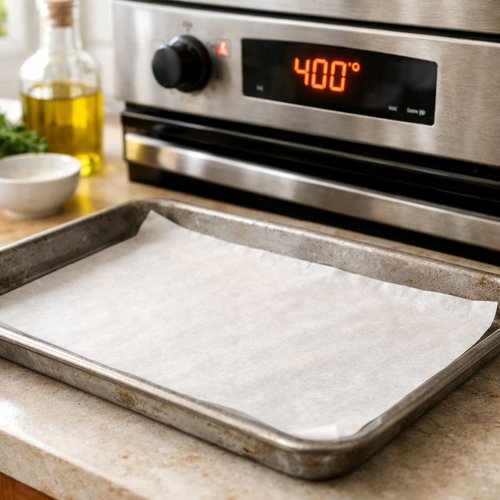
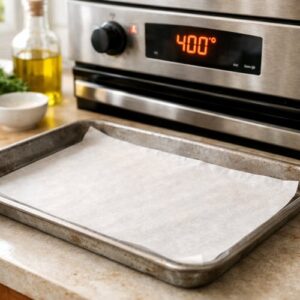
Start by preheating your oven to 400°F (about 200°C). This moderate temperature is the sweet spot—hot enough to cook through in reasonable time, but not so hot that it shocks the delicate flesh. While your oven preheats, line a baking sheet with parchment paper. This matters because it prevents sticking, distributes heat evenly, and makes cleanup effortless. Don’t skip this step thinking you’ll just use butter or oil on a bare pan. Parchment is your secret weapon for perfectly released fish.
Step 2: Prepare the Fish Fillets
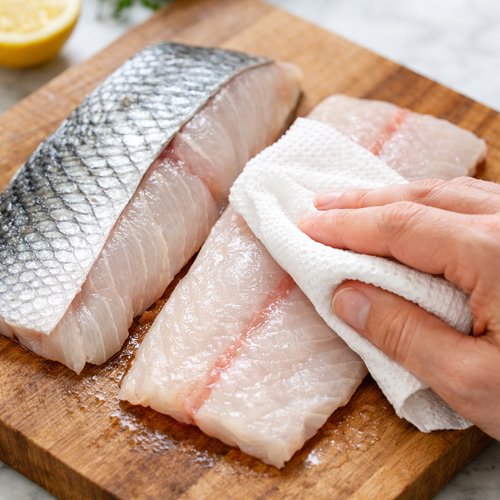
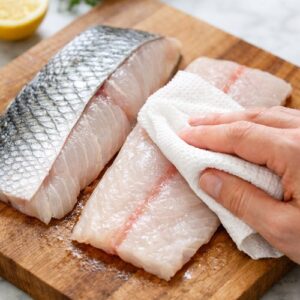
Pat your barramundi fillets dry with paper towels. This is non-negotiable for achieving that beautiful, delicate crust. Any moisture on the surface will turn to steam, which prevents browning and can make the fish texture steamed rather than baked. Dry the fillets thoroughly, top and bottom, and arrange them on your prepared baking sheet skin-side down (if using skin-on). Leave at least an inch of space between each fillet so heat can circulate properly.
Let the fillets sit at room temperature for about 5 minutes while you prepare the aromatic oil. Room temperature fish cooks more evenly than cold fish straight from the refrigerator—this is a professional technique that makes a real difference in even cooking.
Step 3: Create Your Aromatic Oil Coating
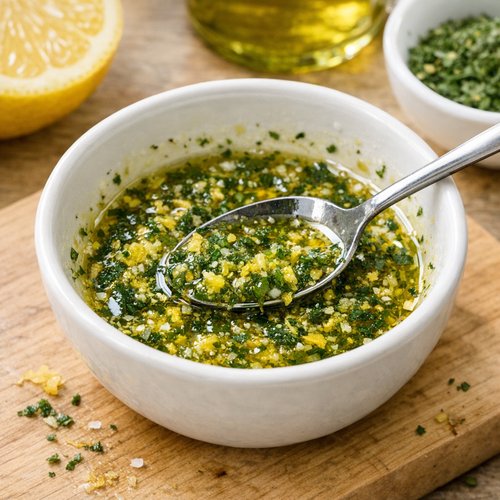
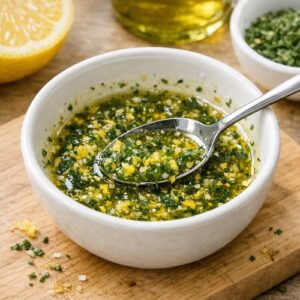
In a small bowl, combine your extra-virgin olive oil, finely grated lemon zest, dried parsley, and fine sea salt. Stir gently but thoroughly, incorporating the zest and herbs into the oil. What you’re doing here is creating a protective, flavorful emulsion that will regulate heat transfer and infuse the fish. Don’t skip this mixing step—it ensures the aromatics are evenly distributed.
The oil will look almost creamy from the zest particles suspended in it. This is perfect. If you’re more visual, you’ll notice the oil has turned a very pale yellow-green from the lemon zest—that’s your indicator that the citrus oils are activating.
Step 4: Coat Each Fillet with the Aromatic Oil
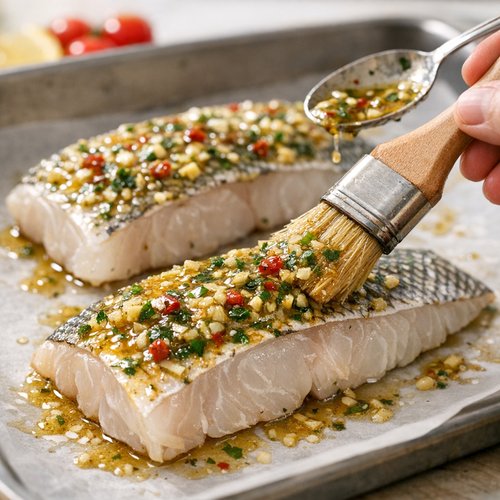
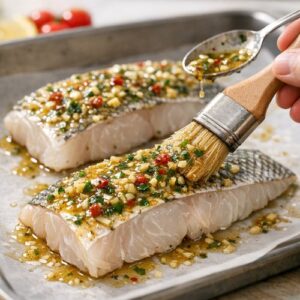
Using a pastry brush or the back of a spoon, gently coat the top of each barramundi fillet with about half of your aromatic oil mixture. Be generous but not wasteful—you want enough that it pools slightly on the fish but not so much that it drips off the sides. The oil should coat the top surface completely, filling any small crevices.
Grind a small pinch of fresh black pepper over each fillet. Here’s a pro tip: add the pepper after the oil, not before, because the oil helps it adhere and prevents it from burning during cooking. If you season directly on dry fish, the pepper will sometimes burn before the fish is done.
Step 5: Bake with Perfect Timing
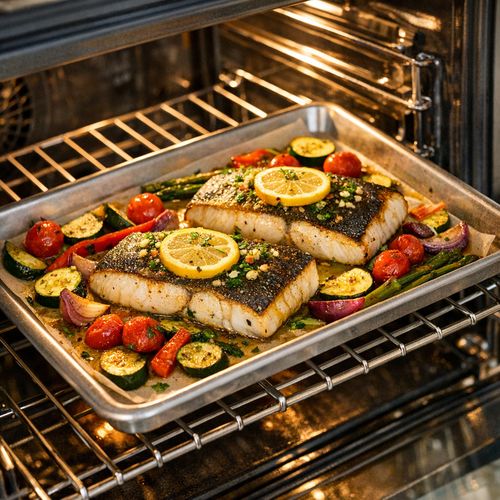
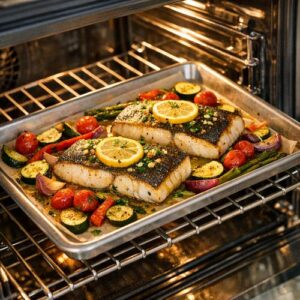
Place your baking sheet in the preheated 400°F oven on the middle rack. The middle rack ensures even heat exposure from above and below. Set a timer for 10 to 12 minutes, depending on the thickness of your fillets. A 4-ounce fillet that’s about ½-inch thick will need closer to 10 minutes; a thicker 5-ounce fillet might need the full 12.
Here’s where patience becomes technique: do not open the oven door during cooking. Every time you open it, you release heat and extend cooking time unpredictably. The oven should maintain steady temperature, and opening the door disrupts that. I know it’s tempting to peek, but resist it.
Step 6: Recognize Doneness Without Guessing
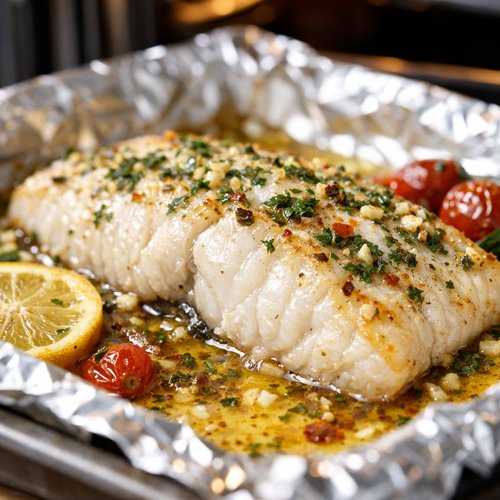
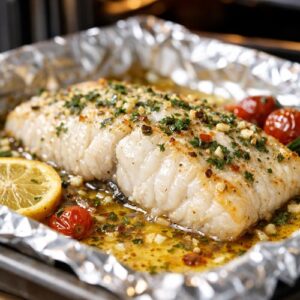
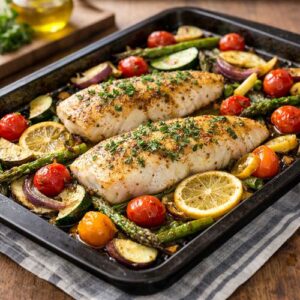
When the timer goes off, carefully open the oven (stand back from the heat for a second). The fish should be opaque throughout with just a slight shimmer of moisture on top. If you gently press the thickest part of a fillet with a fork, it should flake easily into tender pieces rather than resist. The flesh should be white or pale, not translucent.
If it’s not quite there—still slightly translucent in the thickest part—give it 2 more minutes. Fish cooks quickly once it hits the critical temperature, so these final minutes matter. But overcooking by more than 3 minutes is when things start going dry.
Step 7: The Finishing Touch
Remove the baking sheet from the oven and let it rest for exactly 2 minutes. This brief rest allows the residual heat to finish cooking the centers while the exteriors cool just slightly, locking in moisture. Don’t skip this—it’s the difference between good and restaurant-quality.
Transfer each fillet to a plate using a thin fish spatula or a flexible pancake turner. Drizzle with fresh lemon juice and finish with a small pinch of Maldon sea salt. That finishing salt creates a little textural contrast and a burst of clean salt flavor that makes everything taste brighter.
How to Know You’ve Mastered the Technique
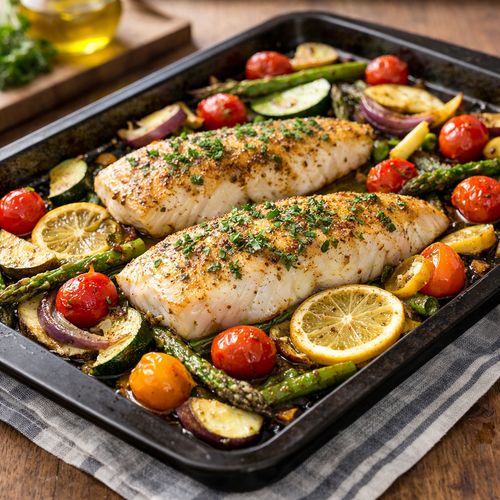
You’ll know you’ve truly mastered this technique when you can consistently recognize doneness by sight and texture rather than relying on a timer. Here’s what perfection looks like:
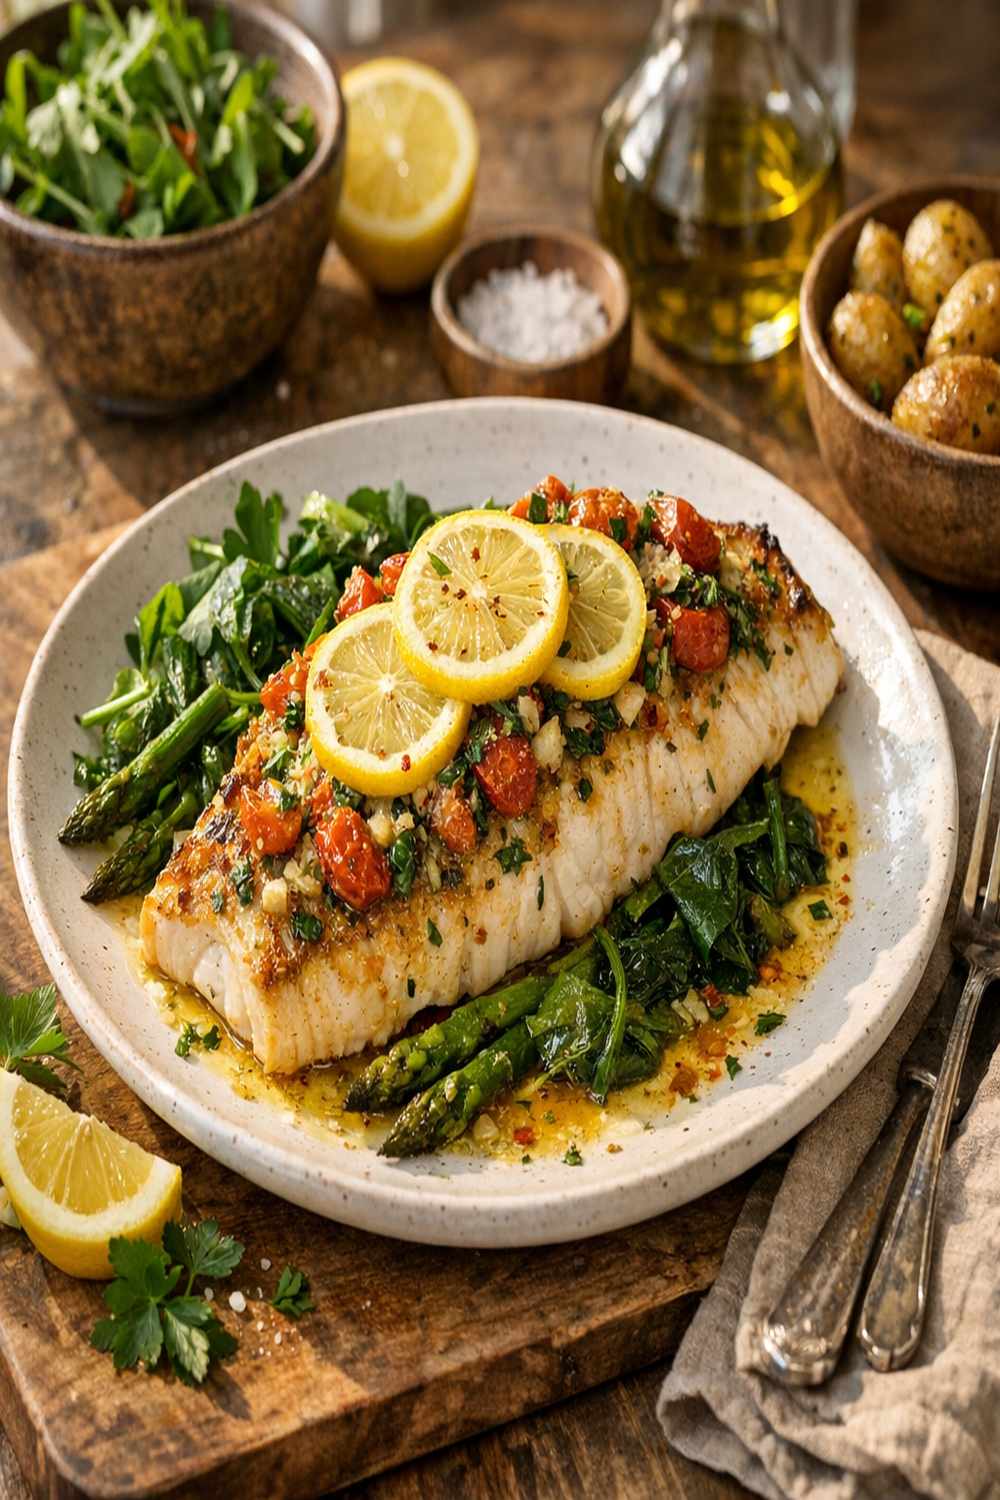
- The exterior has a subtle, barely-there golden sheen – not browned like a seared steak, but not pale either. The oil creates a silky, professional finish that catches the light
- The flesh flakes into tender, moist pieces that hold together beautifully – when you press with a fork, the fish separates easily into the natural grain without becoming mushy or fibrous
- There’s a slight liquidy pool around the fish from released juices – this is the sign of properly cooked, moist fish. Dry fish won’t have this liquid
- The kitchen smells like bright lemon and herbs, not fishy – a fresh, appealing aroma rather than that strong ocean smell means the aromatics have done their job masking any strong fish odors
- The center stays moist even after resting – when you cut into it, there’s visible moisture in the flesh, not a dry, chalky interior
Common Technique Mistakes and How to Fix Them
- Cooking from cold fish straight from the refrigerator – the outside overcooks before the inside reaches proper temperature. Solution: always let protein sit at room temperature for 5-10 minutes before cooking. This ensures even heat penetration
- Using too-high heat (450°F or above) – this causes the exterior to cook too fast while the interior stays cold, then you overcook trying to get the inside done. Solution: stick to 400°F as your standard. It feels slow but it’s actually faster because everything cooks evenly
- Skipping the parchment paper and using oiled pans instead – oil can smoke at moderate temperatures and the fish can stick, tearing when you try to remove it. Solution: parchment every time. It’s not a luxury, it’s essential technique
- Not drying the fillets before cooking – excess surface moisture creates steam that prevents proper heat transfer and creates a mushy texture rather than tender fish. Solution: pat dry thoroughly with paper towels, then let sit 2-3 minutes before oiling
- Overcrowding the pan – fillets touching each other don’t cook evenly because heat can’t circulate properly around all sides. Solution: give each fillet its own space. If your pan is small, use two pans rather than cramming them together
- Cooking fish that’s too thin (under ½-inch) – thin fillets overcook before the aromatics can penetrate. Solution: look for fillets at least ½-inch thick, ideally ¾-inch. These cook perfectly in the 10-12 minute window
Practice Variations to Build Your Skill
Mastery comes from repetition with increasing complexity. Here are three progressively challenging versions of this recipe that build your understanding of how technique adapts:
Version 1: The Foundation (Your First Attempt) – Make this exact recipe with barramundi fillets, nothing added, nothing changed. Your only job is learning temperature control and recognizing doneness. Do this at least twice before moving to variations. This builds confidence and teaches you the baseline.
Version 2: Building Flavor Layers (Second Time) – Keep the same cooking method but experiment with the aromatics. Try: fresh herbs instead of dried (use triple the amount and add them after cooking), orange zest instead of lemon (slightly different flavor profile teaches you how citrus choice matters), or a touch of garlic powder mixed into the oil. The cooking technique stays exactly the same; only the flavoring changes. This teaches you how aromatics work independently from heat management.
Version 3: Different Fish, Challenging Your Adaptability (Third Challenge) – Once you’ve mastered barramundi, try the exact same technique with a thicker fish like halibut or a thinner fish like sole. You’ll have to adjust timing slightly (halibut might need 14-16 minutes, sole might need 8-9), but the method is identical. This teaches you how to apply technique flexibly to different ingredients.
Expert’s Nutritional Tip
As a registered dietitian, I want you to know that barramundi is one of the most nutrient-dense fish you can cook. It’s an excellent source of omega-3 fatty acids, which support heart and brain health, plus it’s high in complete protein and vitamin D—nutrients most people don’t get enough of. The beautiful thing about this baking technique is that it preserves these heat-sensitive nutrients better than high-heat cooking methods. The moderate temperature and short cooking time mean you’re getting maximum nutritional benefit from your fish.
Make-Ahead Guide: Prepare This Like a Pro
This recipe is perfect for meal prep because you can prepare components ahead without sacrificing quality:
Up to 1 day ahead: Mix your aromatic oil mixture (the lemon zest, parsley, salt, and olive oil) and store it in an airtight container in your refrigerator. The flavors actually get more integrated overnight. Let it come to room temperature before using.
Up to 8 hours ahead: Pat your fillets dry and arrange them on the parchment-lined baking sheet. Cover loosely with plastic wrap and refrigerate. Remove from the fridge 10 minutes before cooking to bring them toward room temperature.
Do not prepare ahead: Don’t apply the aromatic oil coating more than 15 minutes before baking. Once the oil hits the fish, you want to get it into the oven promptly so the aromatics don’t oxidize.
Make-ahead meal strategy: Prepare the aromatic oil on Sunday for use throughout the week. Barramundi keeps in the freezer for up to 3 months, so you can portion fillets into individual vacuum-sealed bags and bake straight from frozen (adding just 3-4 minutes to cooking time). This lets you make restaurant-quality dinner on a random Wednesday without any real effort.
Can I Store Baked Barramundi?
Yes, and it keeps beautifully when stored properly. Refrigerated in an airtight container, baked barramundi stays fresh for up to 3 days. The fish won’t dry out if you store it with a paper towel that absorbs excess moisture.
To reheat: place in a 300°F oven for 8-10 minutes until warmed through. Don’t use the microwave, which turns fish mushy. The gentle oven heat rehydrates the fish beautifully without overcooking it.
Freezing is not ideal because fish changes texture when frozen after cooking, becoming a bit mealy when thawed. However, you can freeze leftover baked fish for up to 1 month if needed—just know the texture won’t be as delicate as the first time.
The better freeze strategy: freeze raw fillets with the aromatic oil coating already applied (before baking). Wrap tightly in plastic wrap, then foil. Bake straight from frozen, adding just 4-5 minutes to cooking time.
Nutrition Information
Per serving (one 4-ounce fillet with aromatic oil coating), based on USDA FoodData Central:
Calories: 186 | Protein: 24g | Fat: 10g | Omega-3 fatty acids: 0.8g | Vitamin D: 543 IU | Selenium: 36% daily value | B12: 18% daily value | Carbohydrates: 0g
This is a beautifully balanced protein that delivers serious nutritional density without empty calories. That omega-3 content is particularly valuable—most Americans don’t eat enough oily fish, and this single serving provides a meaningful amount of EPA and DHA, which support cardiovascular and cognitive health. The vitamin D is also significant; many people are deficient in this critical nutrient, and fish is one of the few whole foods that naturally contains it.
What to Serve With Baked Barramundi
This fish technique shines when paired with sides that complement rather than compete with its delicate flavor. Here are my go-to pairings that let the fish be the star:
- Roasted asparagus with garlic – the earthiness pairs beautifully and the sturdy vegetable stands up to the citrus without getting overwhelmed
- Lemon-herb rice pilaf – complements the aromatics already on the fish rather than adding competing flavors
- Sautéed spinach with olive oil – adds green without weight, letting the fish remain the centerpiece
- Cauliflower rice with herbs – lighter than grain sides, perfect if you’re keeping carbs minimal
- Creamy sides using almond flour bases – if you want something richer, an almond-flour-thickened sauce adds luxury without dairy heaviness
- Simple green salad with lemon vinaigrette – brightens the plate and adds textural contrast
- Almond flour wraps for building fish tacos – take the technique and create a fun, casual meal by breaking up the fillet and building handheld meals
Seasonal Variations
Spring: Replace dried parsley with fresh tarragon or chervil for a more delicate, floral note. Use lime zest instead of lemon for brightness that feels seasonal.
Summer: Add fresh herbs directly to the oil—basil, cilantro, or dill—chopped finely. Include a tiny pinch of red pepper flakes for gentle heat that feels fresh in warm weather.
Fall: Swap lemon zest for orange zest and add a whisper of smoked paprika to the oil. The warmer citrus note feels appropriate, and the smoke adds depth as weather cools.
Winter: Stick closer to the classic preparation but add fresh rosemary sprigs directly to the baking sheet under the fish. The evergreen herb feels cozy, and the fish rests on an aromatic bed rather than parchment.

Baked Barramundi Recipe
Ingredients
Method
- Start by preheating your oven to 400°F (about 200°C). This moderate temperature is the sweet spot—hot enough to cook through in reasonable time, but not so hot that it shocks the delicate flesh. While your oven preheats, line a baking sheet with parchment paper. This matters because it prevents sticking, distributes heat evenly, and makes cleanup effortless. Don't skip this step thinking you'll just use butter or oil on a bare pan. Parchment is your secret weapon for perfectly released fish.
- Pat your barramundi fillets dry with paper towels. This is non-negotiable for achieving that beautiful, delicate crust. Any moisture on the surface will turn to steam, which prevents browning and can make the fish texture steamed rather than baked. Dry the fillets thoroughly, top and bottom, and arrange them on your prepared baking sheet skin-side down (if using skin-on). Leave at least an inch of space between each fillet so heat can circulate properly. Let the fillets sit at room temperature for about 5 minutes while you prepare the aromatic oil. Room temperature fish cooks more evenly than cold fish straight from the refrigerator—this is a professional technique that makes a real difference in even cooking.
- In a small bowl, combine your extra-virgin olive oil, finely grated lemon zest, dried parsley, and fine sea salt. Stir gently but thoroughly, incorporating the zest and herbs into the oil. What you're doing here is creating a protective, flavorful emulsion that will regulate heat transfer and infuse the fish. Don't skip this mixing step—it ensures the aromatics are evenly distributed. The oil will look almost creamy from the zest particles suspended in it. This is perfect. If you're more visual, you'll notice the oil has turned a very pale yellow-green from the lemon zest—that's your indicator that the citrus oils are activating.
- Using a pastry brush or the back of a spoon, gently coat the top of each barramundi fillet with about half of your aromatic oil mixture. Be generous but not wasteful—you want enough that it pools slightly on the fish but not so much that it drips off the sides. The oil should coat the top surface completely, filling any small crevices. Grind a small pinch of fresh black pepper over each fillet. Here's a pro tip: add the pepper after the oil, not before, because the oil helps it adhere and prevents it from burning during cooking. If you season directly on dry fish, the pepper will sometimes burn before the fish is done.
- Place your baking sheet in the preheated 400°F oven on the middle rack. The middle rack ensures even heat exposure from above and below. Set a timer for 10 to 12 minutes, depending on the thickness of your fillets. A 4-ounce fillet that's about ½-inch thick will need closer to 10 minutes; a thicker 5-ounce fillet might need the full 12. Here's where patience becomes technique: do not open the oven door during cooking. Every time you open it, you release heat and extend cooking time unpredictably. The oven should maintain steady temperature, and opening the door disrupts that. I know it's tempting to peek, but resist it.
- When the timer goes off, carefully open the oven (stand back from the heat for a second). The fish should be opaque throughout with just a slight shimmer of moisture on top. If you gently press the thickest part of a fillet with a fork, it should flake easily into tender pieces rather than resist. The flesh should be white or pale, not translucent. If it's not quite there—still slightly translucent in the thickest part—give it 2 more minutes. Fish cooks quickly once it hits the critical temperature, so these final minutes matter. But overcooking by more than 3 minutes is when things start going dry.
- Remove the baking sheet from the oven and let it rest for exactly 2 minutes. This brief rest allows the residual heat to finish cooking the centers while the exteriors cool just slightly, locking in moisture. Don't skip this—it's the difference between good and restaurant-quality. Transfer each fillet to a plate using a thin fish spatula or a flexible pancake turner. Drizzle with fresh lemon juice and finish with a small pinch of Maldon sea salt. That finishing salt creates a little textural contrast and a burst of clean salt flavor that makes everything taste brighter.
FAQs
Can I use frozen barramundi, or does it have to be fresh?
Absolutely frozen works. In fact, frozen fish is often fresher than “fresh” because it’s frozen at peak quality immediately after being caught. Thaw it completely in the refrigerator overnight before cooking—never at room temperature, which allows bacteria growth. Pat it extra dry because thawed fish releases more liquid. The cooking technique is identical; you might need 2-3 extra minutes for the heat to fully penetrate if it’s still slightly cold in the center.
What if I don’t have a fish spatula—how do I remove it without breaking it?
Use any thin, flexible turner—a pancake turner works beautifully. The key is getting under the entire fillet at once rather than trying to flip it in the pan like an egg. Slide from one narrow end under the fillet, supporting it as you lift. If it sticks slightly (happens even with parchment sometimes), a tiny nudge with the turner loosens it. The parchment paper is your insurance policy here—it prevents sticking way more than traditional oiling does.
I’m nervous about overcooking—can I use a meat thermometer?
Yes, and it’s actually brilliant for building confidence. Fish is done at 145°F internal temperature, measured in the thickest part of the fillet. Insert the thermometer horizontally into the center from the side, not from above. This technique works perfectly and removes all guesswork. Once you’ve used a thermometer a few times and learned what doneness looks and feels like, you’ll graduate to visual recognition. But there’s absolutely no shame in using a thermometer every single time—even professional chefs do.
Why does my fish sometimes come out dry even when I follow the recipe?
Three likely culprits: (1) Your oven temperature is actually higher than you think—ovens drift and lose calibration. Use an oven thermometer to verify. (2) Your fillets are thinner than you think, so they’re cooking faster than expected—look for thicker fillets next time. (3) You’re not letting the fish rest before serving. Those 2 minutes after baking are essential for moisture to redistribute through the flesh. Every single dry fillet I’ve made was because I skipped the rest and plated immediately.
Can I make this in a cast iron skillet instead of a baking sheet?
You can, but I don’t recommend it for this gentle technique. Cast iron retains heat so aggressively that it tends to overcook the bottom before the top is done. If you must use cast iron, preheat it less aggressively (avoid the preheating step, and just heat it in the oven while it preheats), and check for doneness 2-3 minutes earlier than you would on a sheet pan. Honestly, the baking sheet technique is superior for this particular preparation.
This recipe mentions barramundi—what if I can’t find it or it’s expensive?
The exact same technique works beautifully with cod, halibut, sole, tilapia, or any white fish fillets. The cooking time might vary by 1-2 minutes depending on thickness, but the method is universal. Barramundi is special because it has delicate, sweet flesh and stays moist easily, which is why it’s my choice for teaching this technique. But if your fish counter has something else that looks beautiful and fresh, use that with confidence. The technique you’ve learned transcends the specific fish.
More Recipes Using This Technique
- Air Fryer Steak Recipe – while this uses air frying instead of traditional baking, the low-temperature, protective coating technique is identical and teaches the same principles of even cooking
- Air Fry Rib Recipe – demonstrates how the aromatic oil coating and moderate heat principle applies to larger proteins that need longer cooking
Conclusion: Your New Cooking Superpower
You’ve just learned one of the most valuable techniques in the kitchen—one that professional chefs depend on, one that turns intimidating fish into effortless elegance, and one that you’ll use hundreds of times across dozens of recipes.
What I love about teaching this technique is watching people realize that restaurant-quality cooking isn’t about complicated methods or fancy equipment. It’s about understanding why each step matters, respecting your ingredients, and giving them the right conditions to shine. That’s it. That’s the whole secret.
My mother knew this. Every gathering she hosted felt effortless because she’d mastered techniques that work with you instead of against you. Now you have that same knowledge. When your family tastes this perfectly baked barramundi, they won’t just taste delicious fish—they’ll taste the confidence of someone who knows exactly what they’re doing in the kitchen.
Start with this recipe exactly as written. Make it twice. Then take what you’ve learned and apply it fearlessly to other fish, other vegetables, other proteins. That’s how technique becomes intuition. That’s how you become the cook who makes it all look easy.
Enjoy your cooking journey!