This post contains affiliate links. As an Amazon Associate I earn from qualifying purchases.
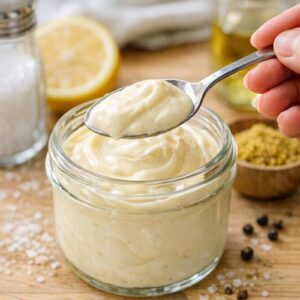
Listen, I’ve been there—standing in the grocery store aisle, reading ingredient labels on mayo bottles and wondering why there are so many things I can’t pronounce. That’s when I decided to make my own, and honey, it changed everything. Making this creamy, tangy spread takes just a few minutes on a Sunday, and you’ll have a week’s worth of something infinitely better than anything you’ll find in a jar. Whether you’re spreading it on homemade sandwiches or using it as a base for chicken salad, this recipe becomes your secret weapon for eating well all week long.
Homemade Creamy Mayo Recipe: Meal Prep Like a Pro
I remember watching my grandmother make mayo by hand with a whisk, her arm moving in steady circles while she slowly drizzled oil into a bowl. I thought she was crazy—why not just buy it? But the first time I tasted that silky, fresh mayo compared to the commercial stuff, I understood. Years later, as a registered dietitian, I learned exactly why her instincts were right. Store-bought mayo often contains seed oils, added sugars, and preservatives that my body didn’t need. When I finally invested in an immersion blender and committed to making my own, I realized this wasn’t just about taste—it was about taking control of what I was putting into my family’s bodies.
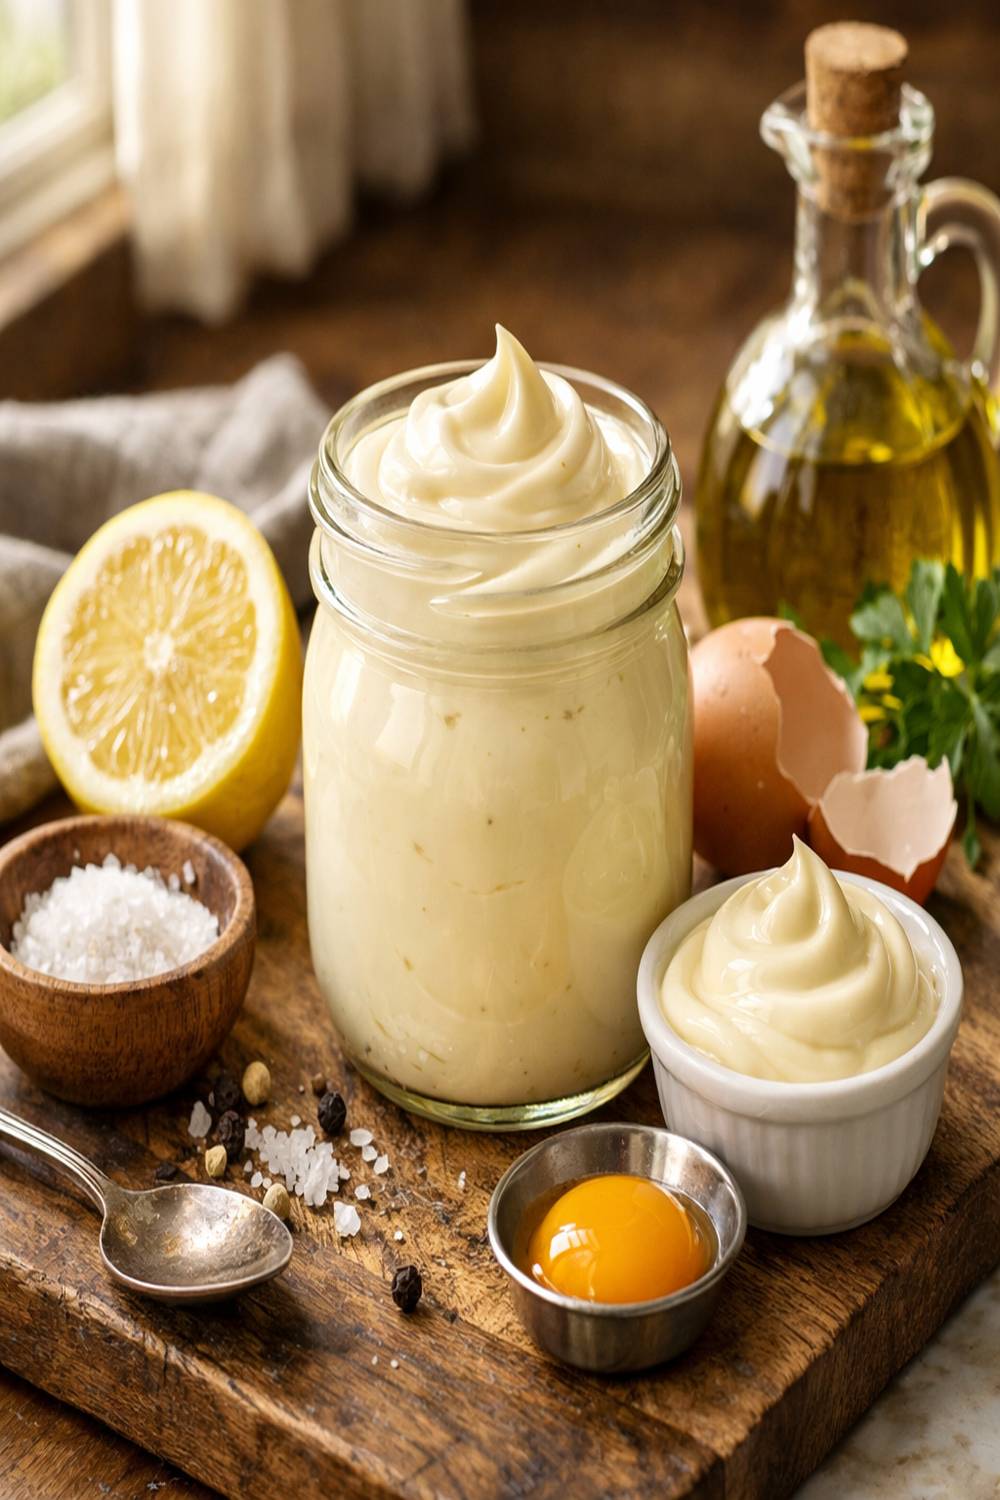
This recipe became my game-changer for meal prep. Once I figured out the technique, I started making double batches every Sunday. It takes maybe ninety seconds total, stores beautifully in glass jars, and transforms boring chicken breasts, veggie platters, and sandwiches into something my family actually looked forward to eating.
Why This Recipe Is Perfect for Meal Prep
- It’s ridiculously fast to make in bulk. I can whip up enough mayo for a full week in under two minutes—literally. That’s time you’re saving across every sandwich, salad, and dip you make for the next seven days.
- It holds beautifully for two full weeks. Unlike some homemade spreads that separate or get watery, this emulsion stays creamy, stable, and delicious from day one through day fourteen when stored properly in the refrigerator.
- One batch transforms into five completely different meals. Use it on Monday’s turkey sandwich, Wednesday’s egg salad, Friday’s fish tacos—the versatility means you’re not eating the same thing twice and you’re maximizing your prep time.
Your Weekly Meal Plan With This Recipe
Here’s how I use one batch of homemade mayo across my entire week. The beauty is that it never feels repetitive because I’m pairing it with totally different proteins and vegetables. This is meal prep done smart—where one recipe supports multiple meals without any boredom.
- Monday Lunch: Classic Deli Sandwich – Spread generously on whole grain bread with sliced turkey, crisp lettuce, and tomato. The fresh mayo makes even simple ingredients taste restaurant-quality.
- Wednesday Dinner: Creamy Chicken Salad – Mix with shredded rotisserie chicken, diced celery, and fresh dill. Serve over greens or in lettuce cups for a lighter option that feels indulgent.
- Thursday Breakfast: Egg Salad Toast – Combine with hard-boiled eggs, mustard powder, and paprika. This transforms simple eggs into something special that keeps you satisfied through the morning.
- Friday Dinner: Fish Tacos with Lime Crema – Whisk with a squeeze of fresh lime juice and a touch of cilantro for a bright, creamy taco sauce that elevates whatever protein you’re using.
- Saturday Snack: Veggie Dip – Thin with a splash of almond milk and mix with ranch seasoning for a veggie dip that’s actually good for you.
The Ingredients – Scaled for a Full Week
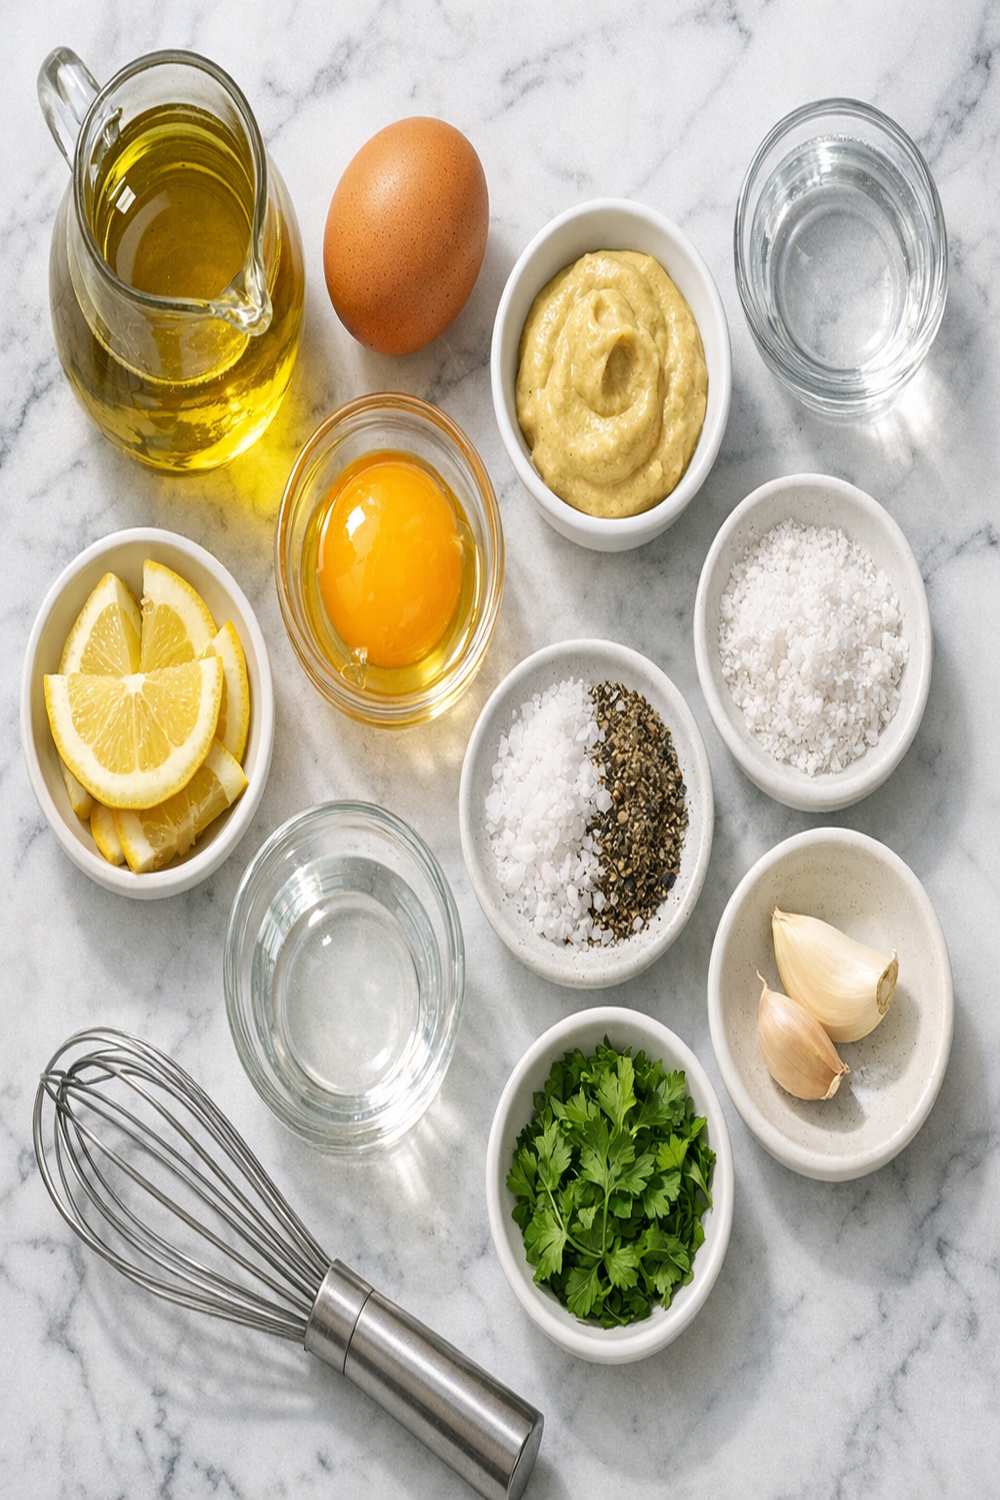
I’m giving you amounts that make enough for a full week of generous use. This recipe scales beautifully—you can double or triple it without any fuss. I keep all these ingredients on hand because they’re pantry staples I use constantly in my cooking.
- 1 large organic egg (choose the freshest eggs you can find—they emulsify better and taste richer)
- 1 teaspoon fresh lemon juice (brightens the flavor and helps with emulsification—bottled works but fresh is superior)
- ⅛ teaspoon white pepper (optional, but adds sophistication without heat)
- 1 cup avocado oil (neutral flavor and heart-healthy monounsaturated fats that won’t overpower your recipe)
- ¼ teaspoon fine sea salt (or adjust to your taste preference)
- ½ teaspoon Dijon mustard (adds subtle tang and helps stabilize the emulsion)
Yields: About 1¼ cups of creamy mayo, approximately 10-12 servings for the week
The Meal Prep Process: How to Make Homemade Mayo in Bulk
I’m going to walk you through this like I’m standing in your kitchen with you. The secret to perfect mayo every single time is understanding the science—it’s all about patience and technique, not just dumping ingredients together. This is where that immersion blender becomes your best friend.
Step 1: Gather Your Tools and Ingredients at Room Temperature
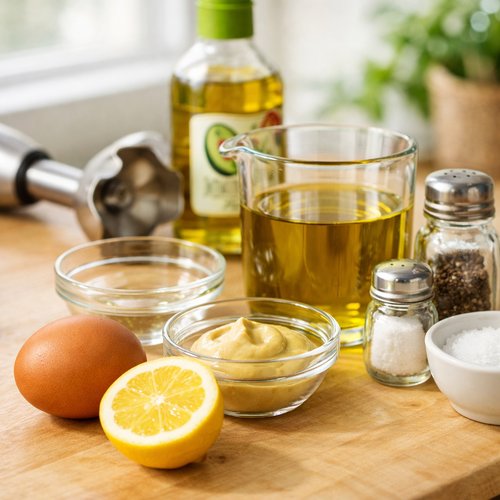
Here’s something most recipes don’t tell you: temperature matters enormously. Pull your egg out of the refrigerator about 20 minutes before you start. Room temperature ingredients emulsify smoothly, while cold ingredients can cause the whole thing to break. I set out my wide-mouth pint mason jar, immersion blender, and all my ingredients on the counter so everything’s ready to go. This five-minute prep step is the difference between silky mayo and a broken mess.
Step 2: Combine Your Base in the Mason Jar
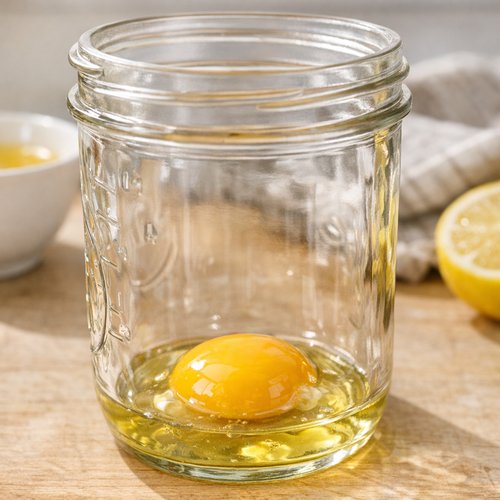
Add your room-temperature egg to the bottom of your wide-mouth pint mason jar. The wide mouth matters—you need room to maneuver your immersion blender. Pour in your lemon juice, Dijon mustard, salt, and white pepper. Don’t add the oil yet. Give everything a gentle stir with a fork to combine. This base is what’s going to emulsify all that oil into a creamy spread.
Step 3: Position Your Immersion Blender and Start Blending
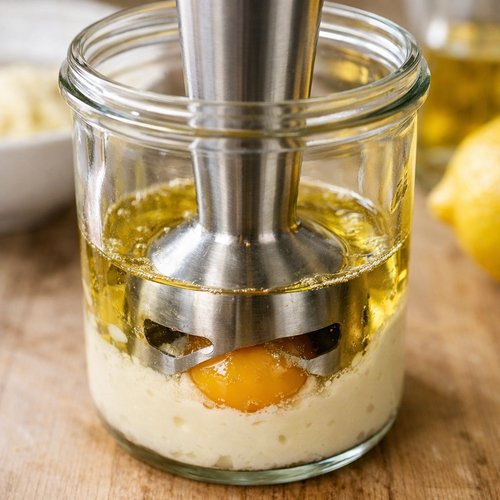
Here’s the critical part: fully submerge your immersion blender all the way to the bottom of the jar, creating a seal that traps the egg yolk right inside the blade. Turn it on high speed. Keep it right there at the bottom for about 20-30 seconds. You’ll actually see the mixture turn white at the bottom—that’s your emulsion forming. This is not the time to be impatient. I set a little timer on my phone so I don’t accidentally move too soon.
Step 4: Begin the Slow Oil Integration
After those initial 20-30 seconds of blending at the bottom, you’re going to slowly, gradually start lifting the immersion blender while keeping it running. As you lift, you’ll begin adding your avocado oil in a thin, steady stream—almost like you’re drizzling it in. If you dump the oil all at once, the emulsion will break and you’ll end up with separated, broken mayo. This is the dance: lift the blender slowly, drizzle the oil slowly, keep everything moving. It should take about 45-60 seconds to add all the oil.
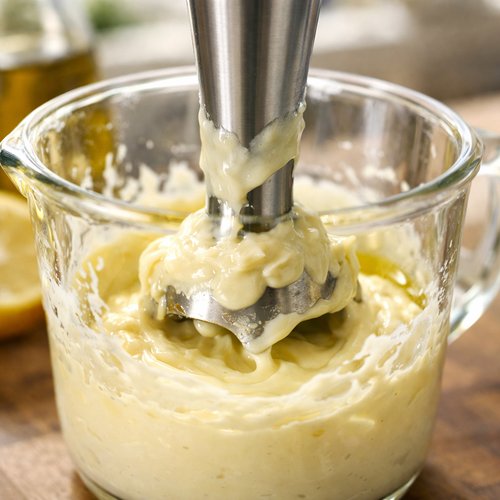
Step 5: Continue Blending Until You Reach Perfect Consistency
Once all the oil is incorporated, keep that immersion blender going for another 15-20 seconds. Your mayo should be thick, creamy, and pale. The entire blending process takes about 1½ to 2 minutes total. The mixture will thicken as you blend—that’s the emulsion working beautifully. If you want it slightly thinner, you can add a teaspoon of water at the very end and blend for a few more seconds.
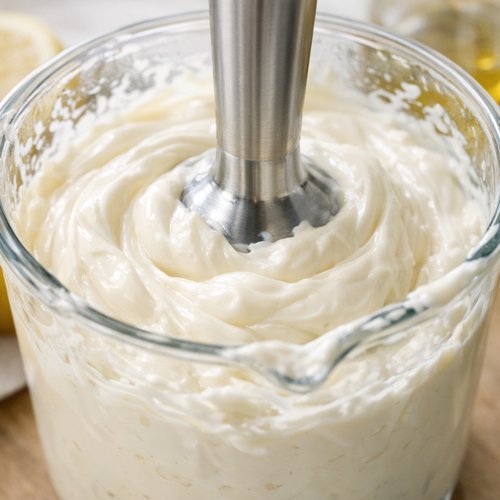
Step 6: Taste and Adjust Your Seasoning
I always taste before storing. Dip a clean spoon into your mayo and really taste it. Does it need more salt? More lemon brightness? A pinch more mustard for tang? This is your moment to adjust. I usually add a tiny pinch more salt—about ⅛ teaspoon—because seasoning matters when you’re eating this every day all week. Remember that flavors mellow slightly over time in the refrigerator, so season it just slightly bolder than you think you need.
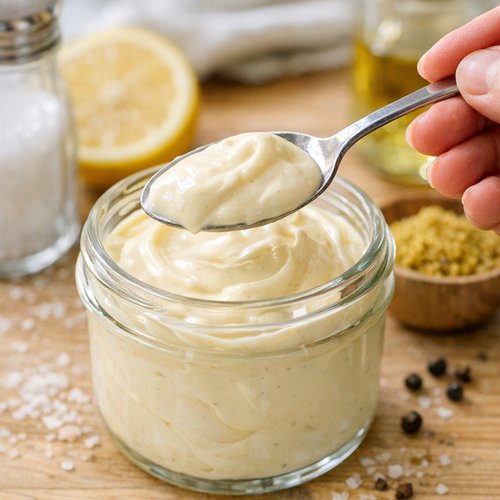
Storage and Organization System
- Wide-mouth pint mason jars are your MVP. Glass doesn’t absorb flavors like plastic, and the wide mouth makes it easy to scoop out mayo without frustration. I use the glass jars with plastic lids because the plastic won’t react with the acidic lemon juice over time.
- Divide into two smaller jars instead of one large container. This strategy keeps your mayo fresher longer. Once you open a container and start using it, you’re introducing bacteria. By splitting your batch into two jars, you’re only opening one at a time, leaving the second untouched until mid-week.
- Label everything with a waterproof marker. Write the date you made it right on the lid. I write “Homemade Mayo – Made [Date]” so there’s zero question about freshness when I’m grabbing jars in the morning rush.
How to Reheat Without Losing Quality
Here’s the beautiful thing about mayo: you don’t reheat it. This is a cold condiment that actually improves with time as flavors meld. If you’re using it on warm sandwiches or in hot dishes, you simply spread it cold on warm bread, or stir it into warm foods at the very end. The heat from the food gently warms the mayo without breaking the emulsion. For egg salad that you’ve made earlier in the week, you can serve it straight from the fridge or bring it to room temperature by letting it sit on the counter for 15 minutes before eating—this makes the flavors pop even more.
Can I Freeze Homemade Mayo?
I don’t recommend it, and here’s why: mayonnaise is an emulsion, meaning it’s oil and water held together in perfect harmony. Freezing breaks that bond. The mixture will separate when you thaw it, and while you might be able to re-emulsify it with an immersion blender, honestly? It’s not worth the effort. Instead, stick to refrigerator storage for up to 14 days, or make smaller batches more frequently. Since this recipe takes literally 90 seconds to make, I honestly prefer making it twice weekly—once on Sunday and once on Wednesday—rather than dealing with frozen mayo. If you absolutely must freeze it, use airtight containers and expect to re-blend after thawing, understanding the texture might not be identical.
Nutrition Information
Per tablespoon serving: approximately 90 calories, 10g fat (mostly heart-healthy monounsaturated fat from avocado oil), less than 1g carbohydrates, and minimal protein. This recipe is genuinely perfect for low-carb and keto lifestyles because you’re using avocado oil instead of seed oils. According to USDA nutrition data, avocado oil contains beneficial plant compounds and higher smoke points, making it both nutritionally superior and more stable for this application. When you’re eating mayo multiple times daily across the week, choosing quality ingredients matters. You’re essentially getting pure, clean fat without fillers or added sugars. One batch provides consistent nutrition across all your meals—no hidden ingredients, no mystery additives. As a registered dietitian, I appreciate knowing exactly what’s going into my body, and this recipe delivers that transparency.
What to Pair With Homemade Mayo Throughout the Week
The magic of great mayo is that it plays well with everything. Pair it with different proteins and vegetables each day so you’re getting varied nutrition and flavors throughout the week, preventing that meal prep monotony that makes people abandon their healthy eating plans.
- Monday with turkey and fresh greens – The lightness of turkey and crispness of lettuce lets your homemade mayo shine as the star, no heavy flavors competing.
- Tuesday with hard-boiled eggs and paprika – The earthiness of eggs and warmth of paprika creates comfort food nostalgia while your mayo adds creamy richness.
- Wednesday with grilled chicken and fresh herbs – Mix your mayo with chopped dill, tarragon, or basil to create entirely different flavor profiles from the same batch.
- Thursday with tuna and capers – The briny capers complement mayo beautifully, and you can drizzle this over creamy coleslaw for a complete meal.
- Friday with fish and lime juice – Transform your mayo into a Mexican-inspired crema by mixing with lime, cilantro, and a pinch of cumin for fish tacos.

Atkins Mayonnaise Recipe
Ingredients
Method
- Here's something most recipes don't tell you: temperature matters enormously. Pull your egg out of the refrigerator about 20 minutes before you start. Room temperature ingredients emulsify smoothly, while cold ingredients can cause the whole thing to break. I set out my wide-mouth pint mason jar, immersion blender, and all my ingredients on the counter so everything's ready to go. This five-minute prep step is the difference between silky mayo and a broken mess.
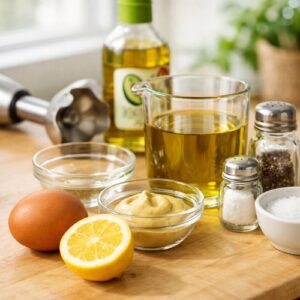
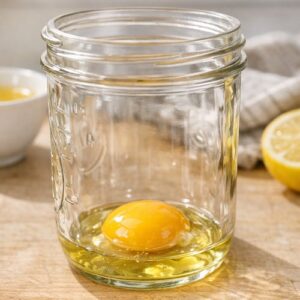
- Add your room-temperature egg to the bottom of your wide-mouth pint mason jar. The wide mouth matters—you need room to maneuver your immersion blender. Pour in your lemon juice, Dijon mustard, salt, and white pepper. Don't add the oil yet. Give everything a gentle stir with a fork to combine. This base is what's going to emulsify all that oil into a creamy spread.
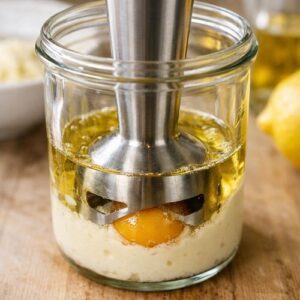
- Here's the critical part: fully submerge your immersion blender all the way to the bottom of the jar, creating a seal that traps the egg yolk right inside the blade. Turn it on high speed. Keep it right there at the bottom for about 20-30 seconds. You'll actually see the mixture turn white at the bottom—that's your emulsion forming. This is not the time to be impatient. I set a little timer on my phone so I don't accidentally move too soon.
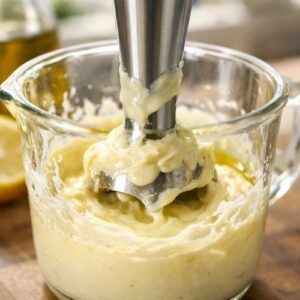
- After those initial 20-30 seconds of blending at the bottom, you're going to slowly, gradually start lifting the immersion blender while keeping it running. As you lift, you'll begin adding your avocado oil in a thin, steady stream—almost like you're drizzling it in. If you dump the oil all at once, the emulsion will break and you'll end up with separated, broken mayo. This is the dance: lift the blender slowly, drizzle the oil slowly, keep everything moving. It should take about 45-60 seconds to add all the oil.
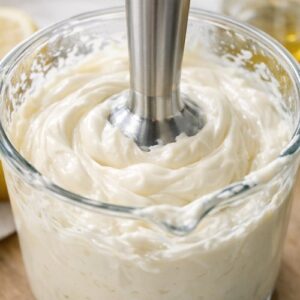
- Once all the oil is incorporated, keep that immersion blender going for another 15-20 seconds. Your mayo should be thick, creamy, and pale. The entire blending process takes about 1½ to 2 minutes total. The mixture will thicken as you blend—that's the emulsion working beautifully. If you want it slightly thinner, you can add a teaspoon of water at the very end and blend for a few more seconds.
- I always taste before storing. Dip a clean spoon into your mayo and really taste it. Does it need more salt? More lemon brightness? A pinch more mustard for tang? This is your moment to adjust. I usually add a tiny pinch more salt—about ⅛ teaspoon—because seasoning matters when you're eating this every day all week. Remember that flavors mellow slightly over time in the refrigerator, so season it just slightly bolder than you think you need.
Notes
FAQs
Why Did My Mayo Break Into a Separated, Oily Mess?
The most common cause is adding oil too quickly. If your mayo breaks, don’t throw it away—you can often fix it. Start with a fresh egg yolk in a clean jar, then slowly blend in your broken mayo like you’re adding oil. Sometimes it takes patience, but it usually comes back together. Going forward, remember: the slower you add the oil, the better your emulsion. I literally count to three between each small pour.
Can I Use a Regular Blender Instead of an Immersion Blender?
Technically yes, but it’s messier and less effective. A regular blender can work, but you’ll need to use more oil initially and the batches get larger, making portion control harder. An immersion blender is genuinely worth the $15-20 investment if you don’t have one. It’s also easier to clean and stores in a drawer. For meal prep efficiency, it’s the right tool.
How Do I Know When My Mayo Is Thick Enough?
It should be spreadable but still hold soft peaks when you pull the blender out. Think of the consistency of store-bought mayo, which is actually your reference point. If it’s too thin, keep blending—the emulsion will continue thickening. If it’s somehow too thick, add a teaspoon of water at a time and blend briefly. Thickness develops as you blend, so resist the urge to stop too early.
What Oil Should I Use If I Don’t Have Avocado Oil?
Avocado oil is my preference because of its neutral flavor and nutritional profile, but you can use light olive oil, grapeseed oil, or even refined coconut oil. Avoid extra virgin olive oil because its strong flavor will dominate, and avoid coconut oil if you want a shelf-stable product (it solidifies below 75°F). For meal prep purposes, avocado oil is genuinely your best option because it stays liquid in the fridge and has a clean taste that doesn’t compete with your food.
Can I Make This Mayo Without an Egg Yolk?
Not really—the egg yolk is what creates the emulsion. You could use aquafaba (chickpea liquid) as a vegan alternative, but you’d need to blend it longer and the results are less stable for week-long storage. I stick with quality eggs because they’re affordable, accessible, and create the most reliable emulsion. If you have egg allergies, that’s a different conversation, but for most people, this traditional approach works beautifully.
Expert’s Nutritional Tip
As a registered dietitian, I want you to understand why avocado oil matters here. Many people default to vegetable or canola oil for mayo, but these seed oils are high in omega-6 polyunsaturated fats while being deficient in omega-3s. Avocado oil is predominantly monounsaturated fat—the same heart-healthy fat found in olives and nuts. When you’re consuming mayo multiple times weekly, that difference compounds. You’re not just making a condiment; you’re making a conscious choice about the type of fat your body is processing repeatedly. This is one place where ingredient quality genuinely impacts your long-term health.
Common Mistakes to Avoid
- Using cold ingredients. Cold eggs and cold oil won’t emulsify properly. Room temperature is non-negotiable. Set your egg out 20 minutes before starting.
- Adding all the oil at once. This is the #1 reason mayo breaks. Slow and steady wins the race. I literally pause between drizzles to let the emulsion set.
- Skipping the initial 20-30 second blending at the bottom. This creates your base emulsion. If you skip it and immediately start lifting the blender, you won’t have a proper foundation. Patience here prevents heartbreak later.
- Not tasting and adjusting seasoning. Mayo tastes different cold versus room temperature, and flavors develop as it sits. Season it just slightly bolder than you think you need, knowing it will mellow in the fridge.
Seasonal Variations
Spring: Add fresh dill, chives, and a touch of white wine vinegar for a bright, herbaceous mayo perfect for spring vegetables and fish.
Summer: Mix in fresh basil, garlic powder, and a squeeze of fresh lemon for a Mediterranean version that pairs beautifully with grilled chicken and heirloom tomatoes.
Fall: Stir in a touch of smoked paprika, chipotle powder, and cumin for a warm, slightly spicy version that works perfectly with turkey and roasted vegetables.
Winter: Add horseradish, a pinch of cayenne, and fresh thyme for a bold version that elevates roast beef and root vegetable meals.
Make-Ahead Guide for Maximum Efficiency
Here’s my system for meal prep success: I make my mayo on Sunday morning while my coffee brews. Total time investment: two minutes. I divide it into two jars immediately, label them, and slide them into the fridge door. Then, when I’m prepping other components—cooking chicken, boiling eggs, chopping vegetables—my mayo is already done. It’s this kind of stacking that makes meal prep feel manageable rather than overwhelming. For maximum freshness, I open the first jar Monday morning and use it through Wednesday lunch. Wednesday evening, I make another small batch while prepping that night’s dinner. This way, I’m never eating mayo that’s more than three days old, which keeps the flavor bright and the texture perfect.
Why Store-Bought Can’t Compare
Store-bought mayo contains soybean oil, added sugars, and preservatives like potassium sorbate that you simply don’t need. I’m not saying those ingredients are toxic—they’re not—but why eat them if you don’t have to? Your homemade version contains exactly four things: egg, oil, lemon, and mustard. That’s it. When you taste that difference, you’ll understand why my grandmother stood there whisking by hand. It’s not nostalgia; it’s the actual superior taste of real food made simply.
More Recipes You’ll Love
- Chick-fil-A Chicken Salad – Use your homemade mayo as the base for a creamier, more delicious version of this beloved classic.
- Sandwiches and Easy Homemade Spreads – Elevate your entire sandwich game with this mayo as your foundation sauce.
- Creamy Skillet Cheeseburger Dip – Mix this mayo into a warm dip for a richness that store-bought versions can’t match.
- Creamy Skinny Coleslaw – Combine your mayo with a touch of vinegar for a slaw that’s both indulgent and light.
Making your own mayo is genuinely the gateway to taking back control of your kitchen. Once you taste the difference and realize how easy this actually is, you’ll never go back to store-bought. You’ll also stop being intimidated by other recipes that seem complicated because you’ll understand that most good food is just about technique and patience. This isn’t about being fancy or spending hours in the kitchen—it’s about spending two minutes on Sunday and eating better all week. That’s the meal prep philosophy I’ve built my whole cooking life around, and it’s the reason I still remember my grandmother’s mayo more than thirty years later. It was never really about the mayo; it was about how it made us feel when we gathered around her table. That’s what good food does. Enjoy your cooking journey!