This post contains affiliate links. As an Amazon Associate I earn from qualifying purchases.
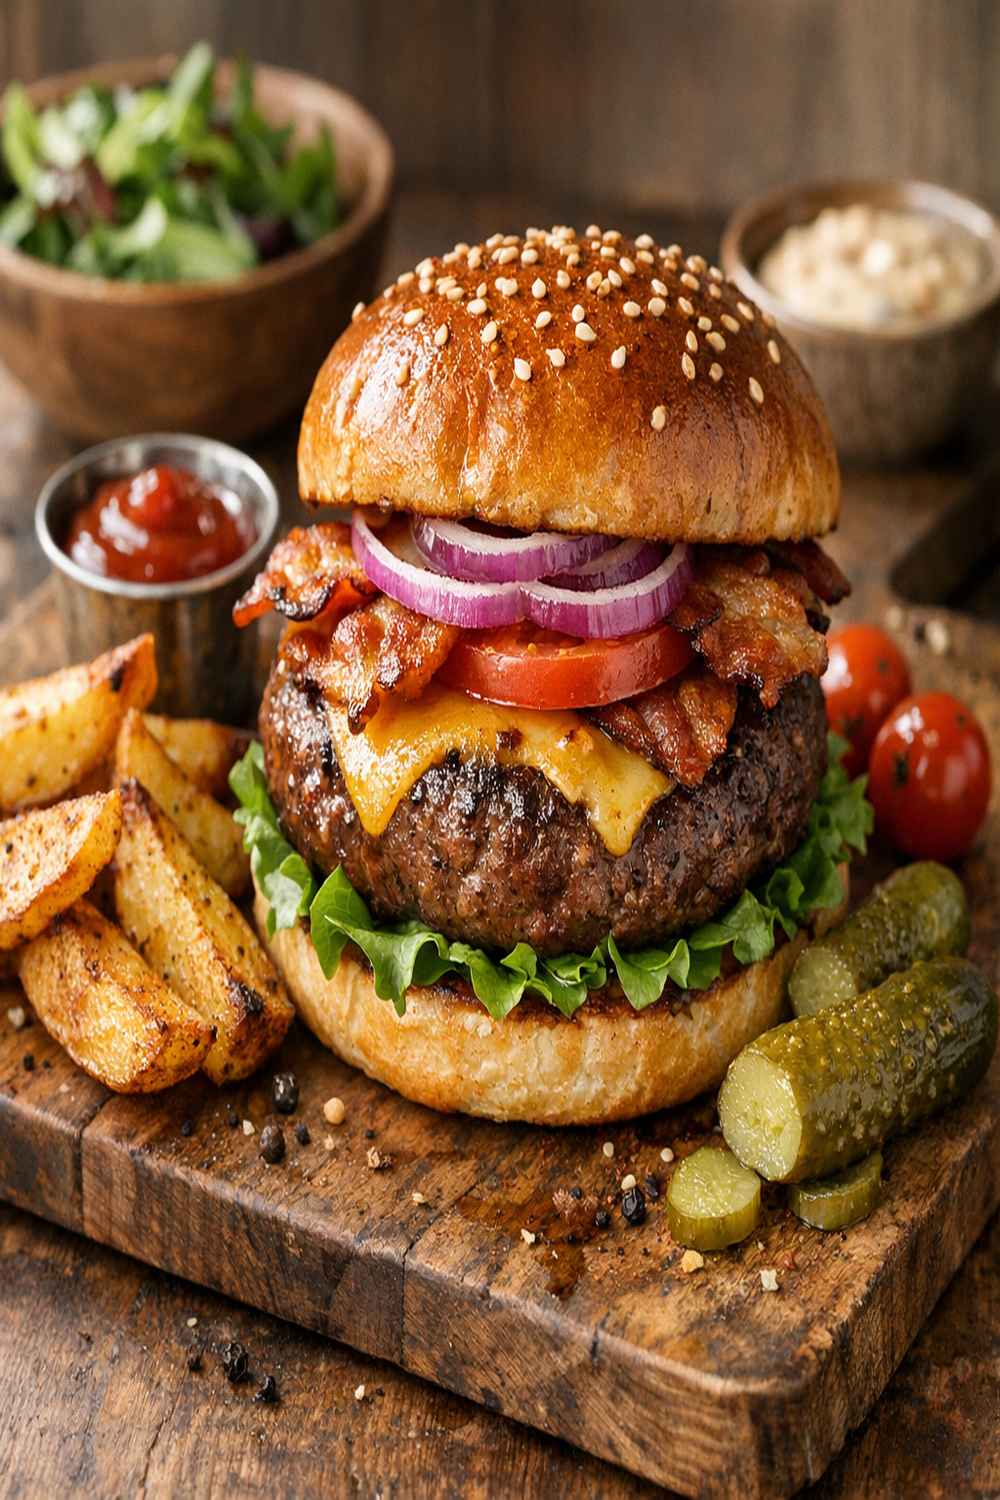
If you’ve always wanted to make a bison burger but felt intimidated—maybe you weren’t sure how to handle the meat, or wondered if it would turn out dry—this is your starting point. I’m going to walk you through every single step, and I promise you’ll have restaurant-quality burgers that taste incredible and actually nourish your body. Bison is one of my favorite proteins to work with as a registered dietitian because it’s naturally leaner than beef while packing serious flavor, and when you season it right with bold spices inspired by my Texas roots, nobody misses the extra fat.
How to Make Bison Burger Recipe for the First Time (You’ve Got This)
I remember the first time my mother asked me to handle the meat for our family gathering—I was terrified. I’d watched her make burgers a thousand times, but actually being responsible for getting them right felt different. My hands were shaking a little as I mixed the seasoning into the ground beef, worried I’d overwork it or mess up the proportions. But here’s what I learned: making burgers is actually one of the most forgiving cooking skills you can develop. The meat tells you what it needs. If you’re gentle with it, if you trust your instincts, and if you follow along with me, you’ll create something that brings people together just like my grandmother’s cooking always did.
That’s the beauty of this bison burger recipe. It’s simple enough for a first-timer, but the flavors run deep and true—just like the best Southern cooking always does.
What to Expect Before You Start
Let me set the stage for what you’re about to do so there are no surprises. This recipe takes about 20 minutes total from ingredient prep to plating, with most of that being the actual grilling. The hands-on work is minimal, which means you can make these burgers on a weeknight without stress. The difficulty level is genuinely beginner-friendly—if you can mix ingredients and watch something cook, you can make this.
- The meat won’t feel exactly like ground beef – Bison is leaner and slightly firmer, so it requires a gentler touch. Don’t be alarmed by this texture; it’s actually what makes these burgers so exceptional. You’re not overworking it; you’re just being respectful of the ingredient.
- Your burgers might look smaller than you expect – Bison has less fat, which means less shrinkage during cooking. Those four-ounce patties will stay closer to their original size, which actually means they’ll be perfectly portioned and won’t dry out like some beef burgers do.
- The spice blend might seem like a lot, but it’s balanced – When I first started cooking with bison, I worried the seasonings would overpower the delicate meat. They don’t. Instead, they create layers of flavor that make every bite interesting without masking what makes bison special.
Equipment You’ll Need (And What You Can Skip)
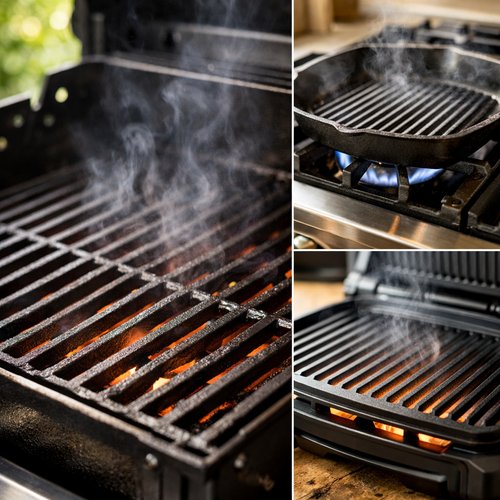
I’m going to be honest with you: you don’t need fancy equipment to make exceptional burgers. My grandmother made the best burgers I’ve ever eaten on a cast-iron skillet over a gas flame. What matters is heat, a cooking surface, and your attention. Here’s what actually serves you well.
- A large mixing bowl – Any bowl that fits a pound of meat comfortably works. Glass, ceramic, or metal—doesn’t matter. You need space to mix without splattering.
- Clean hands – This is non-negotiable and honestly the best tool. Your hands are how you feel when the ingredients are evenly distributed. Wash them before you start, and trust your tactile sense.
- A grill, grill pan, or flat cooking surface – This can be your outdoor grill, a cast-iron grill pan on your stovetop, or even a dual-contact electric grill. Each method works beautifully. If you don’t have outdoor grilling space, a grill pan on medium-high heat gets the job done.
- A meat thermometer (optional but reassuring) – If you’re nervous about doneness, grab an instant-read thermometer. Medium doneness registers around 160°F. But honestly, after you make these a couple times, you’ll develop an instinct.
- Burger buns or your serving choice – Have these ready before you start cooking so your burgers go directly from grill to table while they’re warm.
The Ingredients – A Beginner’s Shopping Guide
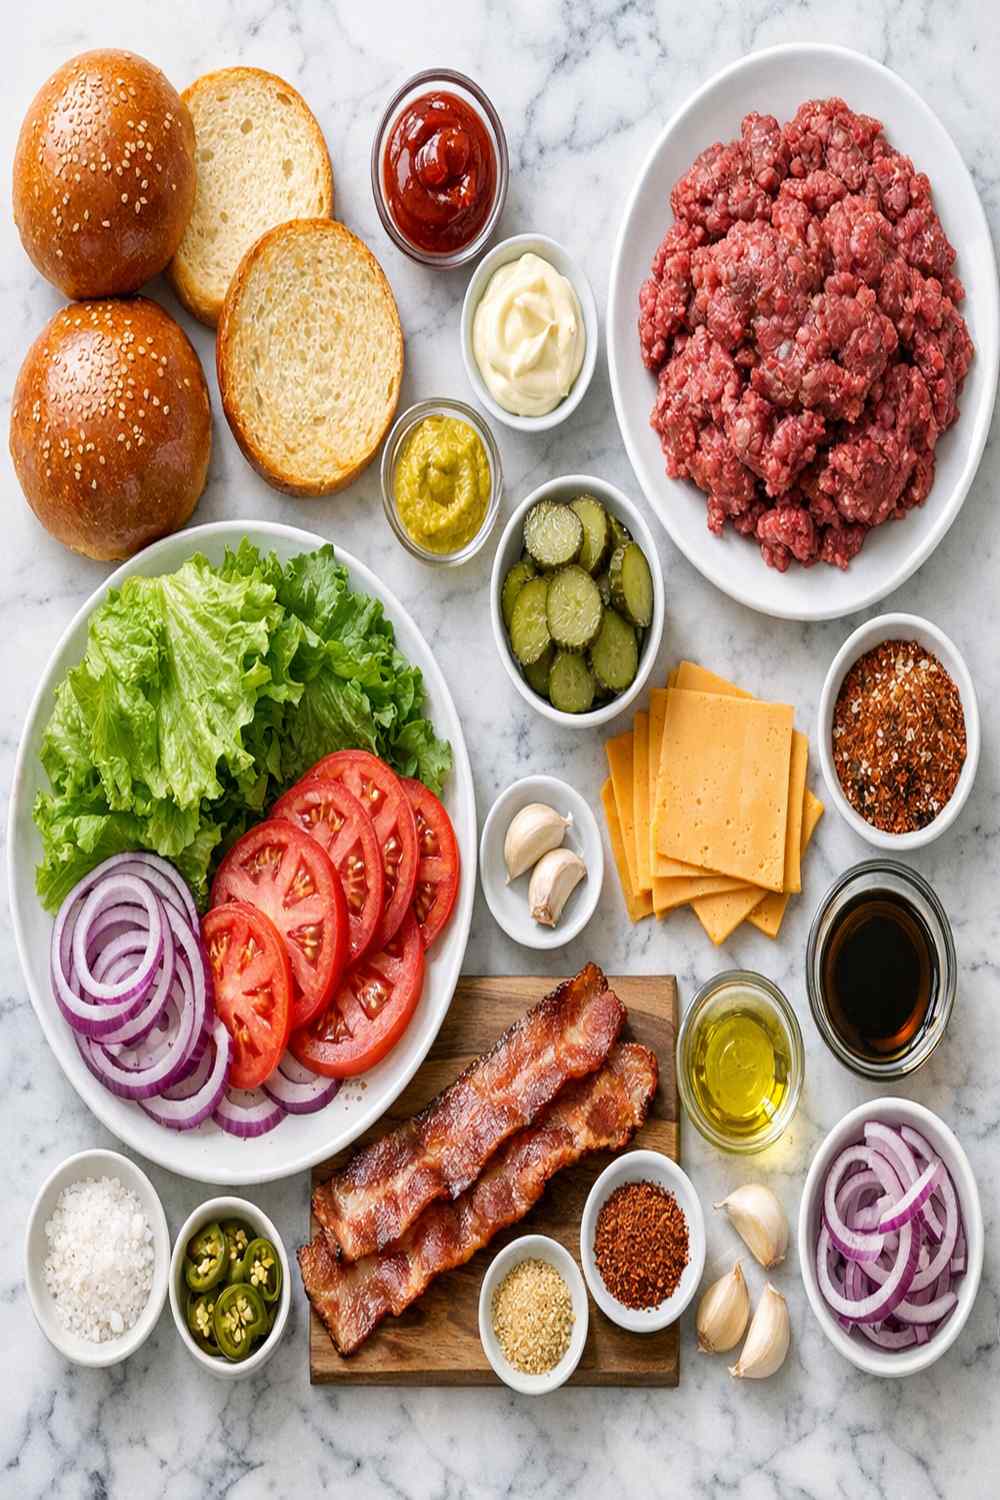
Shopping for bison might feel unfamiliar, but I promise it’s becoming easier every year. Most quality grocery stores now stock ground bison in the meat department, usually near the specialty or grass-fed options. It’s more expensive than conventional ground beef, but you’re getting superior nutrition and flavor. When you’re shopping, here’s what to look for at each stage so you end up with the best ingredients and the most successful burgers.
- 1 teaspoon smoked paprika (find this in the spice aisle; it should smell woodsy and slightly sweet, and one teaspoon delivers gorgeous color and depth)
- 1 teaspoon Diamond Crystal kosher salt (this specific brand dissolves evenly and seasons gently; table salt is too fine and can make the meat tough if you’re not careful)
- 1 teaspoon dried parsley (the green flakes from your spice cabinet; it adds color and a whisper of freshness)
- 1 pound ground bison meat (look for meat that’s a deep burgundy color, never gray or brown; it should smell fresh and clean, and ask the butcher counter when it was ground—ideally within the last two days)
- 1 teaspoon Dijon mustard (the kind in a jar near your condiments, not the bright yellow variety; it adds a subtle tang that enhances the bison without overwhelming it)
- 2 tablespoons avocado oil or another high-heat cooking oil (for coating your grill; avocado oil has a high smoke point and neutral flavor, which keeps the focus on the meat)
- 1 teaspoon garlic powder (not garlic salt; pure powder from the spice section, fresh enough that it still has aroma when you open the container)
- Your choice of burger buns (brioche buns stay soft, potato buns hold juices better, or lettuce wraps if you prefer lower carbohydrate options)
- 1 teaspoon onion powder (same section as garlic powder; it dissolves into the meat and creates savory richness)
- ½ teaspoon black pepper (freshly cracked if you have a grinder, or pre-ground is fine; fresh pepper tastes noticeably brighter)
- ⅛ teaspoon cayenne pepper (just a pinch, which you’ll find near other hot spices; this gives a gentle warmth, not heat, but adjust it down if you’re sensitive to spice)
Step-by-Step: Your First Bison Burger Recipe
I’m going to walk you through this in such detail that you’ll feel like I’m standing right there with you. If something doesn’t make sense, read it again before you move forward. Trust yourself, and trust the process. You’re about to make something delicious.
Step 1: Prepare Your Ingredients and Space
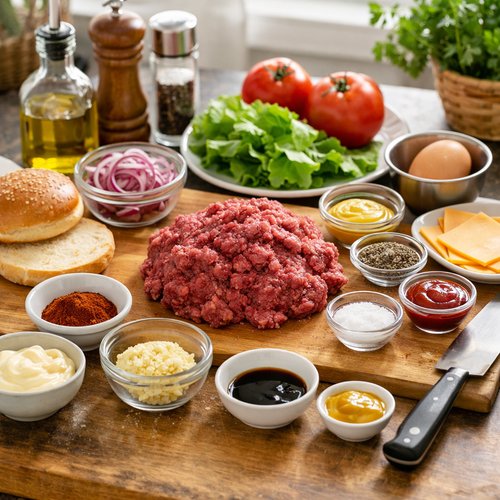
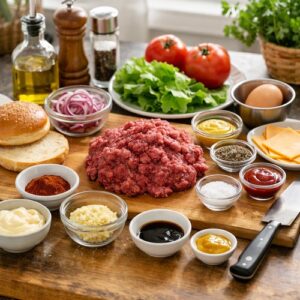
Before you touch the meat, gather everything you need in one place. This is called mise en place, and it’s a professional cooking habit that prevents mistakes. Pull your pound of bison from the refrigerator and let it sit on the counter for about five minutes—not so long that it becomes warm, but long enough that it’s not ice-cold and hard to work with. Cold meat is actually harder to season evenly because the fat particles don’t distribute well. While the meat relaxes slightly, measure out all your spices into a small bowl: the salt, pepper, garlic powder, onion powder, smoked paprika, dried parsley, and cayenne. This takes two minutes and prevents you from fumbling with spice jars while your hands are covered in raw meat.
Step 2: Combine the Meat and Seasonings
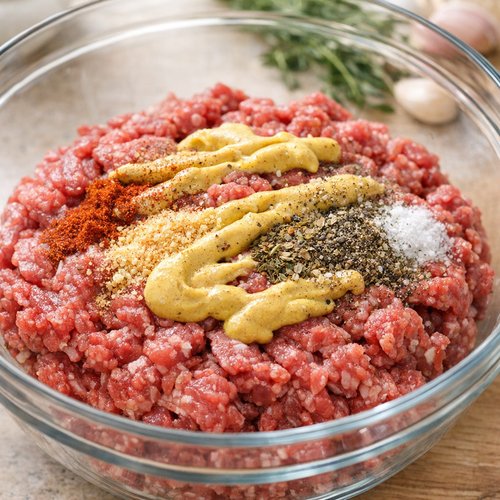
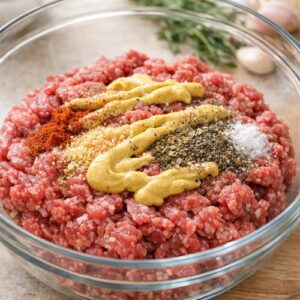
Place your bison meat into a large mixing bowl. Drizzle the Dijon mustard over the top, then sprinkle all your measured spices across the surface. This is the moment where beginners often hesitate, worried about messing up. Here’s what I want you to know: you’re about to use your clean hands to combine these ingredients, and this is where all the magic happens. Wash your hands with cool water first—the temperature matters because you want to keep the meat as cool as possible while working with it. Using your hands, gently fold and turn the mixture, breaking up the meat as you go. You’re looking for a point where the color becomes uniform throughout and the spices are evenly distributed. This takes about one minute of mixing. Don’t squeeze or pound the meat aggressively; you’re mixing, not kneading bread. Aggressive handling creates a dense burger that feels tough to bite into. Instead, imagine you’re folding air into the mixture and treating the meat with respect.
Step 3: Form Your Patties
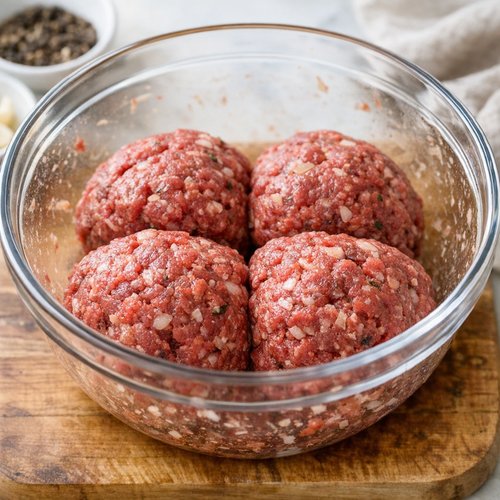
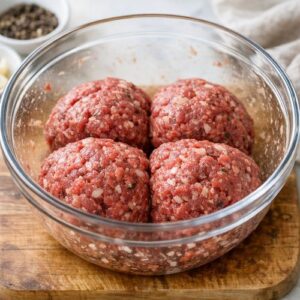
Divide your mixed meat into four equal portions. The easiest way is to imagine your bowl is divided into four sections and portion accordingly. Take one portion in your hands and gently pat it into a disc shape. You want four patties that are each about 3 inches in diameter and roughly ½ inch thick. This size is important because it cooks evenly and stays juicy. Once you’ve shaped the patty, use your thumb to make a shallow dimple in the center—about the size of a dime. This dimple is essential. As the burger cooks, it will puff up slightly, and this dimple prevents it from becoming a dome-shaped ball that cooks unevenly. The dimple keeps your burger flat and ensures the top and bottom cook at the same rate. Place each finished patty on a plate. Do not refrigerate the patties right before cooking; you want them cool but not cold, so they cook through gently rather than getting a char on the outside while staying cool inside.
Step 4: Heat Your Cooking Surface
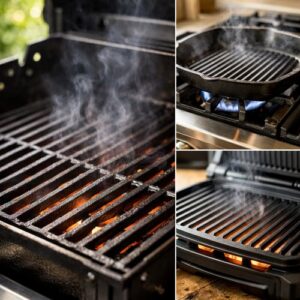
Whether you’re using an outdoor grill, a grill pan on your stovetop, or an electric grill, the goal is the same: medium-high heat. This typically means a grill temperature around 375-400°F if you’re measuring with a thermometer. If you don’t have a thermometer, you can test the heat by holding your hand about 4 inches above the surface. You should be able to hold it there for about three seconds before the heat forces you to pull away. Don’t skip the preheating step. A properly heated cooking surface sears the outside of the burger immediately, creating a flavorful crust while the inside cooks gently.
Step 5: Oil Your Cooking Surface
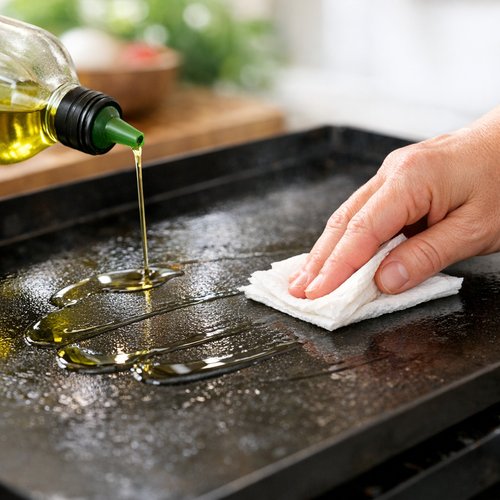
Once your grill is properly heated, coat the surface lightly with avocado oil. Use a brush or a folded paper towel to distribute a thin, even coating. The oil prevents sticking and contributes to those beautiful grill marks. This is not the time to be shy with the oil; a properly oiled grill surface is key to success. Wait about 30 seconds for the oil to heat and shimmer slightly, then you’re ready for the burgers.
Step 6: Cook Your Burgers to Medium Doneness
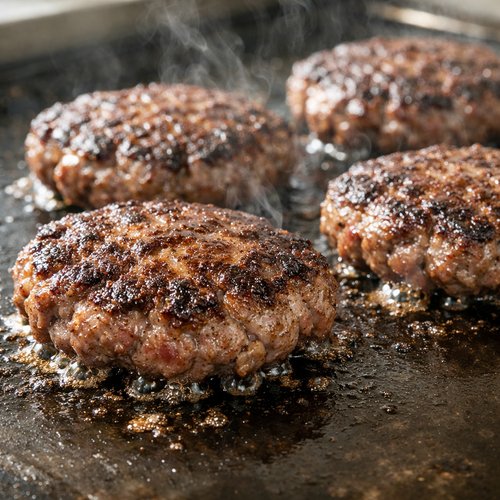
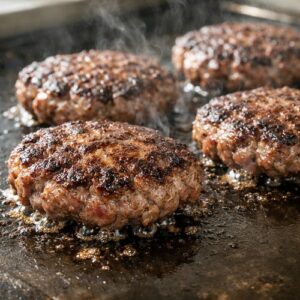
Place your four patties directly onto the heated cooking surface. You should hear a gentle sizzle—if it’s silent, your grill wasn’t hot enough, and if it’s a violent pop, you might be a touch too hot. Don’t touch them immediately. Let them cook undisturbed for about 4 minutes on the first side. This allows the proteins to firm up and create those beautiful grill marks without sticking. You can peek after 3 minutes if you’re nervous, but resist the urge to flip or press. After 4 minutes, use a spatula to flip each patty carefully, and cook for another 4 minutes on the second side for medium doneness. If you’re using a dual-contact electric grill (the kind that closes from above), the entire process takes about 4 minutes total with the lid down. Bison reaches medium doneness at an internal temperature of 160°F according to food safety guidelines, but if you’re cooking by time and experience, 4 minutes per side on medium-high heat typically delivers perfect medium burgers.
Step 7: Rest and Serve Immediately
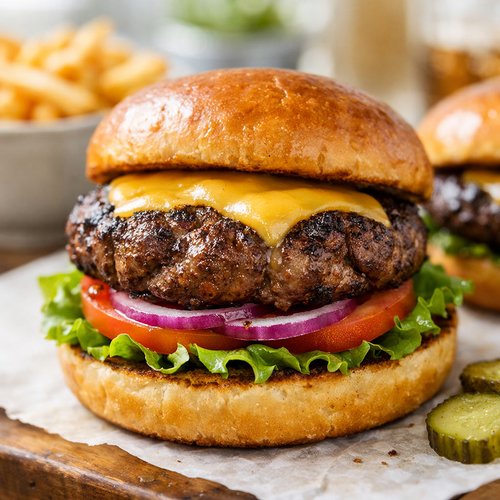
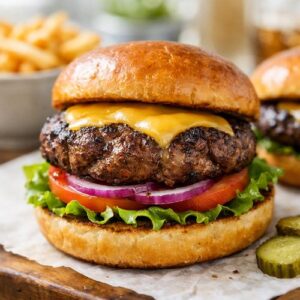
The moment your burgers reach doneness, transfer them directly to toasted buns or your serving vessel. Don’t let them sit on the hot grill any longer than necessary; that’s where they can dry out. The residual heat will continue cooking them slightly as they rest on the plate, so getting them off the heat promptly is crucial. Have your buns ready, your toppings assembled, and your plate set before you start cooking. This ensures your burgers go from grill to table while they’re at peak temperature and juiciness.
How to Tell If You Did It Right
Success in burger-making comes down to visual cues, temperature, and texture. Let me walk you through what to look for at each stage so you can verify you’re on track.
- The spice mixture looks evenly distributed through the meat – When you’ve finished mixing, you should see no white or brown streaks of unmixed spices. The meat should have a uniform, slightly mottled appearance where the seasonings are woven throughout. This ensures every bite tastes consistent and balanced.
- Your patties have a slight indentation in the center and feel cool but not cold – The dimple should be visible and feel shallow (not deep like a thumbprint). The patties should feel cool to the touch but not require ice-cold handling. This texture tells you they’re properly prepped.
- The grill surface sizzles when the burgers make contact – This sound means the heat is correct and the burger will develop a flavorful crust. Silence means the grill isn’t hot enough.
- After 4 minutes, the first side shows golden-brown grill marks – These marks indicate proper heat, proper oil coating, and good contact with the cooking surface. Brown color (not black char) means the temperature was just right.
- The burger feels gently firm to the touch when done – If you press the center gently with your finger, a medium burger feels like the fleshy part of your palm between your thumb and forefinger when your hand is relaxed. It’s not squishy-soft, and it’s not hard.
- A small knife inserted into the thickest part shows no pink in the center – For medium doneness, the interior should be warm and slightly pink only if you prefer it slightly less done. For food safety, 160°F internal temperature is the target, which yields a burger that’s fully cooked but not dried out.
What Went Wrong? Beginner Fixes
Even experienced cooks encounter hiccups. Here’s what commonly trips up first-timers and how to solve it.
- Your burgers fell apart while cooking – This usually means you overworked the meat when mixing. Bison meat needs a light touch. If this happens next time, handle the meat less aggressively and avoid squeezing it while combining ingredients. Think “folding” not “kneading.” If your burgers still broke apart, it might mean your meat was too warm when you were working with it; let it rest in the fridge for 30 minutes next time before forming patties.
- Your burgers turned out dry – Bison is naturally lean, so it dries out faster than beef if cooked past medium. Lower your heat slightly next time and watch the clock closely. Bison cooks faster than you might expect. Additionally, resist the urge to press your burgers with your spatula while they’re cooking; pressing squeezes out the juices, leaving a dry burger behind. Patience is the secret to juicy burgers.
- Your burgers had a gray interior and didn’t develop a crust – This indicates your cooking surface wasn’t hot enough or was crowded. Make sure your grill is truly preheated to medium-high, and don’t cook too many burgers at once if they’re touching; they’ll steam instead of sear. Each burger needs direct contact with hot metal.
- Your spice blend tastes bitter or harsh – Smoked paprika and garlic powder can turn bitter if burned. This means your heat was too high or you cooked too long. Reduce heat slightly next time, and respect the 4-minute-per-side timing. The spices are meant to complement, not dominate.
Your Next Steps After Mastering This
Making bison burgers teaches you foundational skills that open doors in the kitchen. You’ve learned how to season ground meat properly, how to form and cook patties evenly, and how to trust your senses rather than guessing. These skills transfer directly to making meatballs, beef burgers, turkey burgers, or even seasoned ground meat for tacos. Once you’re comfortable with this recipe, try experimenting with different spice blends—maybe swap the smoked paprika for chili powder for a Southwestern twist, or add a teaspoon of Worcestershire sauce for deeper umami. You can also build on the protein fundamentals you’ve learned here by exploring recipes like Air Fry Drumsticks Recipe, which teaches similar heat management and doneness timing. The confidence you’re building right now is the foundation for becoming someone who cooks intuitively and adapts recipes with assurance.
Can I Store Bison Burger Recipe?
Absolutely, and this is where meal prep becomes your friend. Here’s how to handle storage at each stage so your burgers stay fresh and safe.
Raw patties can be refrigerated for up to 24 hours. Form your patties, place them on a plate lined with parchment paper, and cover loosely with plastic wrap. They’ll stay fresh and won’t absorb odors from other foods in your fridge. Raw patties can be frozen for up to three months. Freeze them individually on a parchment-lined baking sheet first (this prevents them from sticking together), then transfer to a freezer bag once frozen. Thaw overnight in the refrigerator before cooking, or cook from frozen (add about 2 minutes per side).
Cooked burgers keep refrigerated for up to four days. Let them cool completely, then store them in an airtight container. Reheat gently on a skillet over medium heat for about one minute per side, which warms them without drying them further. Cooked burgers freeze beautifully for up to two months. Wrap each one individually in plastic wrap, then place them in a freezer bag. Reheat from frozen by warming in a skillet over medium heat for about two minutes per side.
I typically make a batch of four burgers on Sunday afternoon, cook them immediately, and use them for quick lunches throughout the week. They’re fantastic with scrambled eggs for breakfast or on a salad for dinner with my favorite Roasted Garlic Cream Sauce Recipe drizzled over the top instead of traditional condiments.
Nutrition Information
This is where I lean into my expertise as a registered dietitian, because bison deserves recognition for what it brings to your plate nutritionally. One cooked bison burger (approximately 4 ounces, cooked to medium doneness) contains approximately 180 calories, 24 grams of protein, 9 grams of fat, and 0 grams of carbohydrates. Compared to conventional ground beef of the same weight, bison typically contains about 25% fewer calories and significantly less fat while delivering more protein. According to USDA data, bison meat is also notably higher in omega-3 fatty acids than beef, which supports heart and brain health. The spice blend we’re using—particularly the garlic and smoked paprika—contributes antioxidants and compounds with anti-inflammatory properties, though in small amounts. What I love most about this recipe from a nutritional standpoint is that it delivers serious satiety. The high protein content keeps you satisfied longer, and the healthy fat profile means your body can absorb the fat-soluble vitamins efficiently. If you’re watching sodium intake, you can reduce the salt slightly; the other seasonings carry enough flavor that you won’t miss it.
What Can I Serve With Bison Burger Recipe?
The beauty of a perfectly seasoned bison burger is that it plays well with almost anything. Here are some pairings I love, from simple to elaborate.
- Classic bun with lettuce, tomato, and onion – Sometimes simple is best. Let the burger shine with minimal toppings.
- Topped with avocado and a drizzle of lime juice – The healthy fat in avocado complements the lean bison beautifully, and lime adds brightness.
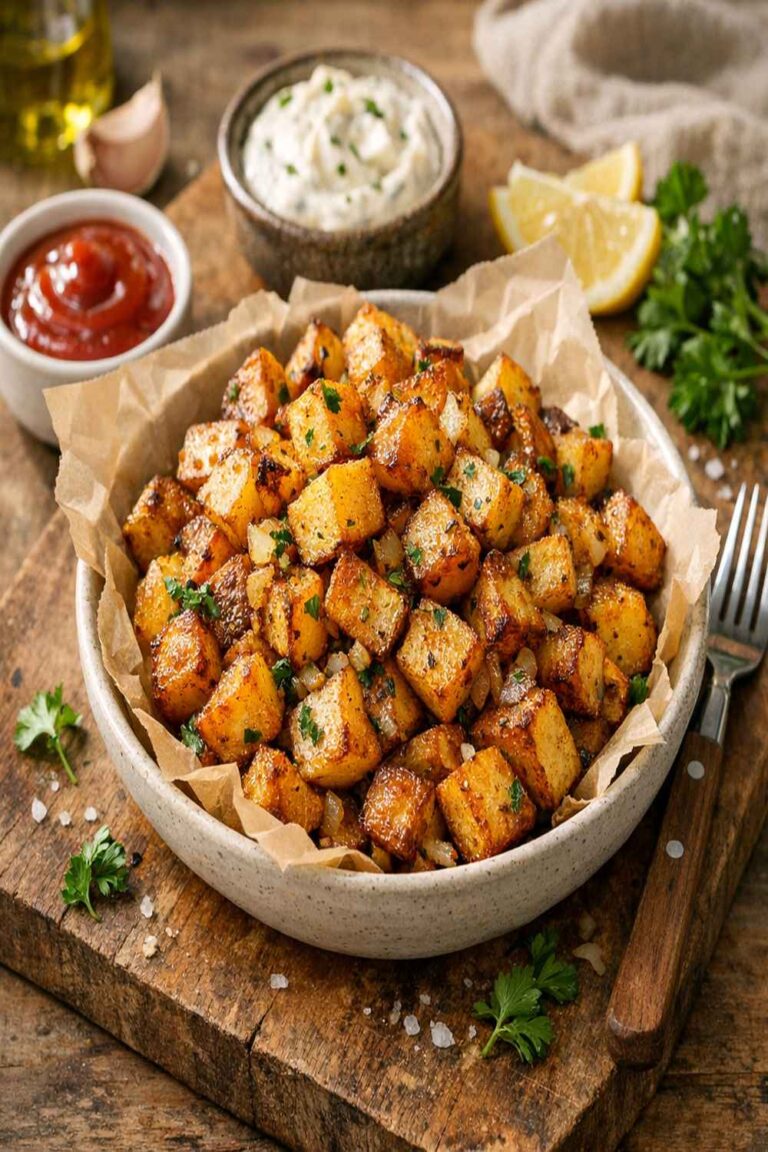
- Paired with crispy Seasoned Baked Potato Wedges and a green salad – This creates a complete, balanced meal with protein, complex carbs, and vegetables.
- Served on a bed of greens as a salad instead of on a bun – Crumble the burger and toss it with mixed greens, cucumber, and your favorite vinaigrette for a low-carb option.
- With sautéed mushrooms and caramelized onions – These toppings add umami depth that makes the burger taste even more luxurious.
- In almond flour tortillas for a lower-carb wrap – Try wrapping your burger in Almond Flour Tortillas Recipe with cheese and jalapeños for a Tex-Mex twist.
Expert’s Nutritional Tip
As a dietitian who’s passionate about creating meals that nourish and satisfy, I want to highlight something many people miss about bison: it’s a complete protein, meaning it contains all nine essential amino acids your body cannot produce on its own. This matters because complete proteins support muscle maintenance, immune function, and hormone production. The fact that you’re getting this nutritional density in a burger that tastes indulgent is genuinely exciting. Additionally, the combination of lean protein with the fat-soluble vitamins in avocado toppings or the antioxidants in the paprika creates a meal that supports both physical health and longevity. This isn’t “eating healthy” in the restrictive sense—this is eating in a way that honors your body while bringing genuine joy to the table, which is how my grandmother approached cooking.
Make-Ahead Guide
One of my favorite ways to handle weeknight cooking is to prep components ahead. Here’s how I manage bison burgers in my own kitchen for maximum convenience.
Two days before serving: Shop for your ingredients. Ground bison is best used within two days of purchase, so timing matters here.
One day before serving: Form your patties and refrigerate them on a parchment-lined plate covered loosely with plastic wrap. This takes 10 minutes and ensures your cooking day is genuinely simple. If you want to freeze them for later, do this step and freeze instead.
The morning of serving: Set out your burger buns, lettuce, tomatoes, and any toppings you’re using. Having these ready means cooking becomes the only task on your plate—literally.
30 minutes before eating: Remove your patties from the refrigerator and let them come to cool room temperature. Preheat your grill. Mix your spices together if you didn’t already (this takes one minute). This relaxed approach prevents stress and means your burger comes together smoothly.
I always tell people: cooking isn’t about having more time; it’s about using the time you have more deliberately. Breaking this recipe into these prep steps means actual cooking day is genuinely relaxed.
Seasonal Variations
This recipe is anchored in warm Texas spices, but you can adapt it beautifully based on what’s in season and what appeals to you.
Spring variation: Add fresh herbs to your patties—finely minced fresh dill or tarragon mixed into the meat adds brightness. Top with fresh spring greens and asparagus that’s been quickly grilled.
Summer variation: Keep the base recipe exactly as written, but top with fresh corn relish, sliced tomatoes from your farmer’s market, and crispy bacon. Grill everything on the same surface for maximum flavor integration.
Fall variation: Add ½ teaspoon of ground cumin and ¼ teaspoon of smoked chili powder to your spice mix. Top with sautéed mushrooms and a slice of aged cheddar cheese. Serve with roasted root vegetables on the side.
Winter variation: The base recipe shines in winter as-is, but consider serving your burgers with a warm side like my oven-baked chicken flavor-inspired caramelized onions, or pair with hearty greens like kale or collards.

Bison Burger Recipe
Ingredients
Method
- Before you touch the meat, gather everything you need in one place. This is called mise en place, and it's a professional cooking habit that prevents mistakes. Pull your pound of bison from the refrigerator and let it sit on the counter for about five minutes—not so long that it becomes warm, but long enough that it's not ice-cold and hard to work with. Cold meat is actually harder to season evenly because the fat particles don't distribute well. While the meat relaxes slightly, measure out all your spices into a small bowl: the salt, pepper, garlic powder, onion powder, smoked paprika, dried parsley, and cayenne. This takes two minutes and prevents you from fumbling with spice jars while your hands are covered in raw meat.
- Place your bison meat into a large mixing bowl. Drizzle the Dijon mustard over the top, then sprinkle all your measured spices across the surface. This is the moment where beginners often hesitate, worried about messing up. Here's what I want you to know: you're about to use your clean hands to combine these ingredients, and this is where all the magic happens. Wash your hands with cool water first—the temperature matters because you want to keep the meat as cool as possible while working with it. Using your hands, gently fold and turn the mixture, breaking up the meat as you go. You're looking for a point where the color becomes uniform throughout and the spices are evenly distributed. This takes about one minute of mixing. Don't squeeze or pound the meat aggressively; you're mixing, not kneading bread. Aggressive handling creates a dense burger that feels tough to bite into. Instead, imagine you're folding air into the mixture and treating the meat with respect.
- Divide your mixed meat into four equal portions. The easiest way is to imagine your bowl is divided into four sections and portion accordingly. Take one portion in your hands and gently pat it into a disc shape. You want four patties that are each about 3 inches in diameter and roughly ½ inch thick. This size is important because it cooks evenly and stays juicy. Once you've shaped the patty, use your thumb to make a shallow dimple in the center—about the size of a dime. This dimple is essential. As the burger cooks, it will puff up slightly, and this dimple prevents it from becoming a dome-shaped ball that cooks unevenly. The dimple keeps your burger flat and ensures the top and bottom cook at the same rate. Place each finished patty on a plate. Do not refrigerate the patties right before cooking; you want them cool but not cold, so they cook through gently rather than getting a char on the outside while staying cool inside.
- Whether you're using an outdoor grill, a grill pan on your stovetop, or an electric grill, the goal is the same: medium-high heat. This typically means a grill temperature around 375-400°F if you're measuring with a thermometer. If you don't have a thermometer, you can test the heat by holding your hand about 4 inches above the surface. You should be able to hold it there for about three seconds before the heat forces you to pull away. Don't skip the preheating step. A properly heated cooking surface sears the outside of the burger immediately, creating a flavorful crust while the inside cooks gently.
- Once your grill is properly heated, coat the surface lightly with avocado oil. Use a brush or a folded paper towel to distribute a thin, even coating. The oil prevents sticking and contributes to those beautiful grill marks. This is not the time to be shy with the oil; a properly oiled grill surface is key to success. Wait about 30 seconds for the oil to heat and shimmer slightly, then you're ready for the burgers.

- Place your four patties directly onto the heated cooking surface. You should hear a gentle sizzle—if it's silent, your grill wasn't hot enough, and if it's a violent pop, you might be a touch too hot. Don't touch them immediately. Let them cook undisturbed for about 4 minutes on the first side. This allows the proteins to firm up and create those beautiful grill marks without sticking. You can peek after 3 minutes if you're nervous, but resist the urge to flip or press. After 4 minutes, use a spatula to flip each patty carefully, and cook for another 4 minutes on the second side for medium doneness. If you're using a dual-contact electric grill (the kind that closes from above), the entire process takes about 4 minutes total with the lid down. Bison reaches medium doneness at an internal temperature of 160°F according to food safety guidelines, but if you're cooking by time and experience, 4 minutes per side on medium-high heat typically delivers perfect medium burgers.
- The moment your burgers reach doneness, transfer them directly to toasted buns or your serving vessel. Don't let them sit on the hot grill any longer than necessary; that's where they can dry out. The residual heat will continue cooking them slightly as they rest on the plate, so getting them off the heat promptly is crucial. Have your buns ready, your toppings assembled, and your plate set before you start cooking. This ensures your burgers go from grill to table while they're at peak temperature and juiciness.
Notes
FAQs
Can I use regular ground beef instead of bison?
You absolutely can, though the cooking time will be slightly different. Ground beef is fattier, so it requires more careful attention to avoid overcooking and drying out. I’d recommend reducing your cooking time to about 3 minutes per side for medium doneness since beef cooks faster. Start checking for doneness at 2½ minutes. The spice blend works beautifully with beef—you’re not changing the recipe, just adjusting timing. That said, I genuinely encourage you to try the bison version at least once. The difference is noticeable and worth experiencing.
What if I don’t have Dijon mustard?
Dijon mustard is in there for its emulsifying properties and subtle tanginess—it helps bind the seasonings and adds depth you wouldn’t expect. If you don’t have it, you can omit it entirely, though your burger will be slightly less complex. Alternatives include ½ teaspoon of Worcestershire sauce, which adds similar umami, or a tiny pinch of dry mustard powder mixed with a splash of water. But honestly, if you don’t have Dijon, just skip it. The burger will still be delicious; the other seasonings carry plenty of flavor.
How do I know if my grill is hot enough?
The hand-hold method I mentioned is reliable: hold your hand about 4 inches above the grill surface. For medium-high heat (which is what we want), you should be able to hold it there for about three seconds before the heat forces you to pull away. If you can hold it longer, the grill isn’t hot enough yet. If you can barely hold it for two seconds, the heat is perfect. A grill thermometer takes the guesswork out—aim for 375-400°F—but the hand method works beautifully once you do it a couple of times.
Can I cook these burgers indoors if I don’t have a grill?
Completely! A grill pan on your stovetop works beautifully. Cast iron is ideal because it retains heat well and creates gorgeous color, but any heavy-bottomed skillet with ridges works. Use the exact same timing and heat level. You can also use a dual-contact electric grill (like a George Foreman–style grill), which actually simplifies the process—the lid presses the burgers evenly so they cook in about 4 minutes total instead of 8. The key is that whatever surface you use needs to be hot, oiled, and capable of direct, concentrated heat.
What if I like my burgers cooked more or less than medium?
I recommend medium as a starting point because it keeps bison juicy without compromising food safety. But cooking preferences are personal. For medium-rare (which is risky from a food safety perspective with ground meat, but some people prefer it), reduce cooking time to about 3 minutes per side. For medium-well, increase to about 5 minutes per side. Use a meat thermometer if you’re unsure: rare is 130-135°F, medium-rare is 135-145°F, medium is 145-160°F (and 160°F is food-safety recommended for ground meat), and medium-well is 160-170°F. The residual heat continues cooking the burger after it leaves the grill, so pull it about 5°F before your target temperature.
More Beginner-Friendly Recipes
- Air Fry Drumsticks Recipe – teaches the same heat-management skills with a different protein
- Seasoned Baked Potato Wedges – a perfect side dish that cooks simultaneously with your burgers
- Cheesy Garlic Crescent Rolls – an impressive bread accompaniment that’s simpler than it sounds
You’ve just learned how to cook a restaurant-quality bison burger from scratch. Let me tell you what this means: you now have a skill that’ll serve you for the rest of your cooking life. You understand how to season ground meat, how to assess heat, how to read doneness visually and by feel. These aren’t small things. These are foundational abilities that transform how you approach any protein. The first time you make these, you might be a little nervous. The second time, you’ll move through the process with confidence. By the third time, you’ll be tweaking it—maybe adding caramelized onions, trying different toppings, cooking them for friends without a second thought. That’s when you’ve truly owned this recipe. I’m genuinely excited for you to start this journey. Come back and let me know how it goes, whether you have questions, or if you discover a variation that becomes your signature. Cooking is meant to be shared, enjoyed, and built upon with each attempt. You’ve got this. Enjoy your cooking journey!