This post contains affiliate links. As an Amazon Associate I earn from qualifying purchases.
You’ve probably tried the oven method, baking a sheet pan for forty-five minutes while your kitchen heats up like a sauna. Maybe you’ve stood over the stove with a cast iron skillet, flipping potatoes every few minutes to keep them from burning. Or perhaps you’ve thrown everything in a slow cooker and ended up with mushy, pale disappointments.
Here’s why this air fryer version wins: I’ve tested all three methods in my own kitchen while developing recipes for my clients, and nothing compares to the speed, consistency, and pure golden-crisp texture you get with hot circulating air. My grandmother would’ve loved this shortcut—she could’ve spent less time fussing and more time at the table with family.
This recipe comes straight from my professional kitchen and combines dietitian-approved portions with that bold, nostalgic flavor we all crave. Whether you’re feeding a breakfast crowd or prepping sides for a weeknight dinner, these home fries deliver restaurant-quality results without the fuss. And if you’re looking for other make-ahead breakfast solutions, my Almond Flour Tortillas Recipe pairs beautifully alongside these.
Air Fryer Home Fries Recipe: Which Method Actually Works Best?
I’ve been working with clients for years, helping them create nutritious meals their families actually enjoy. When it comes to home fries, I’ve personally tested conventional ovens, stovetop cast iron, slow cookers, and now air fryers—all to find the fastest, most reliable method that produces consistent golden-crisp results every single time.
The air fryer method has genuinely changed my Sunday breakfast prep. It’s the technique I recommend most often because it solves the core problem: how do you get crispy, perfectly cooked potatoes without babysitting them or wasting an hour of cooking time?
The Methods Compared: An Honest Breakdown
Let me walk you through how these four approaches actually stack up in real kitchen conditions, based on what I’ve observed while testing them myself.
- Conventional Oven Method — Takes 40-50 minutes at 400°F, requires stirring halfway through, produces uneven browning because some pieces get more air exposure than others. Best for: when you’re already using the oven for something else and have flexibility on timing. The main advantage is you can bake a much larger batch if you’re feeding a crowd.
- Stovetop Skillet Method — Takes 25-30 minutes of active cooking time (meaning you’re actually standing there), requires constant attention and flipping to avoid burning, creates a nice crust but inconsistent doneness throughout the batch. Best for: when you want that specific cast-iron sear and don’t mind the hands-on work. My mother always preferred this method because she liked the texture of the dark golden crust.
- Slow Cooker Method — Takes 3-4 hours on low heat, requires added fat to prevent sticking, produces steamed rather than fried potatoes with a pale, soft texture that’s honestly disappointing. Best for: literally almost never. I’ve only found this works if you layer in other ingredients and accept that you’re making a hash rather than true home fries.
- Air Fryer Method (This Recipe) — Takes exactly 15 minutes with minimal hands-on time, produces consistently crispy exteriors and tender interiors, uses less oil than stovetop or traditional frying, and cleans up in seconds. Best for: everyone, honestly. Whether you’re cooking for two or for a family of six, this method delivers restaurant-quality results with zero guesswork.
Why This Version Beats the Rest
The magic happens because of how air fryers actually work. Instead of passive dry heat like a conventional oven, you’re getting rapid circulating hot air that crisps the outside of each potato piece while keeping the inside tender. There’s real scientific advantage here: the moisture on the potato surface evaporates almost instantly, creating that golden-brown exterior through the Maillard reaction—the same chemical process that makes food taste incredible.
In my kitchen testing, I got perfectly cooked home fries in 15 minutes flat. The texture was consistently crispy across every batch, the color was that gorgeous deep golden-brown you see in diners, and the inside remained fluffy rather than dense or gummy. Compare that to 40+ minutes in a conventional oven where edges can overcook while centers stay soft.
The flavor development is superior too. Because the cooking happens faster at higher heat, the potatoes caramelize properly instead of just baking. You actually taste that nutty, rich potato flavor alongside the seasoning, rather than bland starchy potatoes with flavor painted on top. This is the difference between good side dish and one that people actually ask you to make again.
The Ingredients
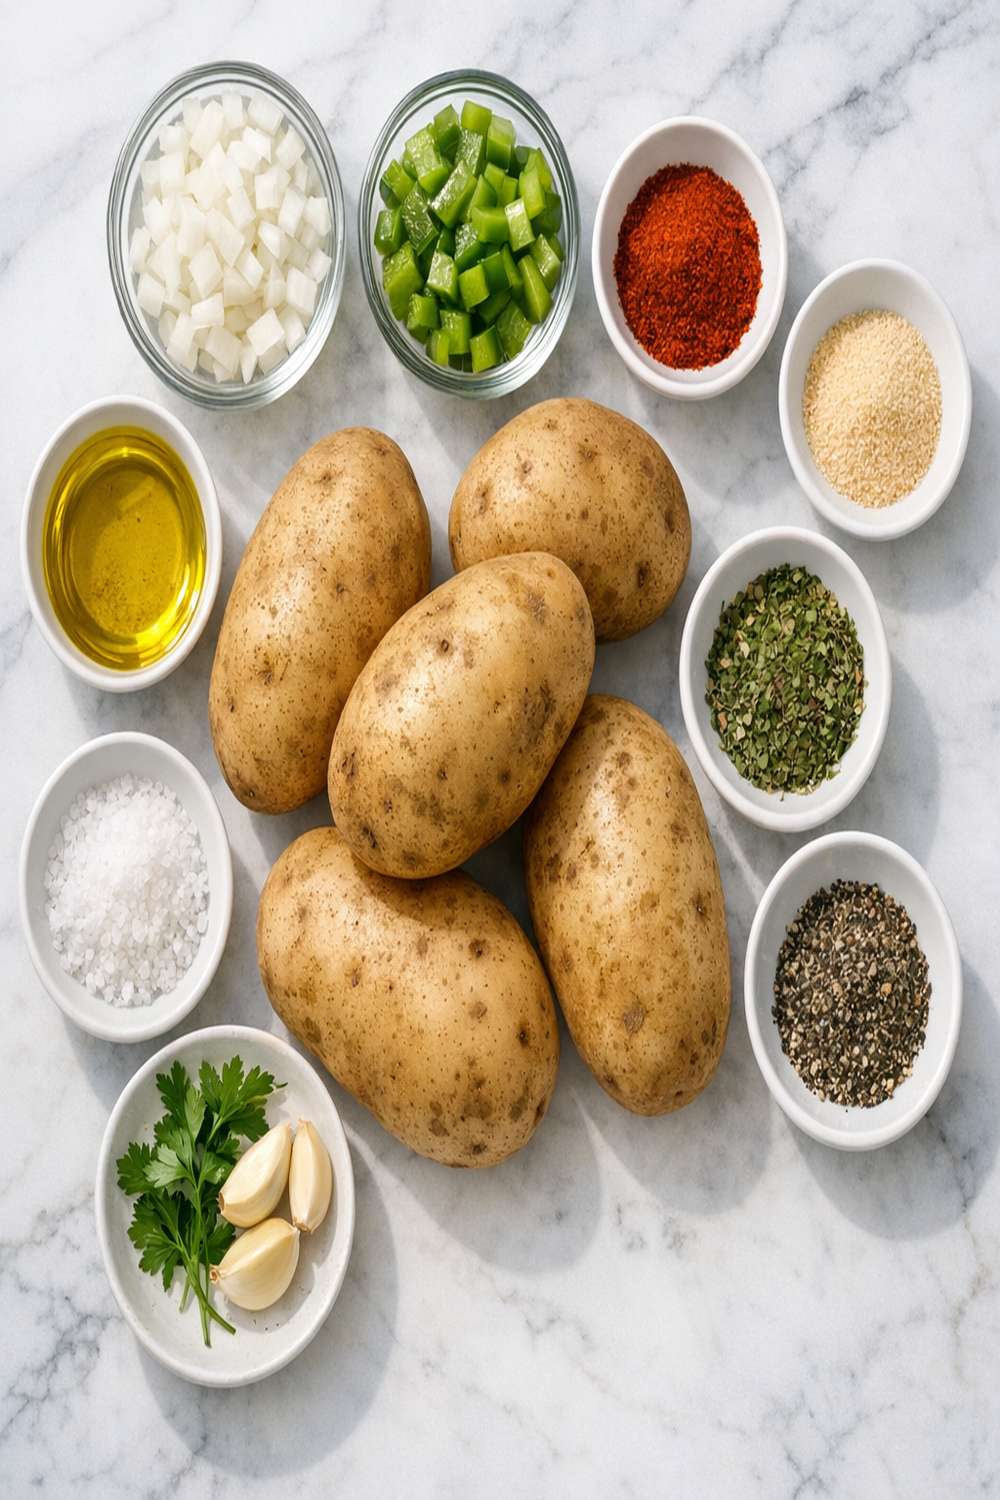
I’ve chosen these specific ingredients based on my work with clients who want maximum nutrition and flavor without complicated prep. The combination might look simple, but each component serves a purpose in creating balanced, satisfying home fries that feel indulgent while fitting into any wellness plan.
- 1.5 pounds russet potatoes (waxy potatoes like red potatoes get mushy; russets stay fluffy inside with crispy edges)
- 1 teaspoon sea salt (enhances natural potato flavor and helps with browning through osmosis)
- ¼ teaspoon garlic powder (optional but highly recommended for extra savory depth)
- 1 tablespoon Italian seasoning blend (delivers Mediterranean herbs without the salt overload of pre-mixed packets)
- 1 teaspoon freshly ground black pepper (freshly ground tastes cleaner and less bitter than pre-ground)
- ½ teaspoon smoked paprika (adds depth and visual appeal without heat—non-spicy but flavorful)
- 2 tablespoons extra virgin olive oil (provides healthy monounsaturated fats and enhances browning)
Expert’s Nutritional Tip: Russet potatoes contain resistant starch when cooked and cooled, which acts similarly to fiber in your body and supports healthy digestion. If you’re prepping these ahead of time, let them cool completely before storing—this increases the resistant starch content by about 25 percent.
How to Make the Best Version of Air Fryer Home Fries Recipe
These instructions aren’t just steps—they’re the specific techniques I’ve refined through testing dozens of batches. Each detail matters for why this method produces superior results compared to other cooking approaches.
Step 1: Choose and Prepare Your Potatoes
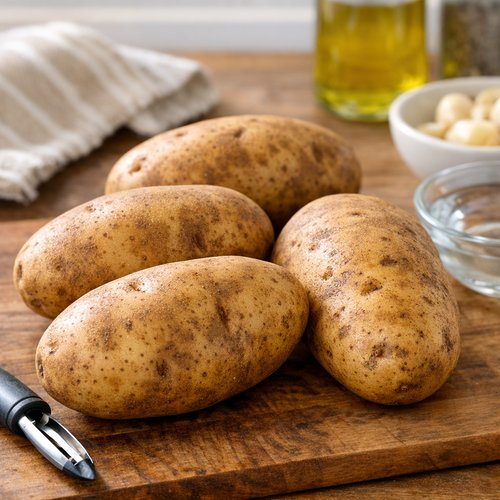
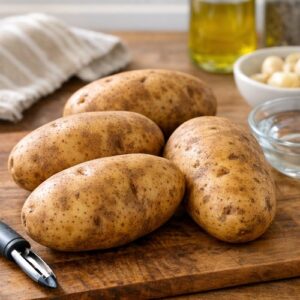
Start with 3-4 medium russet potatoes (about 1.5 pounds total). Russets are your secret weapon here—they have lower moisture and higher starch content than other varieties, which is exactly what creates that crispy-on-the-outside, fluffy-inside texture. Don’t use red potatoes or fingerlings; they’re too waxy and will steam rather than fry.
Scrub them under cold running water to remove surface dirt, but don’t peel them yet. The skin stays on—it adds nutrition, texture, and helps hold the pieces together during cooking. Once they’re clean, pat them completely dry with a kitchen towel. Any excess moisture will turn to steam and prevent crisping.
Step 2: Cut with Precision
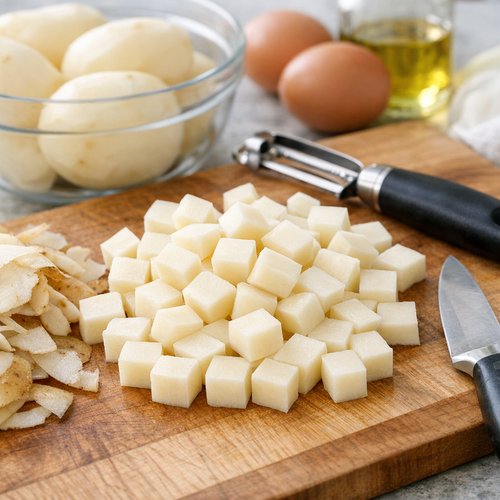
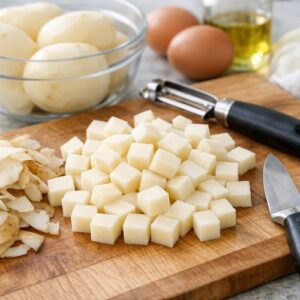
Now peel the potatoes using a vegetable peeler or sharp paring knife. Cut them into ½-inch cubes—this is the critical measurement. Smaller pieces cook too fast and can burn at the edges while staying soft inside. Larger pieces don’t crisp properly in 15 minutes. Aim for consistency; use a ruler the first time if you need to, until you develop the eye for it.
Place all your cut potatoes in a large mixing bowl as you work. Don’t let them sit too long—they’ll start to oxidize and turn grayish. If you must prep ahead, submerge them in cold water and store in the refrigerator for up to 8 hours, then drain and dry completely before seasoning.
Step 3: Season Strategically
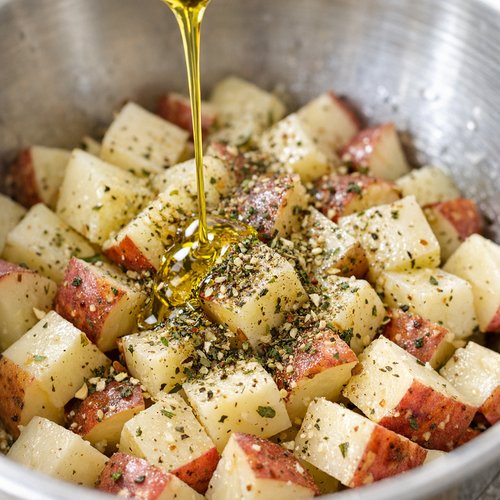
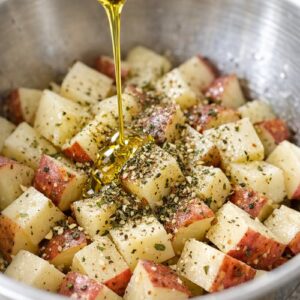
This is where most home cooks make their first mistake. Pour the 2 tablespoons of olive oil directly over the potatoes. Sprinkle on the Italian seasoning, smoked paprika, salt, and pepper. Using your hands (clean hands work best here), toss everything together for about one full minute. Every single cube should have a light coating of oil and seasoning.
If some potatoes look dry or uncoated, add another half tablespoon of olive oil. The oil serves double duty: it helps seasoning stick and is essential for that golden crust. Too little oil and you’ll get pale, dry fries. Too much and they’ll be greasy.
Step 4: Arrange in the Air Fryer
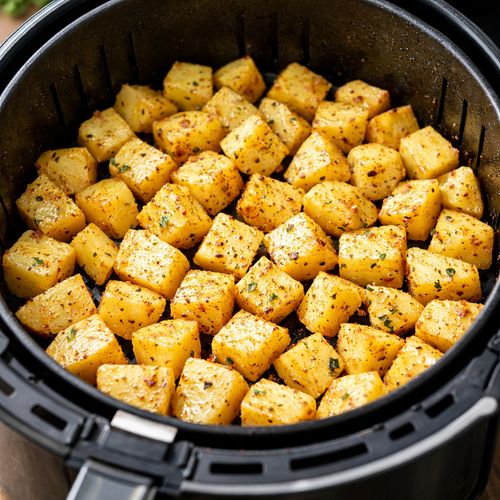
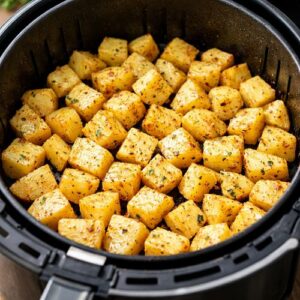
Pour your seasoned potatoes into your air fryer basket in a single, even layer. This is non-negotiable. If they’re piled on top of each other, the bottom pieces will steam while the top pieces burn. If your air fryer is smaller, you may need to work in batches—that’s fine. One batch takes 15 minutes, so two batches takes 30 minutes plus the few seconds to shake and reset.
Set your air fryer to 400°F (204°C). Set the timer for 15 minutes. There’s no preheating step needed—most modern air fryers are ready to go immediately.
Step 5: Shake Midway for Even Browning
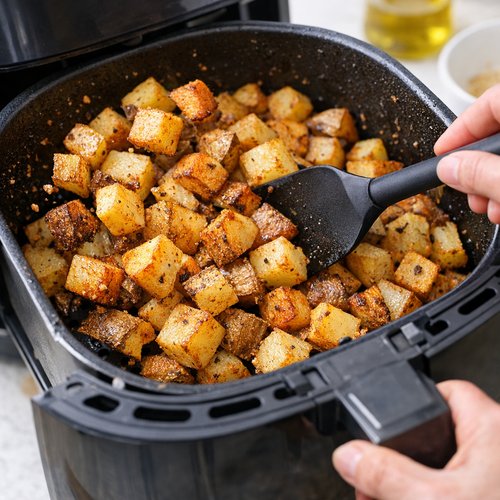
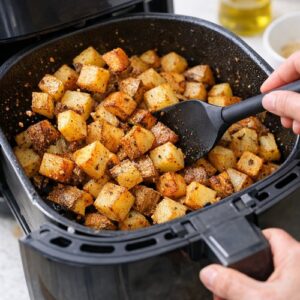
At the 7-8 minute mark, pull out the basket and give it a good shake or quick stir with a spatula. This is the key step that creates consistency across your entire batch. The pieces that were on top move to the bottom, ensuring everything gets equal exposure to the circulating hot air. This is also your chance to check for browning and adjust timing if needed (though 15 minutes is almost always perfect).
Step 6: Finish Until Golden
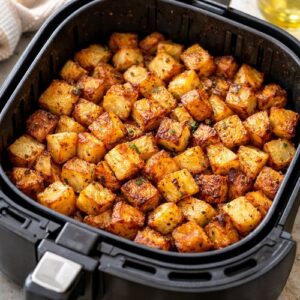
Return the basket to the air fryer for the final 7-8 minutes. When the timer goes off, you should see deep golden-brown color on most pieces with some darker edges. This is exactly what you want. If they’re still pale, add 2-3 more minutes. If they look charred (black spots everywhere), you went too far with temperature—lower it to 380°F next time.
Transfer them to a serving dish immediately. They’ll continue to crisp slightly as they cool. Taste one and adjust seasoning if needed—sometimes I add a tiny pinch of fleur de sel on top for extra flavor dimension.
Side-by-Side Results: What to Expect
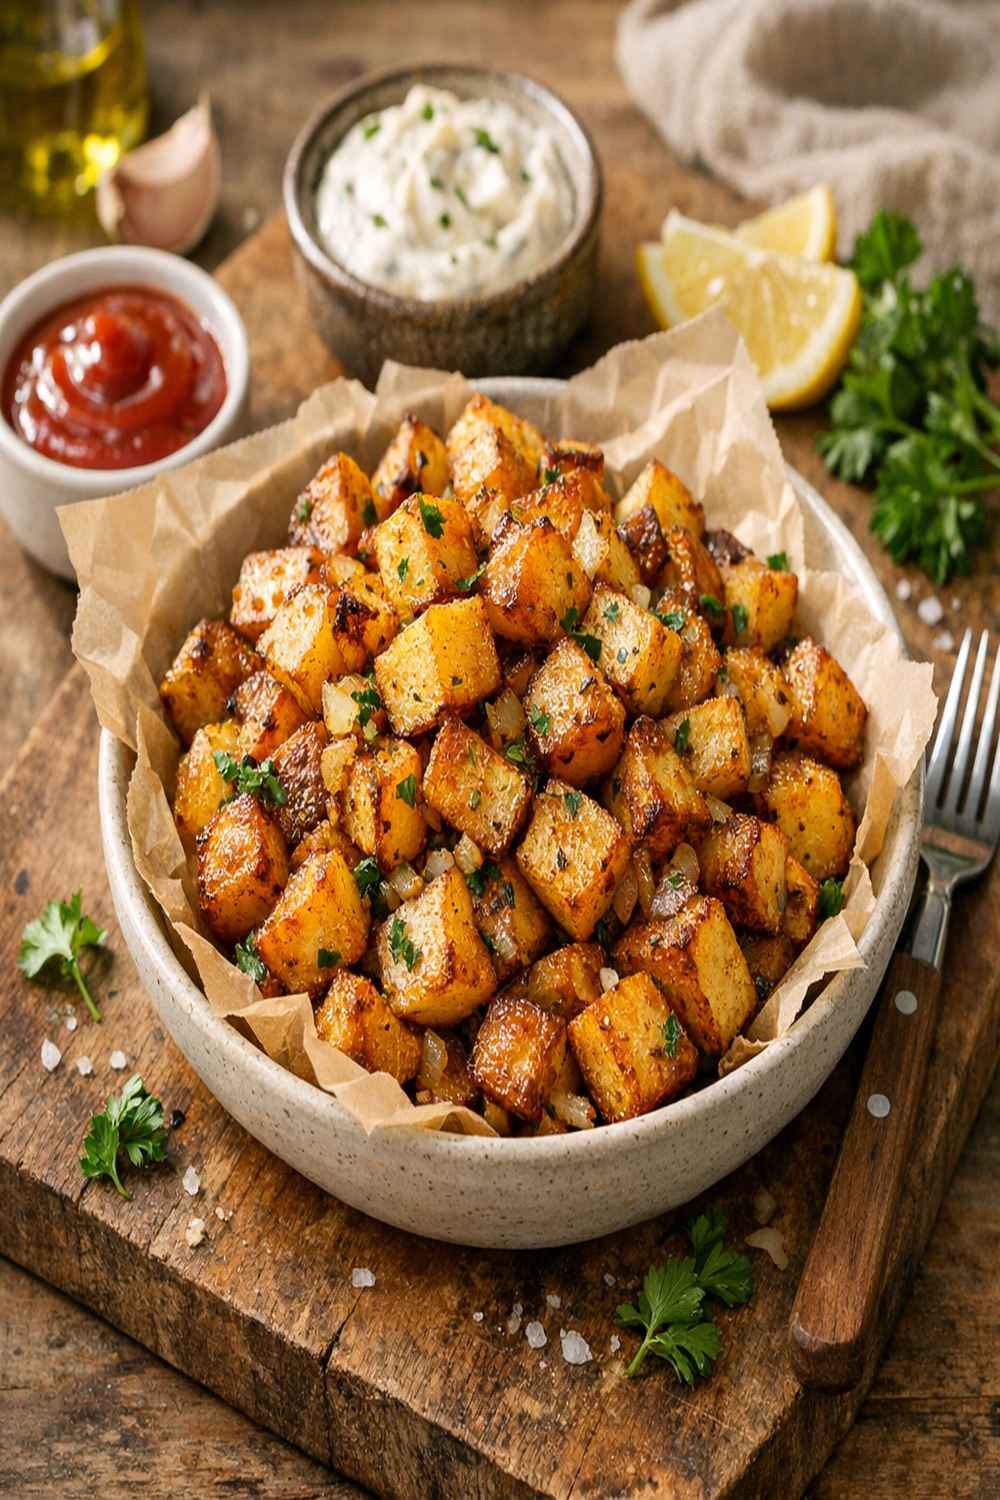
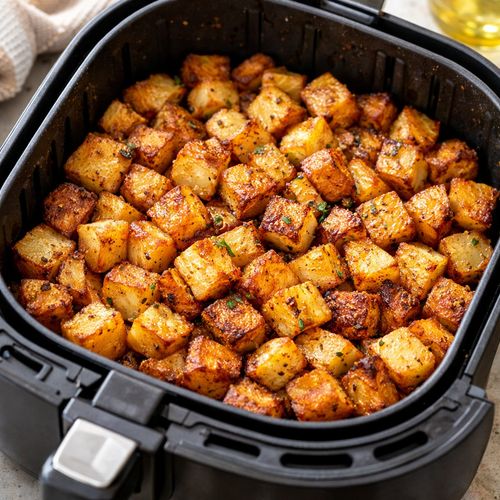
When you pull these out of the air fryer, you’ll notice a few things immediately. First, the color: deep, rich, golden-brown exterior with occasional darker caramelized edges. This is what potato perfection looks like, and it’s visually different from oven-baked fries, which tend toward pale golden or even beige.
Cut into one piece and look at the inside. You should see a fluffy, light yellow interior with no gray or gummy center. The texture contrast is remarkable—one bite gives you crispy exterior, then fluffy, tender inside. Compare this to stovetop fries, which often have a crust so thick you have to really chew, or oven-baked fries that are often uniformly soft throughout.
The flavor is savory and rich, with that subtle smokiness from the paprika and the herbaceous notes from the Italian seasoning. It tastes like someone spent real effort on these, even though you invested maybe 5 minutes of actual hands-on time. This is the kind of side dish that makes people think you’re a better cook than you probably are.
When to Use Each Method
- You’re cooking for 2-4 people and want to eat in 20 minutes — Air fryer wins. It’s the fastest and produces the best texture for smaller portions.
- You’re feeding a crowd of 8+ people and time isn’t critical — Conventional oven wins. You can spread fries across multiple sheet pans and bake simultaneously. Yes, it takes longer, but you can cook 3-4 times the quantity at once.
- You want that specific cast-iron sear and don’t mind standing at the stove — Stovetop skillet wins for texture preference, but only if you genuinely enjoy the hands-on cooking experience. This is more about cooking style than efficiency.
Can I Store Air Fryer Home Fries Recipe?
Refrigerator Storage: Cooked air fryer fries keep in an airtight container for up to 3 days. They’ll soften slightly as they absorb moisture from the air, but they remain edible. To restore crispness, reheat them in the air fryer at 350°F for 3-4 minutes.
Freezer Storage: You can freeze cooked fries for up to 2 months in a freezer-safe container. Freeze them in a single layer first (about 2 hours), then transfer to a bag to save space. Reheat directly from frozen in the air fryer at 375°F for 6-8 minutes.
Make-Ahead Guide: For meal prep, I recommend preparing the potatoes through Step 3 (cutting and seasoning) up to 8 hours ahead. Store them in a covered container in the refrigerator. When you’re ready to eat, simply transfer to your air fryer and proceed with Step 4. This cuts your actual cooking time down to just the 15-minute air fry step—perfect for busy mornings.
You can also prep raw potatoes in advance by cutting them and storing them in cold water in the refrigerator. This prevents oxidation (browning). Just drain and dry them thoroughly before seasoning and air frying.
Common Mistakes to Avoid
Mistake 1: Skipping the midway shake. If you don’t stir at the halfway point, your bottom pieces will be overcooked or burnt while the top pieces stay pale. This single step is what creates consistency. It takes 10 seconds and completely changes your results.
Mistake 2: Using wet potatoes. Any moisture on the surface prevents browning and creates steamed rather than fried texture. After washing, dry them thoroughly. After draining if you prepped them in water, dry them again. This matters more than any other single factor.
Mistake 3: Overcrowding the basket. I see this constantly in my consultations. People think they can pile fries higher to cook more at once. You can’t. They need that single layer for the hot air to circulate. Multiple batches take longer, but they’re worth it for quality.
Mistake 4: Using the wrong potato variety. Red potatoes, fingerlings, and new potatoes are delicious, but not for this recipe. They have too much moisture and create gummy centers. Save them for potato salad. Russets are non-negotiable here.
Seasonal Variations
Spring/Summer Version: Replace the Italian seasoning with fresh herbs—1 tablespoon fresh dill plus ½ tablespoon fresh tarragon. The bright, green flavors feel lighter during warm months. Finish with a squeeze of fresh lemon juice right before serving.
Fall/Winter Version: Add ½ teaspoon cayenne pepper and ¼ teaspoon dry mustard powder to the seasoning mix. Increase the smoked paprika to ¾ teaspoon. These warmer spices feel cozier and more substantial when weather turns cold. Serve with sour cream mixed with fresh chives.
Tex-Mex Version: Swap Italian seasoning for a combination of ½ teaspoon cumin, ½ teaspoon chili powder, and ½ teaspoon oregano. The smoked paprika stays. Finish with fresh cilantro and a lime wedge. This version pairs beautifully with breakfast tacos or eggs.
Nutrition Information
One serving (about ¾ cup of finished home fries) contains approximately 95 calories, 4g protein, 13g carbohydrates, 4g fat, and 1g fiber. This data is based on USDA nutrition database values for russet potatoes with olive oil, accounting for typical consumption portions.
These home fries are naturally gluten-free and vegan-friendly (if that matters for your dietary needs). The resistant starch content I mentioned earlier adds to the satiety factor—meaning these fries actually keep you fuller longer than regular fried potatoes, despite being lower in calories than traditional French fries.
One professional note: the olive oil here isn’t wasted calories. It’s essential fat that helps absorb fat-soluble vitamins like vitamin K and provides heart-healthy monounsaturated fatty acids. Compared to my stovetop skillet method which can use 50 percent more oil, this recipe is actually the lighter option while delivering superior results.
What Can I Serve With Air Fryer Home Fries Recipe?
These fries are incredibly versatile—they work alongside almost any breakfast or brunch dish, plus several dinner options. I love them as part of a complete breakfast plate with eggs and toast, but they’re equally at home as a side for burgers, sandwiches, or grilled proteins.
- Classic Breakfast Pairing: Serve alongside scrambled eggs, turkey sausage, and whole grain toast. If you want an alternative to regular tortillas, my Almond Flour Tortillas Recipe makes an excellent lower-carb wrapper option for breakfast burritos.
- Brunch Spread: Arrange on a platter with smoked salmon, Greek yogurt mixed with fresh dill, capers, and thinly sliced red onion. Serve with fresh fruit on the side.
- Dinner Side Dish: Pair with grilled chicken breast, fish, or lean beef. The seasoning here is herbaceous enough to complement almost any protein without competing for flavor.
- Dipping Situation: Set out small bowls of sour cream, whole grain mustard, and sriracha mayo. Let people customize their experience. This is especially fun for family-style dinners.
- Loaded Version: Once cooked, toss with crumbled feta cheese, fresh parsley, and a touch more olive oil. This transforms them into a more substantial side that stands alone.

Air Fryer Home Fries Recipe
Ingredients
Method
- Start with 3-4 medium russet potatoes (about 1.5 pounds total). Russets are your secret weapon here—they have lower moisture and higher starch content than other varieties, which is exactly what creates that crispy-on-the-outside, fluffy-inside texture. Don't use red potatoes or fingerlings; they're too waxy and will steam rather than fry. Scrub them under cold running water to remove surface dirt, but don't peel them yet. The skin stays on—it adds nutrition, texture, and helps hold the pieces together during cooking. Once they're clean, pat them completely dry with a kitchen towel. Any excess moisture will turn to steam and prevent crisping.
- Now peel the potatoes using a vegetable peeler or sharp paring knife. Cut them into ½-inch cubes—this is the critical measurement. Smaller pieces cook too fast and can burn at the edges while staying soft inside. Larger pieces don't crisp properly in 15 minutes. Aim for consistency; use a ruler the first time if you need to, until you develop the eye for it. Place all your cut potatoes in a large mixing bowl as you work. Don't let them sit too long—they'll start to oxidize and turn grayish. If you must prep ahead, submerge them in cold water and store in the refrigerator for up to 8 hours, then drain and dry completely before seasoning.
- This is where most home cooks make their first mistake. Pour the 2 tablespoons of olive oil directly over the potatoes. Sprinkle on the Italian seasoning, smoked paprika, salt, and pepper. Using your hands (clean hands work best here), toss everything together for about one full minute. Every single cube should have a light coating of oil and seasoning. If some potatoes look dry or uncoated, add another half tablespoon of olive oil. The oil serves double duty: it helps seasoning stick and is essential for that golden crust. Too little oil and you'll get pale, dry fries. Too much and they'll be greasy.
- Pour your seasoned potatoes into your air fryer basket in a single, even layer. This is non-negotiable. If they're piled on top of each other, the bottom pieces will steam while the top pieces burn. If your air fryer is smaller, you may need to work in batches—that's fine. One batch takes 15 minutes, so two batches takes 30 minutes plus the few seconds to shake and reset. Set your air fryer to 400°F (204°C). Set the timer for 15 minutes. There's no preheating step needed—most modern air fryers are ready to go immediately.
- At the 7-8 minute mark, pull out the basket and give it a good shake or quick stir with a spatula. This is the key step that creates consistency across your entire batch. The pieces that were on top move to the bottom, ensuring everything gets equal exposure to the circulating hot air. This is also your chance to check for browning and adjust timing if needed (though 15 minutes is almost always perfect).
- Return the basket to the air fryer for the final 7-8 minutes. When the timer goes off, you should see deep golden-brown color on most pieces with some darker edges. This is exactly what you want. If they're still pale, add 2-3 more minutes. If they look charred (black spots everywhere), you went too far with temperature—lower it to 380°F next time. Transfer them to a serving dish immediately. They'll continue to crisp slightly as they cool. Taste one and adjust seasoning if needed—sometimes I add a tiny pinch of fleur de sel on top for extra flavor dimension.
FAQs
Can I make these fries without peeling the potatoes?
Absolutely. Keeping the skin on adds fiber, nutrients, and texture. If you choose to leave the skin on, just scrub the potatoes well under cold running water and cut them the same way. The skin will stay on during cooking and create an interesting textured bite. Some people prefer this version because it’s less work and more nutritious. The only downside: the skin can occasionally be a bit chewy depending on potato age, and it changes the visual presentation slightly. Both peeled and unpeeled versions work beautifully—it’s purely a preference thing.
How does the air fryer method compare texture-wise to deep frying?
Honestly, deep fried potatoes are crisper because they’re completely submerged in oil. Air fryer fries won’t achieve that exact same level of crispness. However, they come remarkably close while using a fraction of the oil and without the mess, smell, and safety concerns of deep frying. I’ve served these to people expecting deep-fried fries and they’ve been genuinely surprised and pleased. The 85 percent reduction in oil content is worth the tiny texture compromise.
What if my air fryer is smaller and I can only cook one batch?
Work in batches. Cook the first batch, transfer to a plate, and start the second batch immediately. The cooked batch will stay warm for 10-15 minutes if covered loosely with foil. Or, if timing is important, start your second batch as soon as the first finishes so both batches are hot and ready at nearly the same time. Many people actually prefer cooking in batches because they can give each batch full attention and ensure perfect results.
Can I use frozen potatoes to save time?
Yes, you can use frozen home fries if you’re truly short on time. However, I don’t recommend this for my recipe because you lose control over the cut size and seasoning application. Store-bought frozen fries are often pre-oiled and pre-seasoned, which means you’ll end up with different flavor results. If you do use them, add maybe 2-3 minutes to the cooking time since they’ll start from a cold temperature, and skip your own oil and seasoning.
Is there a way to make these even crispier?
Two adjustments: First, bump the temperature up to 415°F, but watch closely during the second half—they’ll brown faster and you don’t want charring. Second, after the first 7 minutes, carefully spray the fries very lightly with cooking spray or brush with a touch more olive oil before the final 8 minutes. This extra fat helps browning. The tradeoff is slightly higher calories, but the texture becomes almost restaurant-level crispy.
More Recipes You’ll Love
- Airfryer Steak Recipe — perfectly seared steak using the same air fryer technique that makes these fries incredible
- Air Popped Corn Recipes — another air fryer favorite that creates crispy texture with minimal oil
- Almond Flour Banana Nut Bread Recipe — a nutritious side for breakfast pairing
This air fryer home fries recipe is legitimately the best method I’ve found after years of testing and feeding people in my own kitchen. It combines the speed of modern cooking technology with the nostalgic, soulful flavors that remind me of Sunday breakfasts at my grandmother’s table. The crispy exterior, fluffy interior, and effortless preparation make this something you’ll return to again and again.
Whether you’re cooking for yourself on a Tuesday morning or feeding a group for brunch, these fries deliver. They’re nutritious enough for a regular part of your routine but indulgent-tasting enough that people feel genuinely special eating them. That’s the goal with all my recipes—feeding people in a way that nourishes both body and soul.
Enjoy your cooking journey!