This post contains affiliate links. As an Amazon Associate I earn from qualifying purchases.
If you’ve always wanted to make air fryer shrimp but felt intimidated, this is your starting point. I promise you—if I can master this recipe, so can you. My grandmother taught me that the most impressive dishes are often the simplest ones, and this shrimp is proof of that. It comes together in under 15 minutes, requires minimal ingredients, and tastes like you spent hours in the kitchen. Whether you’re preparing a weeknight dinner or impressing guests, this recipe delivers every single time. And because I’m a registered dietitian, I can tell you that what you’re making is genuinely good for your body too.
How to Make Air Fryer Shrimp for the First Time (You’ve Got This)
My first attempt at making shrimp at home was a disaster. I grew up watching my mother and grandmother prepare seafood for our family gatherings in Texas, but I was terrified to try it myself. When I finally decided to use my air fryer—a tool I was still learning myself—I was convinced I’d overcook the shrimp into rubber. What I discovered instead was that shrimp is actually one of the most forgiving proteins you can cook. It cooks quickly, seasons beautifully, and has an elegance that belies how simple it truly is. That first batch? It was perfect. And yours will be too.
What to Expect Before You Start
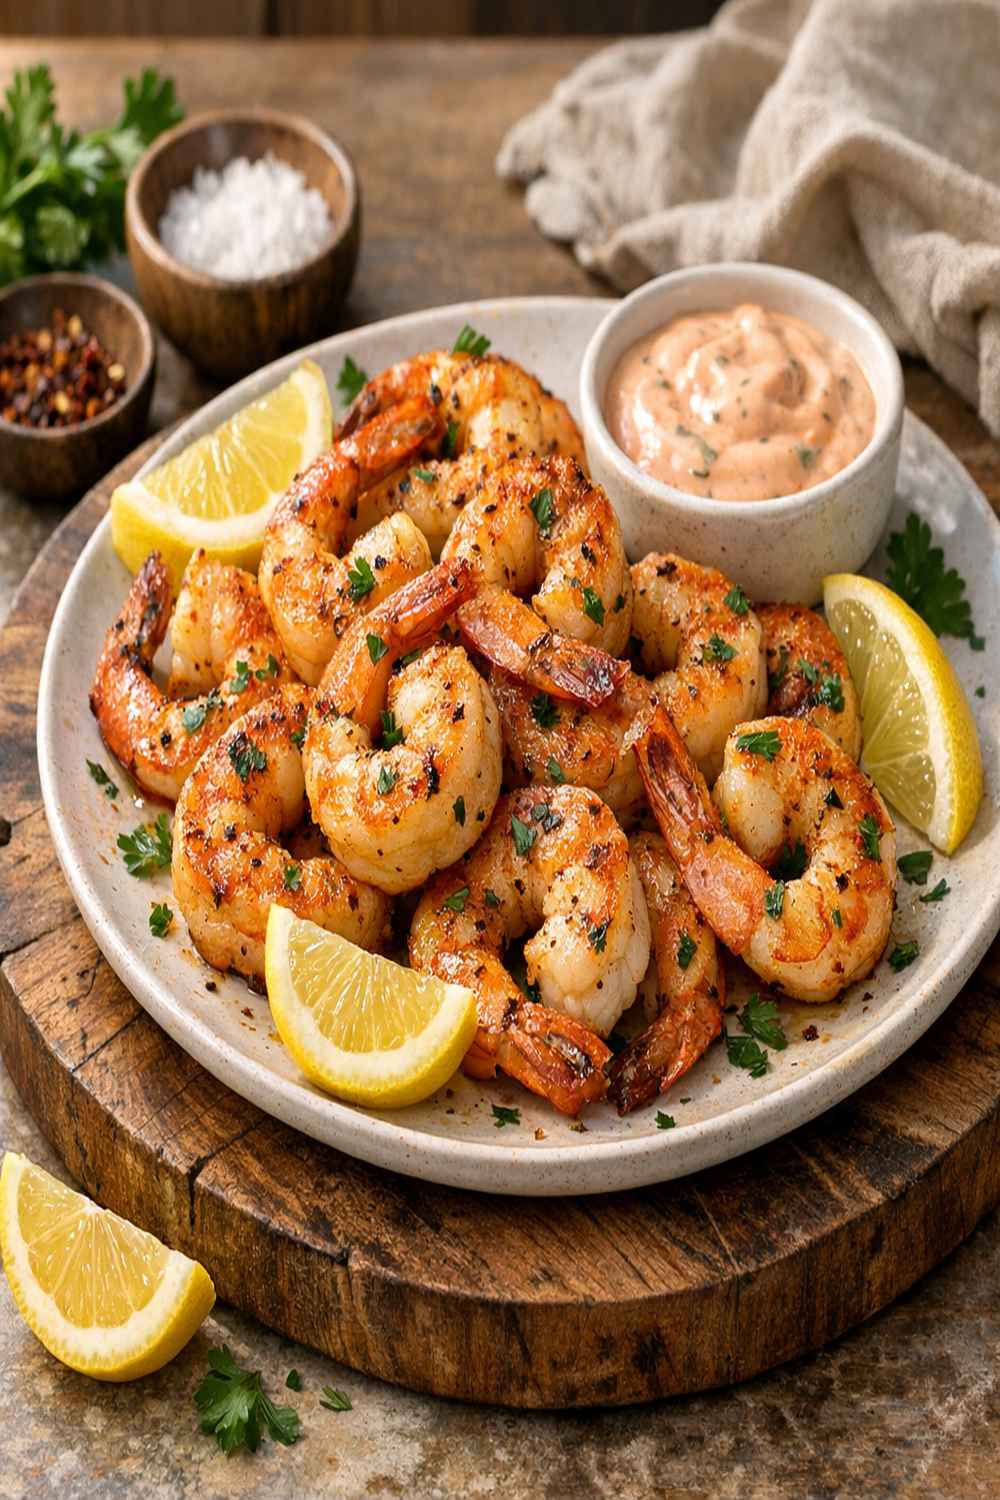
This recipe takes about 15 minutes from start to table, with just 5 minutes of actual hands-on work. The air fryer does almost all the heavy lifting, which is exactly why beginners love this dish. You’ll need one mixing bowl, one measuring spoon, and your air fryer. That’s it. Success looks like shrimp that’s opaque throughout, lightly golden on the edges, and bursting with lemon and garlic flavor when you bite into it.
- The cooking itself is incredibly forgiving – shrimp is small, cooks fast, and won’t dry out in the few minutes it takes to cook. You’re not managing a delicate timing window here; you’ve got a comfortable margin for success.
- You won’t need fancy equipment or special skills – the air fryer’s circulating heat does exactly what we want: creates a light exterior while keeping the inside tender. No special techniques required, and your fear of “what if I mess up” is unfounded because these little swimmers are nearly impossible to ruin.
Equipment You’ll Need (And What You Can Skip)
I love that this recipe doesn’t require a kitchen full of gadgets. You have everything you need already, and I mean that sincerely. Here’s the real list of what matters:
- An air fryer basket – this is your workhorse. Any brand works; you don’t need the fanciest model. Budget-friendly options work just as well as premium ones for this recipe.
- One mixing bowl – medium-sized is perfect. Glass or ceramic works beautifully, and honestly, even a large coffee mug will do in a pinch.
- One measuring spoon set – you’ll use these for your seasonings. If you don’t have them, I trust your instincts to eyeball; just be conservative with salt.
- Paper towels – optional but helpful for patting your shrimp dry, which helps them crisp up nicely in the air fryer.
The Ingredients – A Beginner’s Shopping Guide
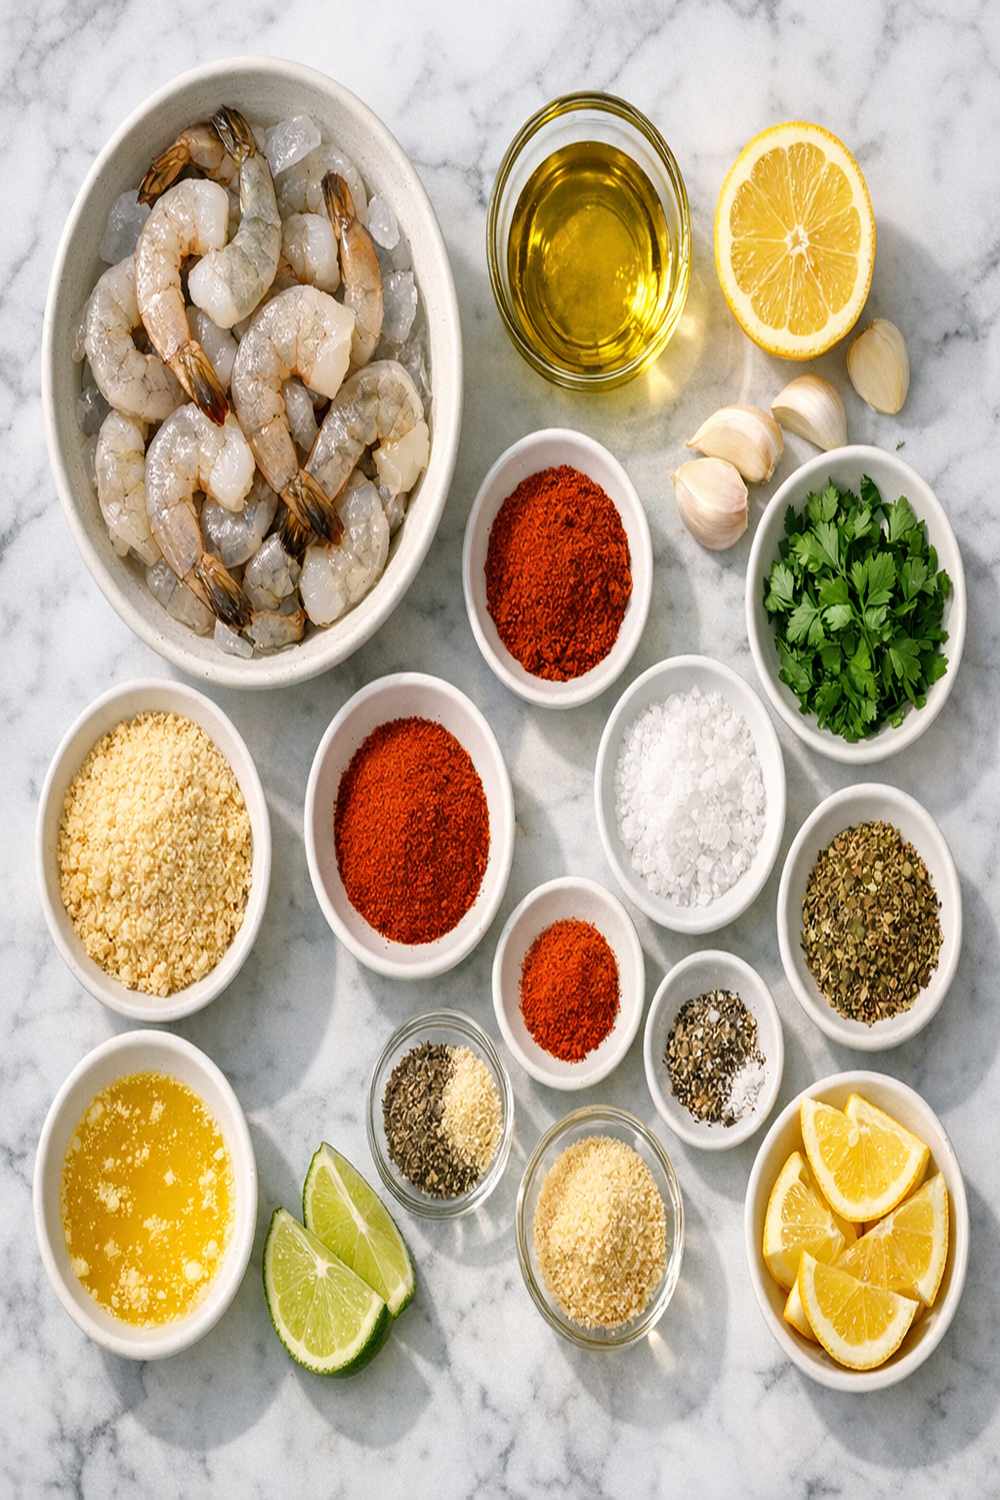
Shopping for these ingredients is straightforward, and I want to walk you through exactly what to look for. These are pantry staples you probably already have at home, which is part of why I love this recipe. When you do need to buy shrimp, that’s your only fresh ingredient, and I’ll tell you exactly what to look for.
- ½ teaspoon smoked paprika (this gives a subtle depth and gentle smokiness; find it near other spices, and yes, the “smoked” designation matters here)
- ½ teaspoon freshly ground black pepper (pre-ground is fine, but freshly cracked tastes noticeably better)
- ½ tablespoon fresh lemon juice (one fresh lemon yields about this amount; bottled works in a pinch, but fresh tastes brighter)
- 1 pound large or extra-large shrimp (buy them frozen and thaw in the refrigerator overnight, or ask your seafood counter for fresh; they should smell like the ocean, not “fishy,” and have a slight translucent appearance)
- ½ teaspoon fine sea salt (regular table salt works too, though it dissolves more quickly and tastes slightly sharper)
- 1 clove fresh garlic, minced (or ¼ teaspoon additional garlic powder if you want to skip fresh; fresh garlic adds brightness the powder can’t replicate)
- 1 tablespoon extra virgin olive oil (look for a bottle that’s dark-colored to protect the oil from light damage; find this in any grocery store’s oil section)
- 1 teaspoon Italian seasoning (a blend of dried herbs like oregano, basil, and thyme; any brand in your spice section works perfectly)
- ¼ teaspoon cayenne pepper (optional but adds a gentle warmth; start with less if you’re sensitive to heat)
- ½ teaspoon garlic powder (not garlic salt; look for pure garlic powder in the spice aisle)
Step-by-Step: Your First Air Fryer Shrimp
Here we go—the moment where you realize this is actually simple. I’m going to walk you through each step like you’ve never cooked shrimp before, because that’s exactly who I’m writing this for. You’ve got this, and I’ll be with you every step of the way.
Step 1: Prepare Your Shrimp Properly
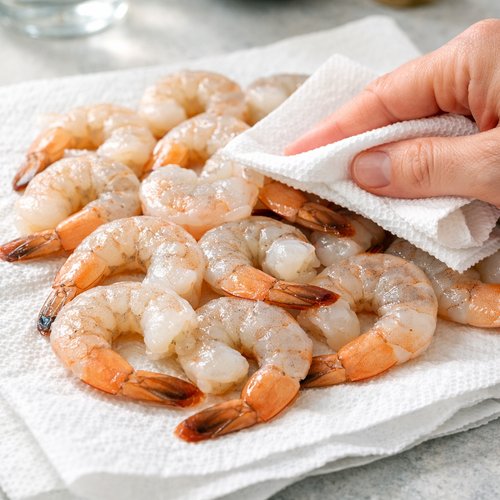
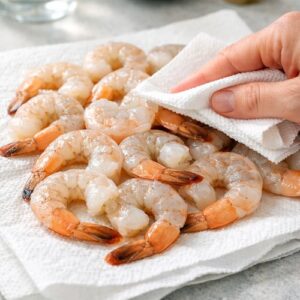
Take your pound of shrimp and lay them on a clean paper towel or kitchen cloth. This is your first success point: patting them completely dry. Wet shrimp will steam in the air fryer instead of crisping, and we want that beautiful golden exterior. Don’t be shy here—use a fresh paper towel and press gently all over each shrimp. You’re removing surface moisture, not bruising them. This takes about 2 minutes and changes everything about your final result. When they feel dry to the touch, you’re ready to move forward.
Step 2: Mix Your Seasoning Blend
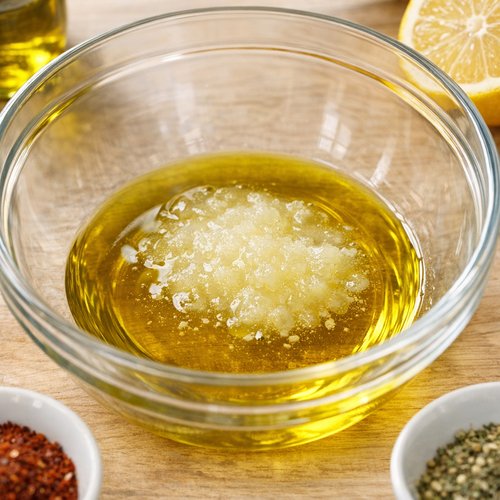
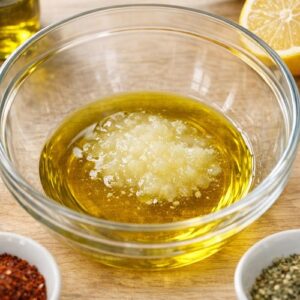
Grab your medium mixing bowl and add the olive oil first. Then add your lemon juice directly into the oil—don’t be alarmed if they don’t mix completely at first; that’s perfectly normal and exactly what you want. Now, measure out your salt, pepper, garlic powder, smoked paprika, and Italian seasoning. Add the minced fresh garlic too. Whisk everything together until it looks like a wet, fragrant paste. This should take about 30 seconds of vigorous stirring. Your mixture should smell absolutely wonderful—lemony, garlicky, with that smoky warmth underneath. That’s how you know your seasoning blend is balanced correctly.
Step 3: Coat the Shrimp Evenly
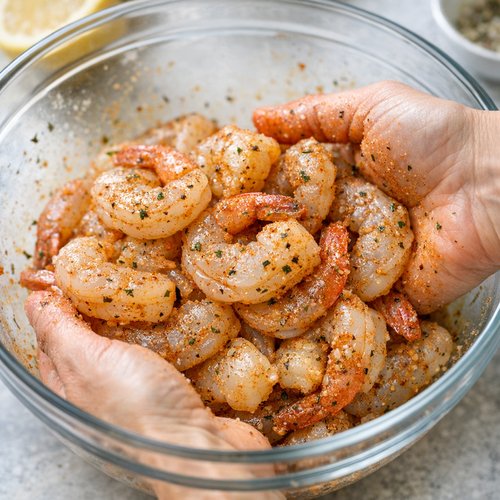
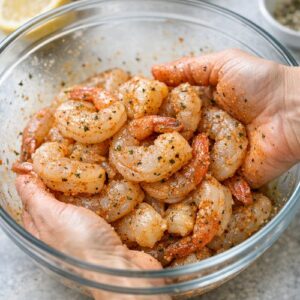
Add your dried shrimp to the mixing bowl with your seasoning blend. Using a spoon or your clean hands (I prefer hands for this), toss the shrimp gently but thoroughly until every piece is coated with the oil and seasonings. This should take about 1 minute of tossing. You’ll notice the shrimp starting to glisten and smell incredible. Every shrimp should have a thin, even coating—not swimming in liquid, just kissed with flavor. If you have extra oil pooling at the bottom of the bowl, that’s fine; just make sure your shrimp gets the seasoning first.
Step 4: Arrange in Your Air Fryer
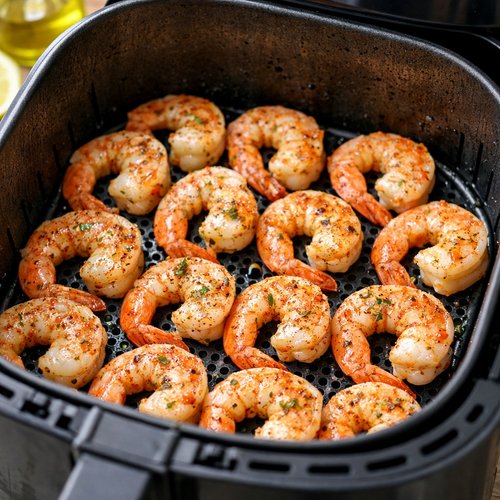
Preheat your air fryer to 400°F. While it’s heating (about 3 minutes), arrange your seasoned shrimp in a single layer in your air fryer basket. This is important: they shouldn’t be stacked or crowded. Shrimp cook from all sides when air can circulate around them. If your basket feels crowded, cook in two batches rather than piling them up. They cook so quickly that a second batch takes mere minutes.
Step 5: Cook Until Perfect
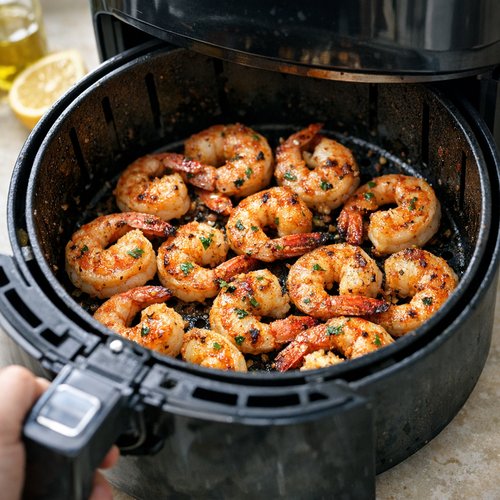
Place your basket in the preheated air fryer and set the timer for 7 to 8 minutes. Don’t walk away completely—check them at the 6-minute mark. This is where your experience starts building. You’ll see them turn from grayish-blue to opaque white and slightly pink. The edges should begin showing a gentle golden color. At 7 minutes, they should be ready. If they’re still slightly translucent in the very center, give them one more minute. But honestly, at 7 minutes, you’re almost certainly done.
Step 6: Serve Immediately
When the timer sounds, carefully remove your basket from the air fryer (it’s hot!). Serve the shrimp immediately while they’re still warm. This is when they’re at their most tender and flavorful. Leftover shrimp will still taste good cold, but the texture changes, so fresh is definitely your best bet here. Scoop them onto a serving plate and enjoy within minutes of finishing.
How to Tell If You Did It Right
Success in cooking is recognizable if you know what to look for. Let me tell you exactly what perfect air fryer shrimp looks and feels like at every stage:
- After drying: smooth, matte appearance with no visible moisture – they should feel dry to the touch, not slippery. This ensures they’ll crisp properly in the air fryer.
- After seasoning: every shrimp visibly coated with the oil mixture – you shouldn’t see any white shrimp peeking through; they should all be kissed with the golden oil and spices.
- When done cooking: opaque white throughout, with slight golden edges – cut one open to check if you’re unsure. The inside should be white, not translucent or gray. Smell matters too—it should smell absolutely delicious and lemony.
- Texture when you bite: tender but slightly firm, not mushy or rubbery – they should have a gentle bounce to them. If they’re chewy or tough, you’ve overcooked them slightly (though honestly, with this quick cooking time, that’s hard to do).
What Went Wrong? Beginner Fixes
I want you to feel confident, so let me address the things that might not turn out perfectly on your first try—and how to handle them:
- Shrimp came out tough or chewy – this usually means they cooked a minute or two too long. Shrimp are small and cook fast, so they can go from perfectly tender to slightly overcooked quickly. Next time, start checking at 6 minutes instead of 7. Even 30 seconds matters with such a small protein. The good news? They’re still edible and delicious.
- Shrimp are still partially gray or translucent in the center – they need another 1-2 minutes. Pop them back in and check again. This is easier to fix than overcooking, so don’t worry. Just give them a bit more time.
- Seasoning tastes too salty – you probably added a full teaspoon of salt instead of half. Next time, measure carefully. Salt is forgiving in most dishes, but shrimp is small enough that a little goes a long way. Start with less and taste as you go.
- Shrimp didn’t crisp up; they’re steamed instead – they weren’t dried well enough before cooking. That’s your biggest takeaway here. Moisture is the enemy of crispiness. Dry them thoroughly with paper towels next time, and you’ll see the difference immediately.
Your Next Steps After Mastering This
Once you’ve made this recipe a couple of times, you’re building real kitchen skills. You’ve learned how to properly prepare a delicate protein, how to balance seasonings with acid (that lemon juice), and how to use an air fryer confidently. These skills transfer beautifully to other proteins too. Next, try using the same seasoning blend with white fish like cod or tilapia—those cook at the same temperature and similar timeframe. You could also experiment with Airfryer Steak Recipe, which teaches you how to handle a heartier protein with confidence. From there, the whole world of air fryer cooking opens up, and you’ll be inventing your own variations without hesitation.
Can I Store Air Fryer Shrimp?
Yes, and I’ll give you the practical details. Cooked shrimp keeps in an airtight container in the refrigerator for up to 3 days. They’re best eaten fresh and warm, but they’re honestly delicious cold too—toss them into a salad, add them to pasta the next day, or eat them straight from the fridge as a protein-rich snack. For longer storage, freeze them in an airtight freezer bag for up to 3 months, though the texture becomes slightly less tender once thawed. If you’re meal prepping, I recommend cooking them fresh rather than freezing, since they cook in such minimal time that having them prepped ahead isn’t necessary.
Expert’s Nutritional Insight
As a registered dietitian, I want you to understand why shrimp is such a nutritional powerhouse. A serving of this recipe gives you lean protein without the saturated fat of beef or chicken thighs. The omega-3 fatty acids in shrimp support heart and brain health, and they’re anti-inflammatory—something my grandmother’s generation understood intuitively even if they didn’t know the science. The lemon juice adds vitamin C, which helps your body absorb the iron in shrimp more efficiently. This isn’t just delicious comfort food; it’s genuinely nourishing food. The olive oil and smoked paprika add antioxidants too. Every component here was chosen not just for flavor but for how it fuels your body.
Make-Ahead Guide
I know you’re busy, so let me give you the meal prep strategy. You can prepare your seasoning blend up to 3 days ahead—make a double or triple batch and store it in a small glass jar in your pantry. When you’re ready to cook, just grab your shrimp, pat them dry, toss them with your pre-made blend, and cook. This cuts your actual cooking time to under 10 minutes. Alternatively, you can season your shrimp up to 2 hours before cooking, cover them, and refrigerate them. They’ll develop even more flavor this way. Don’t season them more than 2 hours ahead though, as the salt will start drawing moisture from the shrimp, making them watery rather than crispy. This is a trade-off to understand: maximum flavor development versus maximum crispiness. For beginners, I recommend cooking within 30 minutes of seasoning to nail both.
Nutrition Information
Per serving (assuming 4 servings from 1 pound of shrimp): 120 calories, 18g protein, 5g fat, 0g carbohydrates, 0g fiber, 450mg sodium, 85mg cholesterol. Based on USDA data, this is a genuinely lean protein source. The 18g of protein per serving supports muscle maintenance and keeps you full longer, making this perfect for lunch or a light dinner. The 5g of fat comes entirely from the olive oil and the shrimp’s natural omega-3 content, so it’s the kind of fat your body actually benefits from. If you’re watching sodium, remember that the salt in this recipe is minimal—about 200mg per serving of added salt—which leaves room for you to add more if you wish or stay conservative if you’re managing blood pressure.
Seasonal Variations
This recipe is beautiful in its simplicity, but you can adapt it throughout the year. In spring and summer, add fresh dill instead of (or alongside) the Italian seasoning, and use fresh lime juice instead of lemon for brightness. In fall and winter, swap the lemon for lime and add a tiny pinch of cumin along with the smoked paprika for warmth. Add minced fresh cilantro just before serving in cooler months for an unexpected twist. Year-round variation: if you love Tex-Mex flavors like I do, replace the Italian seasoning with chili powder and cumin, use lime instead of lemon, and serve with a squeeze of jalapeño. The foundation stays the same, but these little adjustments keep the recipe feeling fresh and seasonal.
What Can I Serve With Air Fryer Shrimp?
The beauty of this shrimp is that it’s versatile enough to fit into almost any meal you’re imagining. It’s elegant enough for date night but casual enough for weeknight dinners. Here are my favorite pairings, built from years of watching my mother and grandmother serve seafood at our family table:
- Over a fresh green salad – the warm shrimp wilts the greens slightly and the lemon dressing works beautifully. Add cucumber, tomato, and red onion for crunch.
- With roasted vegetables – try Sheet Pan Roasted Carrots on the side for sweetness and earthiness that contrasts the briny shrimp perfectly.
- In a light pasta dish – toss with angel hair pasta, a touch of olive oil, fresh garlic, and a handful of fresh parsley. The shrimp’s seasoning carries the entire dish.
- With cauliflower rice – keeps it light and low-carb while giving you a canvas for the shrimp’s beautiful flavors to shine.
- Wrapped in lettuce cups – use butter lettuce or romaine leaves, add shrimp, a drizzle of the seasoning oil left in your bowl, and fresh herbs.
- Alongside Spanish rice – this is peak comfort for me, reminiscent of my grandmother’s gatherings. The shrimp’s brightness plays beautifully against rice’s warmth.

Air Fryer Shrimp Recipe
Ingredients
Method
- Take your pound of shrimp and lay them on a clean paper towel or kitchen cloth. This is your first success point: patting them completely dry. Wet shrimp will steam in the air fryer instead of crisping, and we want that beautiful golden exterior. Don't be shy here—use a fresh paper towel and press gently all over each shrimp. You're removing surface moisture, not bruising them. This takes about 2 minutes and changes everything about your final result. When they feel dry to the touch, you're ready to move forward.
- Grab your medium mixing bowl and add the olive oil first. Then add your lemon juice directly into the oil—don't be alarmed if they don't mix completely at first; that's perfectly normal and exactly what you want. Now, measure out your salt, pepper, garlic powder, smoked paprika, and Italian seasoning. Add the minced fresh garlic too. Whisk everything together until it looks like a wet, fragrant paste. This should take about 30 seconds of vigorous stirring. Your mixture should smell absolutely wonderful—lemony, garlicky, with that smoky warmth underneath. That's how you know your seasoning blend is balanced correctly.
- Add your dried shrimp to the mixing bowl with your seasoning blend. Using a spoon or your clean hands (I prefer hands for this), toss the shrimp gently but thoroughly until every piece is coated with the oil and seasonings. This should take about 1 minute of tossing. You'll notice the shrimp starting to glisten and smell incredible. Every shrimp should have a thin, even coating—not swimming in liquid, just kissed with flavor. If you have extra oil pooling at the bottom of the bowl, that's fine; just make sure your shrimp gets the seasoning first.
- Preheat your air fryer to 400°F. While it's heating (about 3 minutes), arrange your seasoned shrimp in a single layer in your air fryer basket. This is important: they shouldn't be stacked or crowded. Shrimp cook from all sides when air can circulate around them. If your basket feels crowded, cook in two batches rather than piling them up. They cook so quickly that a second batch takes mere minutes.
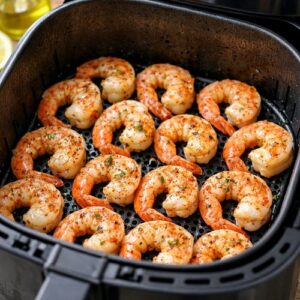
- Place your basket in the preheated air fryer and set the timer for 7 to 8 minutes. Don't walk away completely—check them at the 6-minute mark. This is where your experience starts building. You'll see them turn from grayish-blue to opaque white and slightly pink. The edges should begin showing a gentle golden color. At 7 minutes, they should be ready. If they're still slightly translucent in the very center, give them one more minute. But honestly, at 7 minutes, you're almost certainly done.
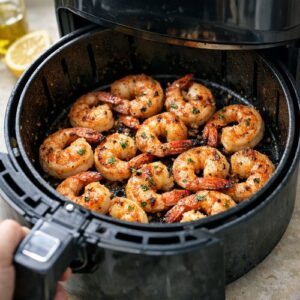
- When the timer sounds, carefully remove your basket from the air fryer (it's hot!). Serve the shrimp immediately while they're still warm. This is when they're at their most tender and flavorful. Leftover shrimp will still taste good cold, but the texture changes, so fresh is definitely your best bet here. Scoop them onto a serving plate and enjoy within minutes of finishing.
Notes
FAQs
Can I use frozen shrimp, or do they have to be fresh?
Frozen shrimp are actually my preference, and here’s why. Quality frozen shrimp are flash-frozen at peak freshness, often fresher than what you find labeled “fresh” at the grocery store. Thaw them in the refrigerator overnight before cooking, and they’ll perform identically to fresh shrimp. If you’re in a time crunch, you can thaw them in cold water for about 30 minutes, but never use hot water, as it cooks the outside unevenly. Pat them completely dry before seasoning—this is even more important with thawed frozen shrimp, as they tend to hold extra water.
What size shrimp works best for this recipe?
Large or extra-large shrimp work perfectly here. They cook evenly, stay tender, and are easy to handle. Medium shrimp work too but will cook slightly faster—start checking at 5 minutes instead of 6. Jumbo shrimp are beautiful but can take 8-9 minutes. Smaller shrimp (like popcorn shrimp) cook very quickly and can easily overcook, so I’d recommend sticking with large or extra-large for a beginner.
Can I make this recipe without an air fryer?
Absolutely. You have a few options: (1) Use a traditional oven at 400°F for 8-10 minutes on a baking sheet, (2) Pan-sear them on medium-high heat in a skillet with a touch of olive oil for about 2-3 minutes per side, or (3) Broil them on high for 4-5 minutes. The air fryer method is fastest and most hands-off, but shrimp is so quick-cooking that any of these methods work beautifully. The pan-sear method is probably my second favorite because you can build a pan sauce while the shrimp rest.
What if I don’t like smoked paprika—can I leave it out?
Yes, you can absolutely omit it or replace it with regular paprika if you want gentler flavor. Or skip paprika entirely and add ¼ teaspoon of cayenne pepper for warmth instead. The smoked paprika adds a subtle smokiness that I adore, but it’s not essential to the recipe’s success. Taste matters, and if something doesn’t appeal to you, your version is the right version.
Can I double this recipe?
Yes, but here’s the key: cook in two batches rather than crowding your air fryer basket. Two pounds of shrimp in a single basket will steam instead of crisp up. By cooking in two batches (about 7-8 minutes each), you’ll get perfect results. It seems like extra work, but it’s honestly only 15-20 minutes total cooking time, and you’ll achieve better texture and flavor.
How do I know if shrimp is cooked all the way through?
The color change is your first clue—gray-blue to opaque white and slightly pink. But the most reliable way is to cut the thickest shrimp in half and look at the center. It should be white throughout, with no gray or translucent areas remaining. Once you’ve made this a couple times, you’ll be able to tell by touch too; cooked shrimp feels firmer than raw shrimp. Undercooked shrimp is unsafe to eat, but overcooked shrimp is still delicious—just slightly less tender. When in doubt, cook 30 seconds longer.
More Beginner-Friendly Recipes
- Almond Flour Tortillas Recipe – Perfect for serving alongside your shrimp or using as a wrap.
- Almond Butter Recipe – Learn foundational cooking skills with another quick, hands-on recipe.
- Air Popped Corn Recipes – More air fryer mastery to expand your confidence with this kitchen tool.
You did it. You made air fryer shrimp, and I’m genuinely proud of you for trying something new. That first bite—when you realized it came out perfectly seasoned, tender, and absolutely delicious—that’s the moment everything clicks. This is the beginning of cooking with confidence, the moment when recipes stop feeling intimidating and start feeling like possibilities. My grandmother would tell you that the best meals are made with love and a willingness to try, and you’ve just done both. Keep this recipe in your rotation. Make it for someone you love. Experiment with the seasoning variations. And most importantly, trust yourself in the kitchen from here on out. Enjoy your cooking journey!