Every summer, my backyard transforms into a lively gathering spot, filled with the tantalizing scent of grilled veggies and the cheerful chatter of friends and family. Nothing completes these cozy evenings like a homemade pizza—crusty on the outside but soft and pillowy on the inside, generously topped with fresh ingredients. That’s why I’m excited to share my go-to recipe for 2-recipe pizza dough, bringing the pizzeria experience right into your kitchen.

Let’s take a moment to appreciate pizza, that universally adored dish. It’s a canvas for creativity, customizable for every dietary preference and personal taste. Whether you’re a meat lover, a veggie enthusiast, or somewhere in between, a well-crafted pizza crust can elevate any topping into something truly special. Best of all, you don’t need complex techniques to whip up a fantastic dough.
You Might Also Like These Recipes!
Slow Cooker Ranch Mushrooms Recipe
Ultra Creamy Crockpot Mac and Cheese Recipe
French Onion Baked Chicken Recipe
What is 2 Recipe Pizza Dough?
The 2 recipe pizza dough is a simple and approachable way to whip up fresh pizza at home. With just two main ingredients—self-rising flour and Greek yogurt—you can create a dough that’s not just quick to make but also allows for endless possibilities in terms of toppings and flavors. It’s a straightforward method that any home cook can master!
Why You’ll Love this 2 Recipe Pizza Dough?
You’ll adore this pizza dough for its speed and simplicity. It’s ready in under 30 minutes, perfect for those spontaneous pizza nights. Plus, using Greek yogurt gives the dough a protein boost, keeping it both wholesome and tasty. And if you’re like me and often find yourself short on time or ingredients, this recipe adapts beautifully—switching up toppings or seasonings is a breeze!
The Ingredients You Will Need To Make This Dish

– 1 cup plain Greek yogurt
– 1 ½ cups self-rising flour, plus extra for kneading
– 1 teaspoon garlic powder (adds a nice depth of flavor)
– 1 tablespoon olive oil (to enhance texture and flavor)
– Cooking spray for greasing
How to make 2 Recipe Pizza Dough?
Now that you’ve gathered your ingredients, let’s jump into the fun part. Making this pizza dough is a breeze, and soon you’ll have a rustic dough ready for your favorite toppings. You’ll be mixing, kneading, and shaping in no time!
Step-by-step Directions
Step 1: Gather Your Ingredients

Start by assembling all of your ingredients. You’ll need that Greek yogurt, self-rising flour, garlic powder, olive oil, and cooking spray. It’s always helpful to have everything within arm’s reach—this makes for a more enjoyable cooking experience.
Step 2: Preheat the Oven

While you’re prepping, go ahead and preheat your oven to 500°F (260°C). A hot oven will give your crust that desirable crispiness. Grab a pizza pan and give it a light spray with cooking spray to prevent any sticking.
Step 3: Mix the Dough

In a mixing bowl, combine the self-rising flour and Greek yogurt. Add in the garlic powder for an extra kick of flavor. Stir until the mixture starts to come together in clumps. Don’t worry if it looks a bit shaggy; that’s all part of the process!
Step 4: Knead the Dough
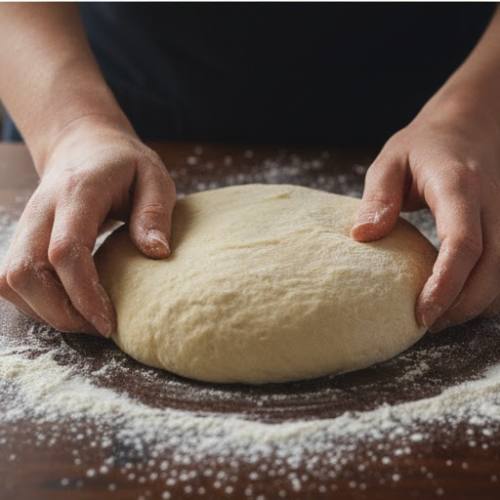
Transfer your shaggy dough to a well-floured work surface. Sprinkle a little more self-rising flour over the top to prevent sticking. Knead the dough for about 8 to 10 minutes. As you knead, feel free to sprinkle in a bit more flour if it’s too sticky to work with. You’re looking for a smooth, elastic dough.
Step 5: Shape the Dough

Once you have your dough kneaded, press it down gently and roll it out to fit your prepared pizza pan. Aim for about 12 inches in diameter. If it springs back while you’re rolling, let it rest for a couple of minutes, then continue.
Step 6: Par-Bake the Crust

To get that perfect crust, transfer your shaped dough to the pan and pop it in the oven for about 5 to 7 minutes. You want it to set slightly before adding your toppings.
Step 7: Top with Your Favorites

After the crust has set, it’s time to unleash your inner pizzaiolo! Layer on your favorite tomato sauce, cheese, and toppings. The options are endless—pepperoni, bell peppers, mushrooms, or even a drizzle of pesto.
Step 8: Bake to Perfection

Return your assembled pizza to the oven and bake for an additional 5 to 7 minutes until the cheese is bubbly and the crust is a beautiful golden brown. The aroma wafting from your oven will have everyone gathered around, eagerly waiting to dig in.
Step 9: Enjoy

Let your pizza cool for a few minutes before slicing. This awaits you a delicious homemade pizza, ready to be enjoyed fresh from your oven. Gather your family or friends, and relish your creation!
Notes
– Use more flour on your work surface while kneading to avoid stickiness.
– For a thicker crust, adjust the dough thickness as you roll it out.
– Feel free to substitute Greek yogurt with plain yogurt if needed.
– Store leftover dough in the fridge wrapped in plastic wrap for another use.
– Experiment with different herbs in the dough for added flavor!
Storage Tips
If you have any leftover pizza dough, wrap it in plastic wrap and store it in the refrigerator for up to 3 days. It’s perfect for those last-minute pizza cravings! If you want to keep it longer, you can freeze the dough. Just make sure to wrap it tightly in plastic and place it in a freezer-safe bag. It can last in the freezer for about 3 months. To use, thaw it in the refrigerator overnight before rolling it out.
Nutrition Information
This pizza dough serves two pizzas, approximately 200 calories per serving. It’s not only satisfying but packs a good protein punch, thanks to the Greek yogurt. Each serving is relatively low in fat, making it a healthier option compared to many store-bought versions.
Serving Suggestions
1. Classic Margherita: Top with fresh mozzarella, basil, and a drizzle of olive oil.
2. Veggie Supreme: Layer on a colorful mix of bell peppers, onions, and spinach for a refreshing taste.
3. BBQ Chicken: Use BBQ sauce as the base, topped with shredded chicken and red onion slices.
4. Pepperoni Delight: Simple yet satisfying, don’t forget a generous sprinkle of cheese!
5. Mediterranean Style: Garnish with olives, feta, and arugula after baking for a fresh twist.
What Other Substitutes Can I Use in 2 Recipe Pizza Dough?
1. Fat Greek Yogurt: Consider using low-fat or fat-free Greek yogurt if you’re looking to reduce calories.
2. Non-dairy Yogurt: Vegan yogurt can substitute Greek yogurt for a plant-based option.
3. Whole Wheat Flour: Swap out self-rising flour for whole wheat for a healthier option and a slightly nuttier flavor.
4. Pizza Stone: Instead of a pan, use a preheated pizza stone for even crispier crusts!
5. Flavored Yogurts: Infuse the dough with flavor by using herbed Greek yogurt. Just keep in mind how it will change your overall flavor profile!
Conclusion
Mastering this 2-recipe pizza dough gives you the freedom to enjoy delicious homemade pizza whenever the craving strikes. It’s approachable, versatile, and packs a flavor punch that rivals any pizzeria. The next time you find yourself reaching for takeout, remember that a warm, gooey pizza, pulled straight from your oven, is just a quick mix and knead away. Now, let’s get that pizza party started!
You Might Also Like These Latest Recipes!
Cheesy Breakfast Hashbrown Casserole Recipe
Sheet Pan Roasted Carrots Recipe

2 Recipe Pizza Dough – Easy Comfort Food Recipes
Description
Let’s take a moment to appreciate pizza, that universally adored dish. It’s a canvas for creativity, customizable for every dietary preference and personal taste. Whether you’re a meat lover, a veggie enthusiast, or somewhere in between, a well-crafted pizza crust can elevate any topping into something truly special. Best of all, you don’t need complex techniques to whip up a fantastic dough.
Ingredient
Instructions
Step 1: Gather Your Ingredients
-
Start by assembling all of your ingredients. You’ll need that Greek yogurt, self-rising flour, garlic powder, olive oil, and cooking spray. It’s always helpful to have everything within arm’s reach—this makes for a more enjoyable cooking experience.
Step 2: Preheat the Oven
-
While you’re prepping, go ahead and preheat your oven to 500°F (260°C). A hot oven will give your crust that desirable crispiness. Grab a pizza pan and give it a light spray with cooking spray to prevent any sticking.
Step 3: Mix the Dough
-
In a mixing bowl, combine the self-rising flour and Greek yogurt. Add in the garlic powder for an extra kick of flavor. Stir until the mixture starts to come together in clumps. Don’t worry if it looks a bit shaggy; that’s all part of the process!
Step 4: Knead the Dough
-
Transfer your shaggy dough to a well-floured work surface. Sprinkle a little more self-rising flour over the top to prevent sticking. Knead the dough for about 8 to 10 minutes. As you knead, feel free to sprinkle in a bit more flour if it’s too sticky to work with. You’re looking for a smooth, elastic dough.
Step 5: Shape the Dough
-
Once you have your dough kneaded, press it down gently and roll it out to fit your prepared pizza pan. Aim for about 12 inches in diameter. If it springs back while you’re rolling, let it rest for a couple of minutes, then continue.
Step 6: Par-Bake the Crust
-
To get that perfect crust, transfer your shaped dough to the pan and pop it in the oven for about 5 to 7 minutes. You want it to set slightly before adding your toppings.
Step 7: Top with Your Favorites
-
After the crust has set, it’s time to unleash your inner pizzaiolo! Layer on your favorite tomato sauce, cheese, and toppings. The options are endless—pepperoni, bell peppers, mushrooms, or even a drizzle of pesto.
Step 8: Bake to Perfection
-
Return your assembled pizza to the oven and bake for an additional 5 to 7 minutes until the cheese is bubbly and the crust is a beautiful golden brown. The aroma wafting from your oven will have everyone gathered around, eagerly waiting to dig in.
Step 9: Enjoy
-
Let your pizza cool for a few minutes before slicing. This awaits you a delicious homemade pizza, ready to be enjoyed fresh from your oven. Gather your family or friends, and relish your creation!
Nutrition Facts
Servings 2
- Amount Per Serving
- Calories 200kcal
Note
- Use more flour on your work surface while kneading to avoid stickiness.
- For a thicker crust, adjust the dough thickness as you roll it out.
- Feel free to substitute Greek yogurt with plain yogurt if needed.
- Store leftover dough in the fridge wrapped in plastic wrap for another use.
- Experiment with different herbs in the dough for added flavor!