Brownies are an indulgent treat that can elevate any occasion, and the keto version is no exception. Pair your keto brownie with a scoop of sugar-free ice cream for a classic dessert combo. Want something refreshing? A dollop of whipped cream topped with fresh berries works wonders.
If you crave nutty flavors, serve them alongside a small handful of pecans or walnuts. I can tell you from experience; they add a delightful crunch. Lastly, try drizzling your brownies with some almond or peanut butter for an added burst of flavor. The options are endless!

Let’s Get Started
You’ve probably heard the buzz about keto diets—maybe even tried them. One of the best parts? You can still enjoy sweets like brownies, just turned into a healthier, low-carb version.
Keto brownies are a revelation for dessert lovers. When I first heard of these, I thought there had to be a catch. But as I dove into the world of keto baking, I discovered a sweet reality.
What Is a Keto Brownie?
Keto brownies are a low-carb, sugar-free alternative to the traditional brownie. They typically replace flour with almond flour and sugar with sweeteners like erythritol. The result?
A rich, satisfying treat that keeps your blood sugar stable while you satisfy your sweet tooth. It’s a game-changer, particularly for those watching carbs.
How Does It Taste?
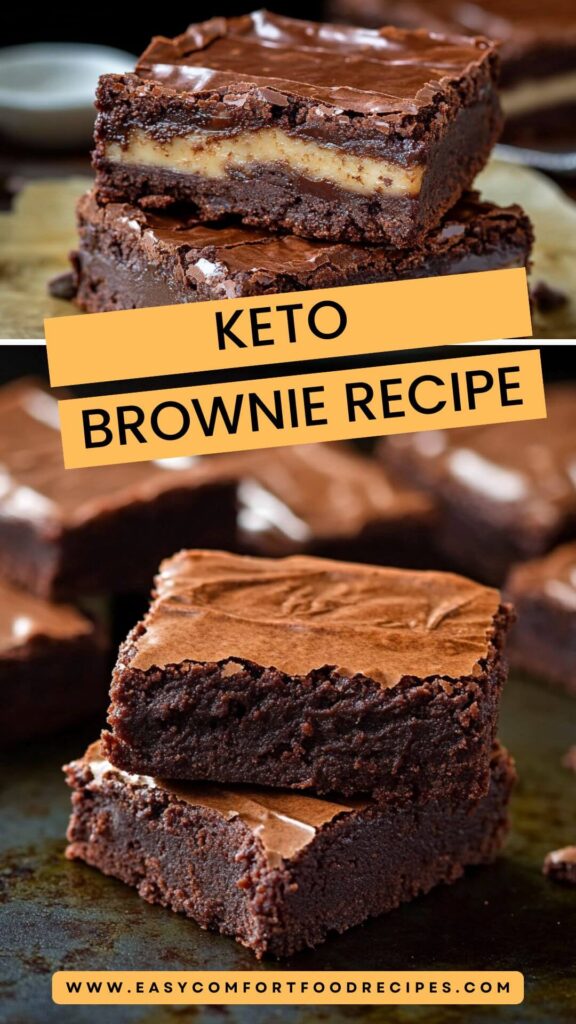
Biting into a keto brownie feels like a warm hug. You lose none of that fudge-like texture. It’s rich, moist, and utterly satisfying. While sugar-laden brownies might overwhelm you with sweetness, keto brownies strike a balance.
The cocoa brings a depth that pairs wonderfully with a hint of sweetness from the erythritol. Picture this: a gooey center with a slightly crisp top, perfect baseline chocolate flavor, and maybe, just maybe, a few dark chocolate chips melting in your mouth.
Why You’ll Love This!
Keto brownies fit seamlessly into a low-carb lifestyle, but more than that, they’re genuinely delicious. You’ll love how easy they are to make. The recipe itself takes less than 30 minutes, and that means more time to indulge.
Perfect for those midnight cravings or unexpected guests. And because they’re lower in carbs, you can savor them without the guilt. Not to mention, they adapt beautifully to various dietary needs!
Ingredients
Here’s everything you need:
- 1 cup finely ground almond flour
- 2 tablespoons Dutch-process cocoa powder or additional regular cocoa powder
- ¼ cup unsweetened cocoa powder
- 1 teaspoon baking powder
- ½ teaspoon fine sea salt
- 2 eggs or 2 flaxseed eggs (for a vegan alternative)
- ⅔ cup granulated erythritol or cane sugar
- 3 tablespoons water or additional oil
- ⅓ cup melted coconut oil or unsalted butter
- 1 teaspoon pure vanilla extract
- 1 tablespoon brewed espresso (optional, to enhance the chocolate flavor)
- 2 tablespoons dark chocolate chips (optional, for added richness)

Step-by-Step Directions
Step 1: Gather Your Ingredients
Before you start, make sure all your ingredients are measured and ready. This little prep step makes things flow smoothly when you start mixing. Trust me, it saves you from scrambling around.
Step 2: Preheat Your Oven
Set your oven to 350°F (175°C). This ensures even baking and helps set that perfect brownie texture.
Step 3: Mix the Dry Ingredients
In a bowl, mix the almond flour, both cocoa powders, baking powder, and salt. Stir until everything is well combined. This step lays the foundation for your brownie.
Step 4: Whisk the Wet Ingredients
In another bowl, whisk your eggs (or flaxseed eggs). Then, add melted coconut oil (or butter), erythritol (or sugar), vanilla extract, water, and espresso. This mixture brings moisture and flavor, turning dry ingredients into delightful batter.
Step 5: Combine the Mixtures
Pour the wet ingredients into the bowl with the dry ingredients. Stir until just combined. Don’t over-mix, or your brownies may become tough. A few lumps are perfectly fine!
Step 6: Add Chocolate Chips
If you’re feeling indulgent, fold in the dark chocolate chips. This step is an option, but can turn your brownies into a chocolate lover’s dream come true.
Step 7: Prepare Your Pan
Grease an 8×8 baking pan with a little oil or line it with parchment paper. Pour the brownie batter into the pan and spread it evenly.
Step 8: Bake and Cool
Place the pan in the preheated oven for 20-25 minutes. Keep an eye on them. A toothpick inserted into the center should come out with a few moist crumbs—not wet batter.
Step 9: Let It Rest
Once baked, remove the brownies from the oven. Let them cool in the pan for about 10 minutes before transferring them to a cooling rack. This step enhances the texture—believe me.
Step 10: Slice and Serve
Once cooled, cut the brownies into squares. Serve them as is or with your favorite pairing!
Tips on Making Keto Brownies
Here are some tips to elevate your brownie-making skills:
- Use Good Quality Cocoa: The chocolate flavor is central. Invest in high-quality cocoa powder. It makes all the difference.
- Don’t Overmix: When combining the wet and dry ingredients, mix just until blended. Overmixing can result in dense brownies.
- Experiment with Sweeteners: If erythritol isn’t your thing, try monk fruit or stevia. Each brings a slightly different taste.
- Storage is Key: Store them in an airtight container, and they’ll last up to a week. I promise they’ll taste even better after a day!
- Add More Flavor: Consider adding nuts, like pecans or walnuts, for a delightful crunch.
Nutrition Information
Curious about the nutrition? Here’s a rough breakdown per brownie (based on 16 servings):
- Calories: 100
- Fat: 8g
- Carbohydrates: 5g
- Fiber: 3g
- Protein: 3g
- Net Carbs: 2g
How Do You Store This Keto Brownie?
You can store your brownies wrapped tightly in plastic wrap or in an airtight container. Keep them in a cool, dry place, or pop them in the fridge for longer freshness.
Just make sure they’re completely cool before sealing to avoid any sogginess!
What Other Substitutes Can You Use in Keto Brownies?
Here are some substitutions worth considering for a customized taste:
- Coconut flour: Use a small amount, as it absorbs moisture.
- Nut butters: Peanut or almond butter can replace coconut oil, adding richness.
- Sugar-free syrup: For a touch of moisture, use a bit of sugar-free maple syrup with cocoa powder; it creates a surprisingly delightful texture.
- Greek yogurt: This can add a creaminess if you prefer a fudgier texture, reducing fat but maintaining moisture.
- Flaxseed meal: It can replace almond flour in part, providing healthy fats and fiber.

Conclusion
Keto brownies are more than just a trend—they’re a practical solution for dessert lovers. With options to adapt the recipe and keep it aligned with your dietary goals, you won’t miss those traditional versions. Baking them won’t take much of your time, and indulging is worth it.
Next time you want a sweet treat, remember this delightful recipe. Savor every bite, knowing you’ve made a healthy choice without sacrificing flavor. So, gather your ingredients and treat yourself to these delicious brownies!
You’ll also like the following recipes!
- Christmas Tree Brownies Copycat Recipe
- How to Make Applesauce Brownies
- Best Ghirardelli Chocolate Brownie Recipe

Keto Brownie Recipe – Easy Comfort Food Recipes
Description
Brownies are an indulgent treat that can elevate any occasion, and the keto version is no exception. Pair your keto brownie with a scoop of sugar-free ice cream for a classic dessert combo. Want something refreshing? A dollop of whipped cream topped with fresh berries works wonders.
Ingredients
Instructions
Step 1: Gather Your Ingredients
-
Before you start, make sure all your ingredients are measured and ready. This little prep step makes things flow smoothly when you start mixing. Trust me, it saves you from scrambling around.
Step 2: Preheat Your Oven
-
Set your oven to 350°F (175°C). This ensures even baking and helps set that perfect brownie texture.
Step 3: Mix the Dry Ingredients
-
In a bowl, mix the almond flour, both cocoa powders, baking powder, and salt. Stir until everything is well combined. This step lays the foundation for your brownie.
Step 4: Whisk the Wet Ingredients
-
In another bowl, whisk your eggs (or flaxseed eggs). Then, add melted coconut oil (or butter), erythritol (or sugar), vanilla extract, water, and espresso. This mixture brings moisture and flavor, turning dry ingredients into delightful batter.
Step 5: Combine the Mixtures
-
Pour the wet ingredients into the bowl with the dry ingredients. Stir until just combined. Don’t over-mix, or your brownies may become tough. A few lumps are perfectly fine!
Step 6: Add Chocolate Chips
-
If you’re feeling indulgent, fold in the dark chocolate chips. This step is an option, but can turn your brownies into a chocolate lover’s dream come true.
Step 7: Prepare Your Pan
-
Grease an 8x8 baking pan with a little oil or line it with parchment paper. Pour the brownie batter into the pan and spread it evenly.
Step 8: Bake and Cool
-
Place the pan in the preheated oven for 20-25 minutes. Keep an eye on them. A toothpick inserted into the center should come out with a few moist crumbs—not wet batter.
Step 9: Let It Rest
-
Once baked, remove the brownies from the oven. Let them cool in the pan for about 10 minutes before transferring them to a cooling rack. This step enhances the texture—believe me.
Step 10: Slice and Serve
-
Once cooled, cut the brownies into squares. Serve them as is or with your favorite pairing!
Nutrition Facts
Servings 15
- Amount Per Serving
- Calories 100kcal
- % Daily Value *
- Total Fat 8g13%
- Total Carbohydrate 5g2%
- Dietary Fiber 3g12%
- Protein 3g6%
* Percent Daily Values are based on a 2,000 calorie diet. Your daily value may be higher or lower depending on your calorie needs.
Note
- Use Good Quality Cocoa: The chocolate flavor is central. Invest in high-quality cocoa powder. It makes all the difference.
- Don’t Overmix: When combining the wet and dry ingredients, mix just until blended. Overmixing can result in dense brownies.
- Experiment with Sweeteners: If erythritol isn’t your thing, try monk fruit or stevia. Each brings a slightly different taste.
- Storage is Key: Store them in an airtight container, and they’ll last up to a week. I promise they’ll taste even better after a day!
- Add More Flavor: Consider adding nuts, like pecans or walnuts, for a delightful crunch.